KL6M DISH DISASTER October
28, 2013 (with 24-July, 2014 revision)
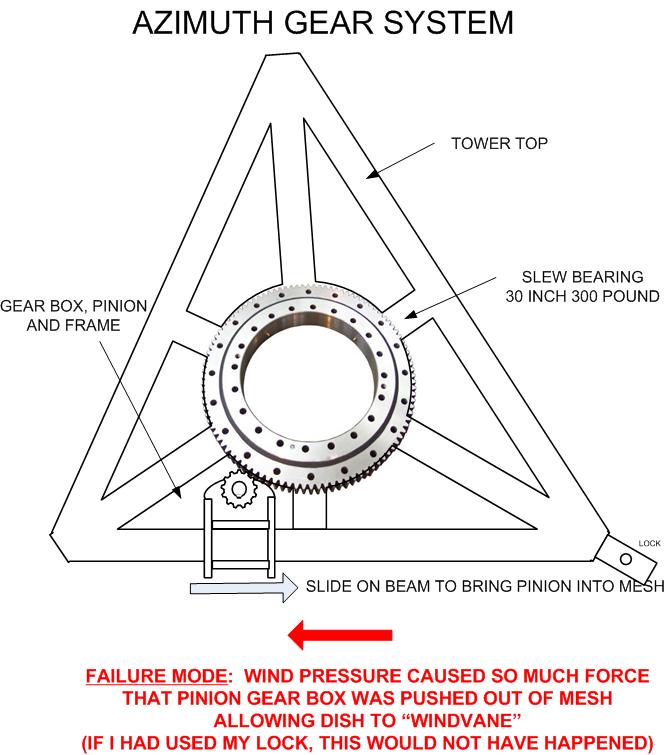
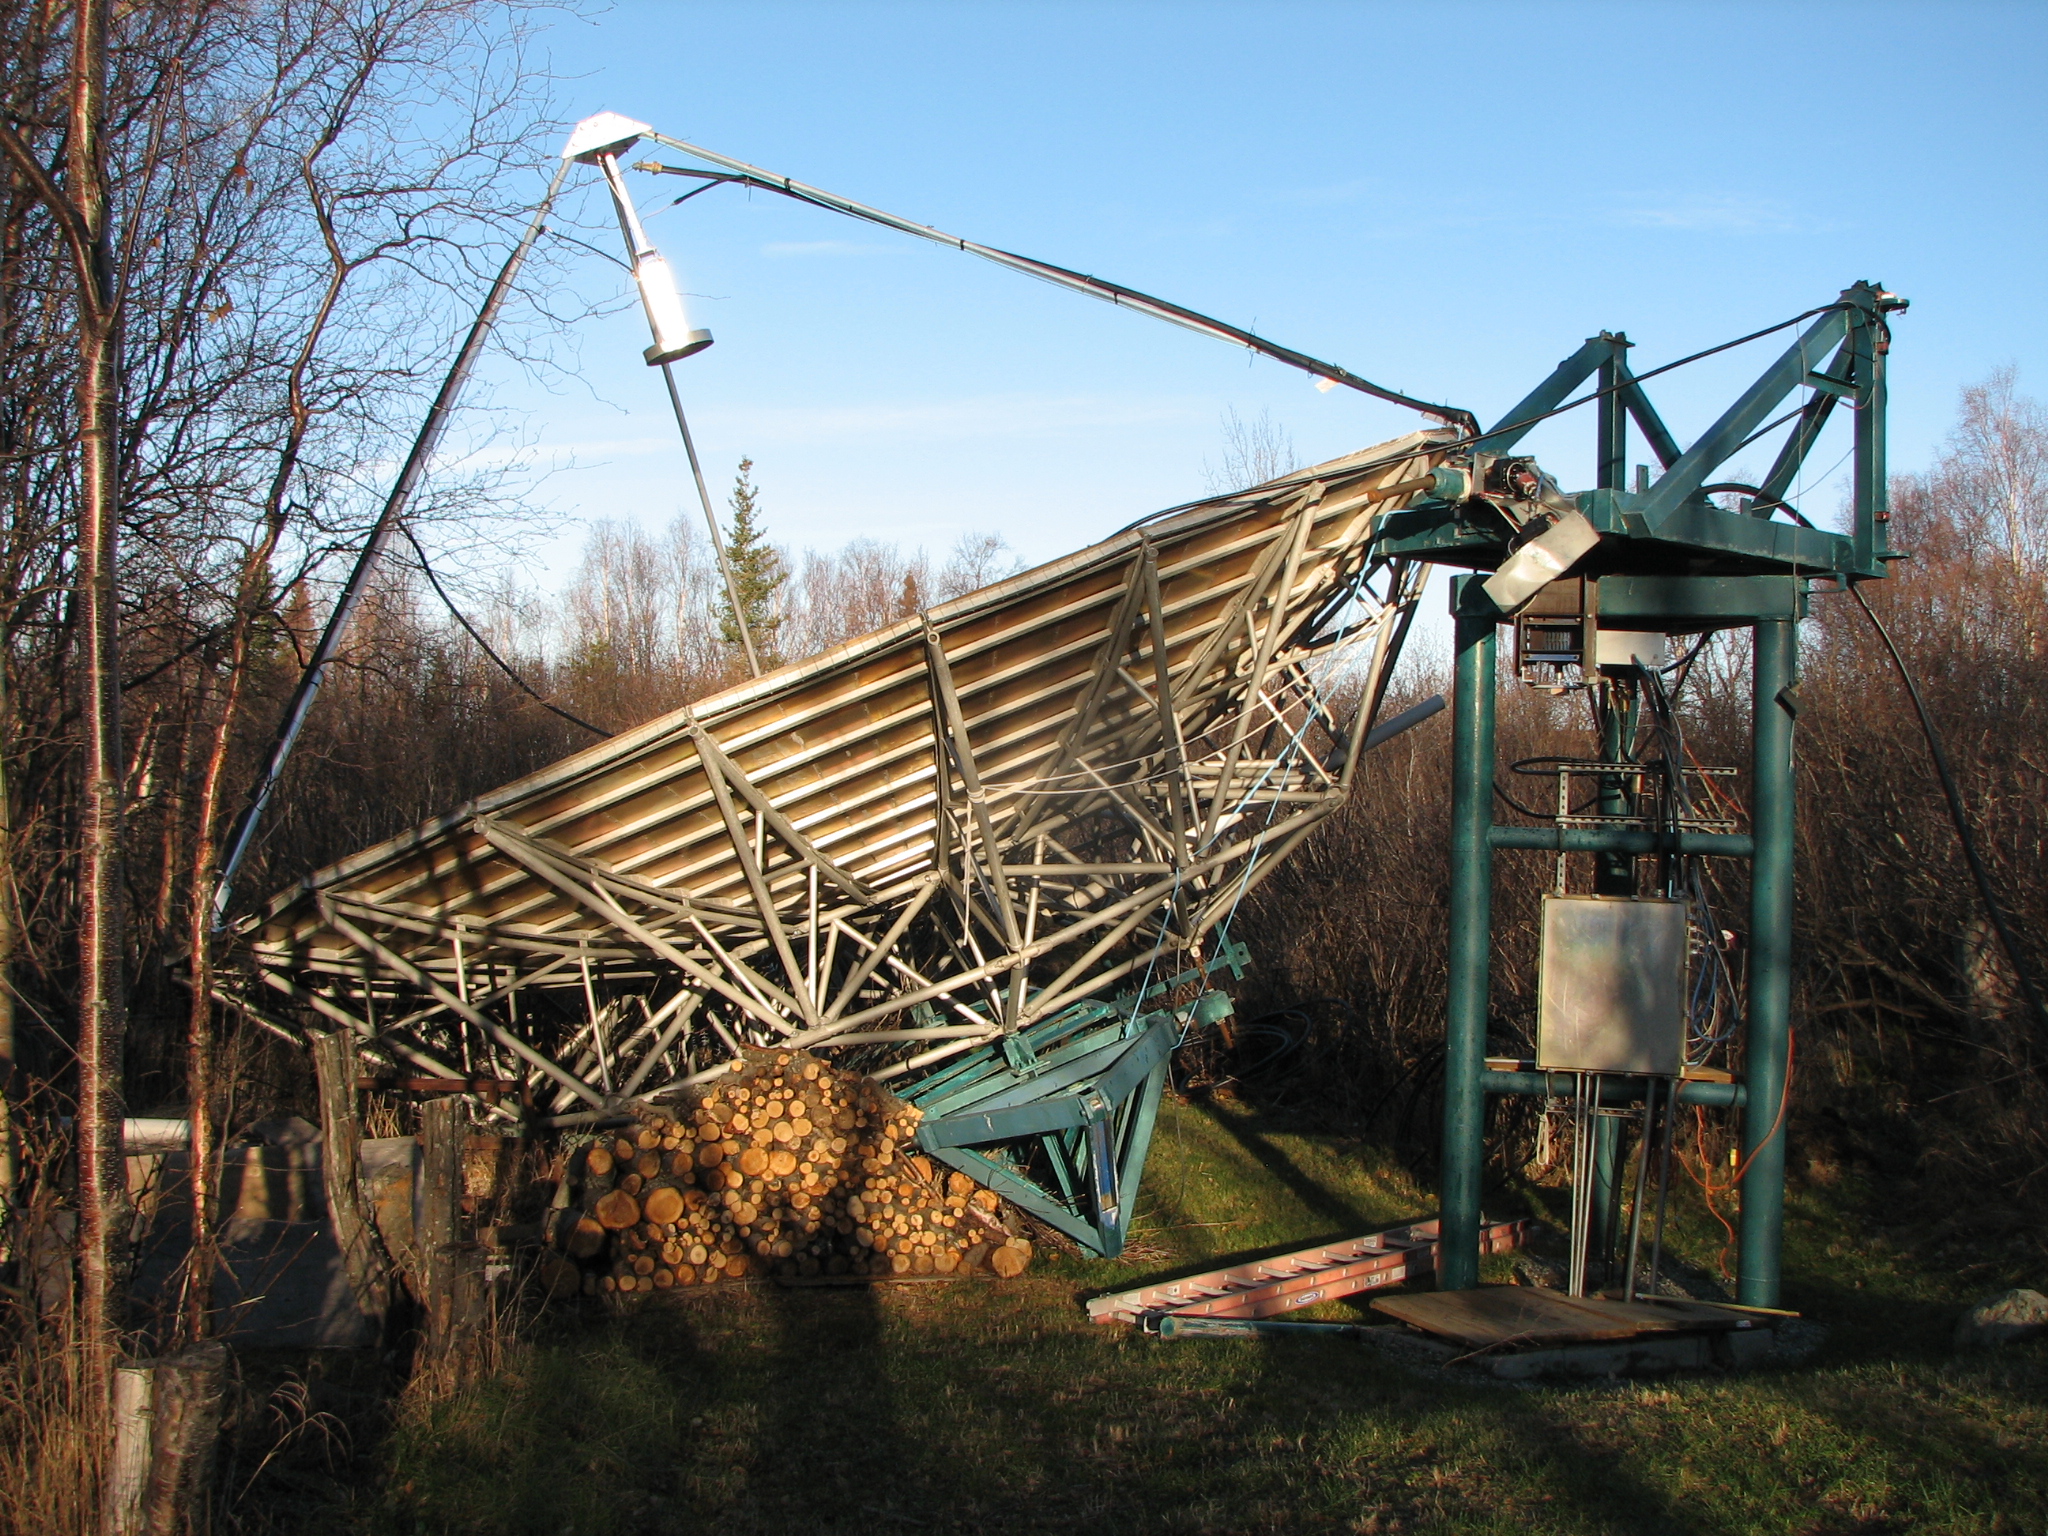
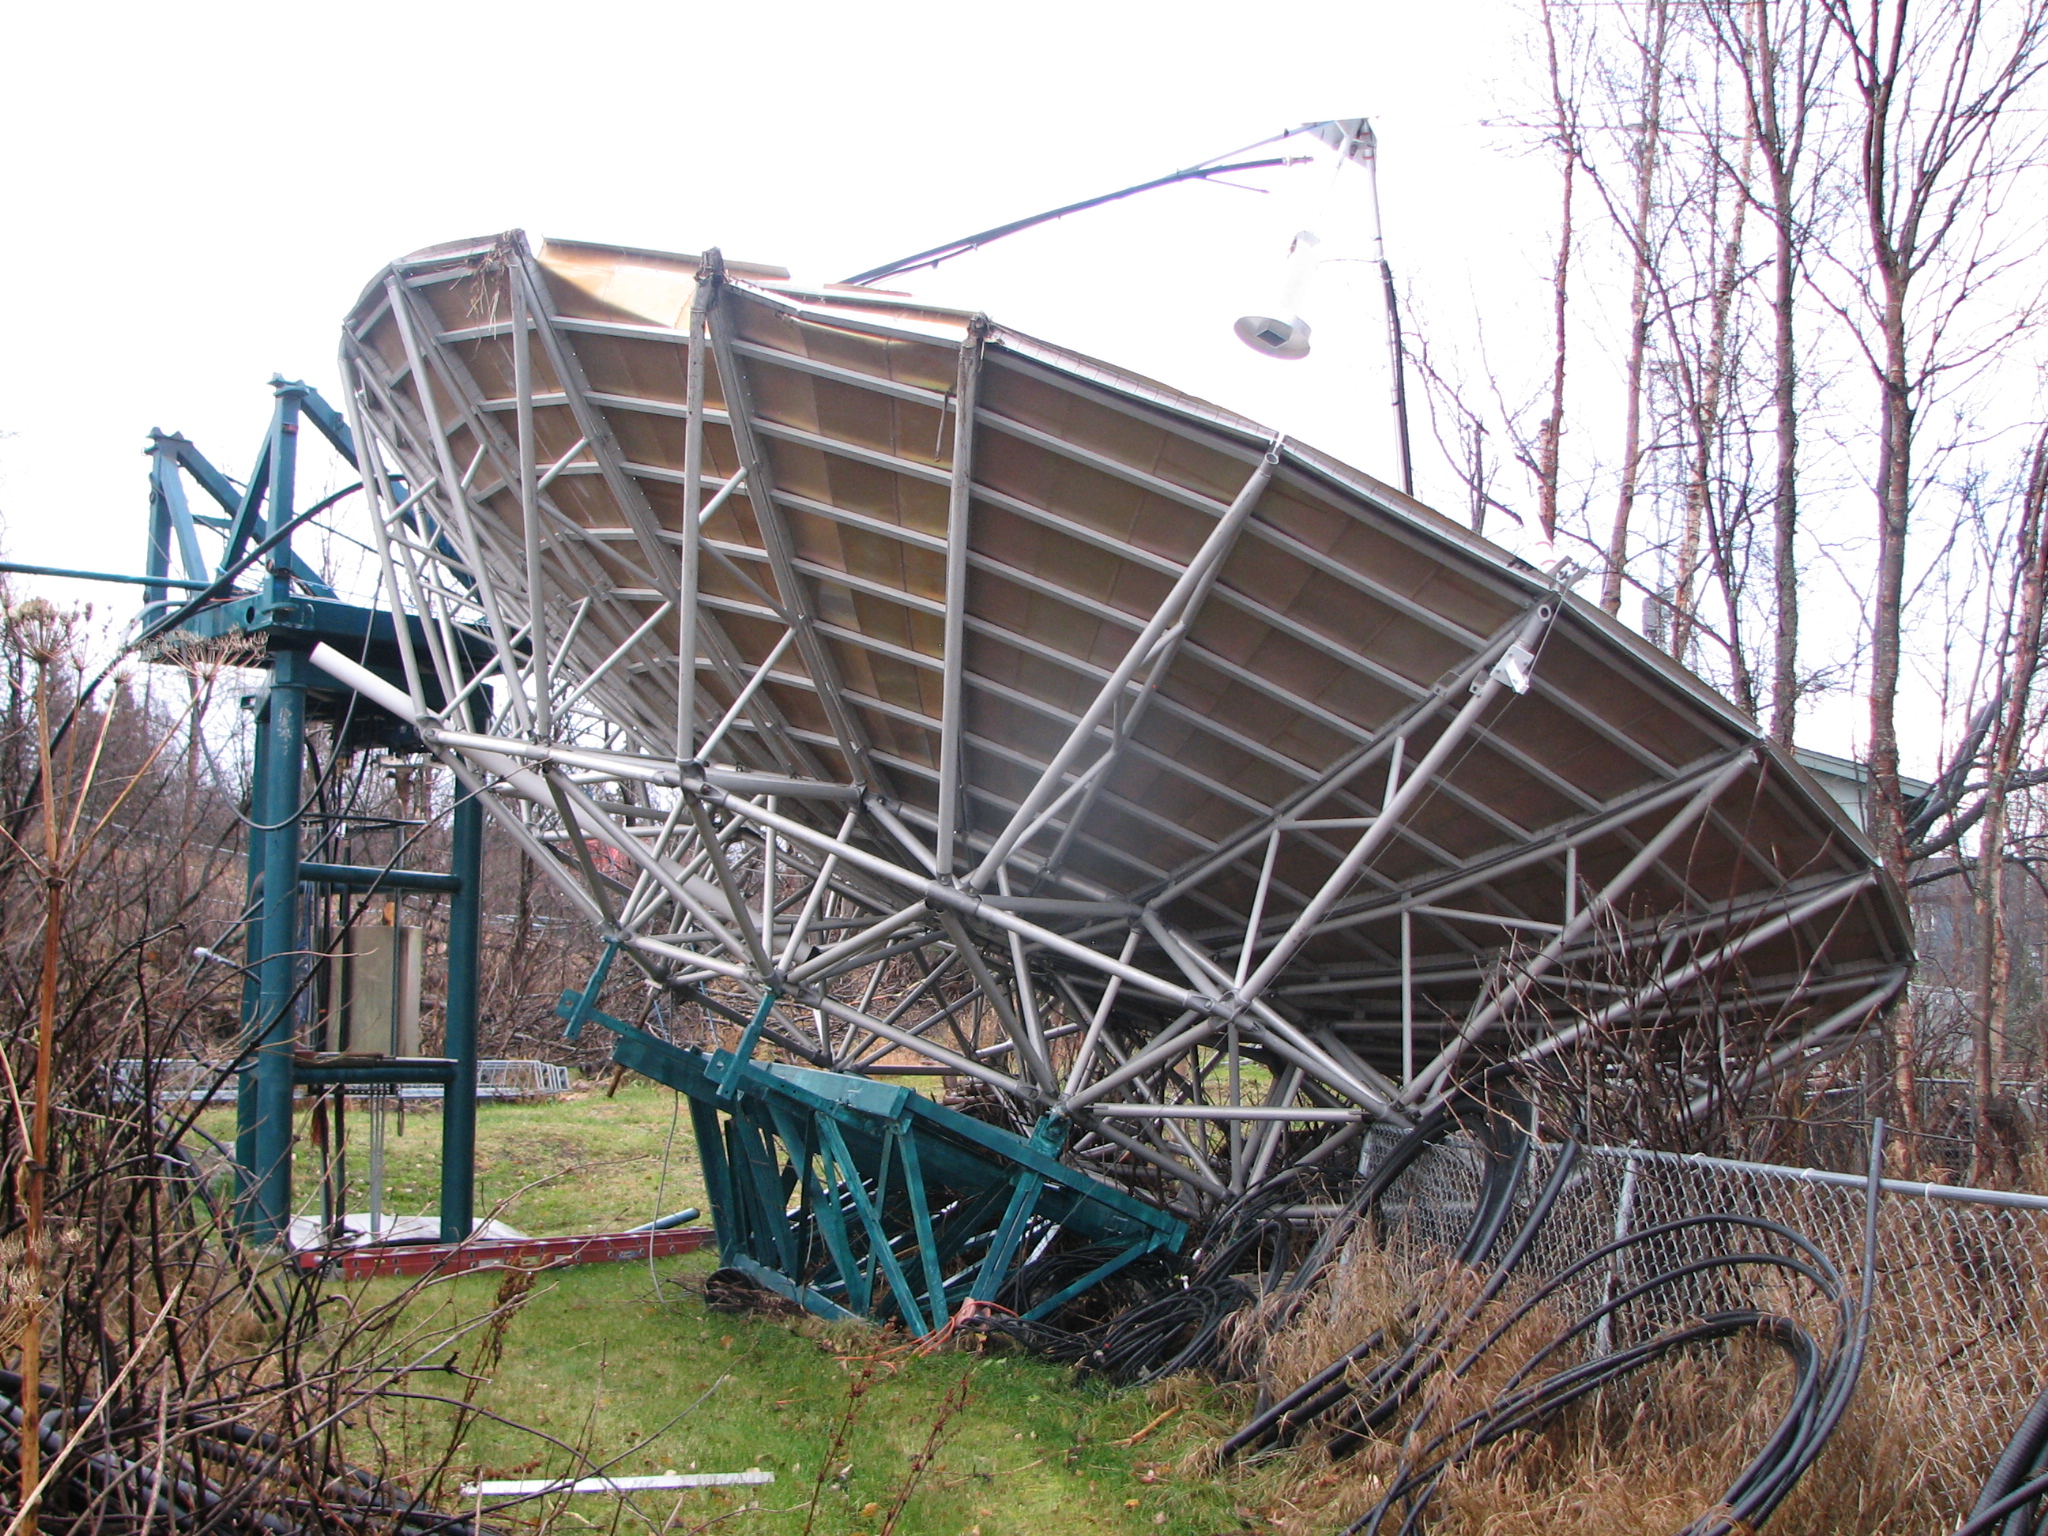
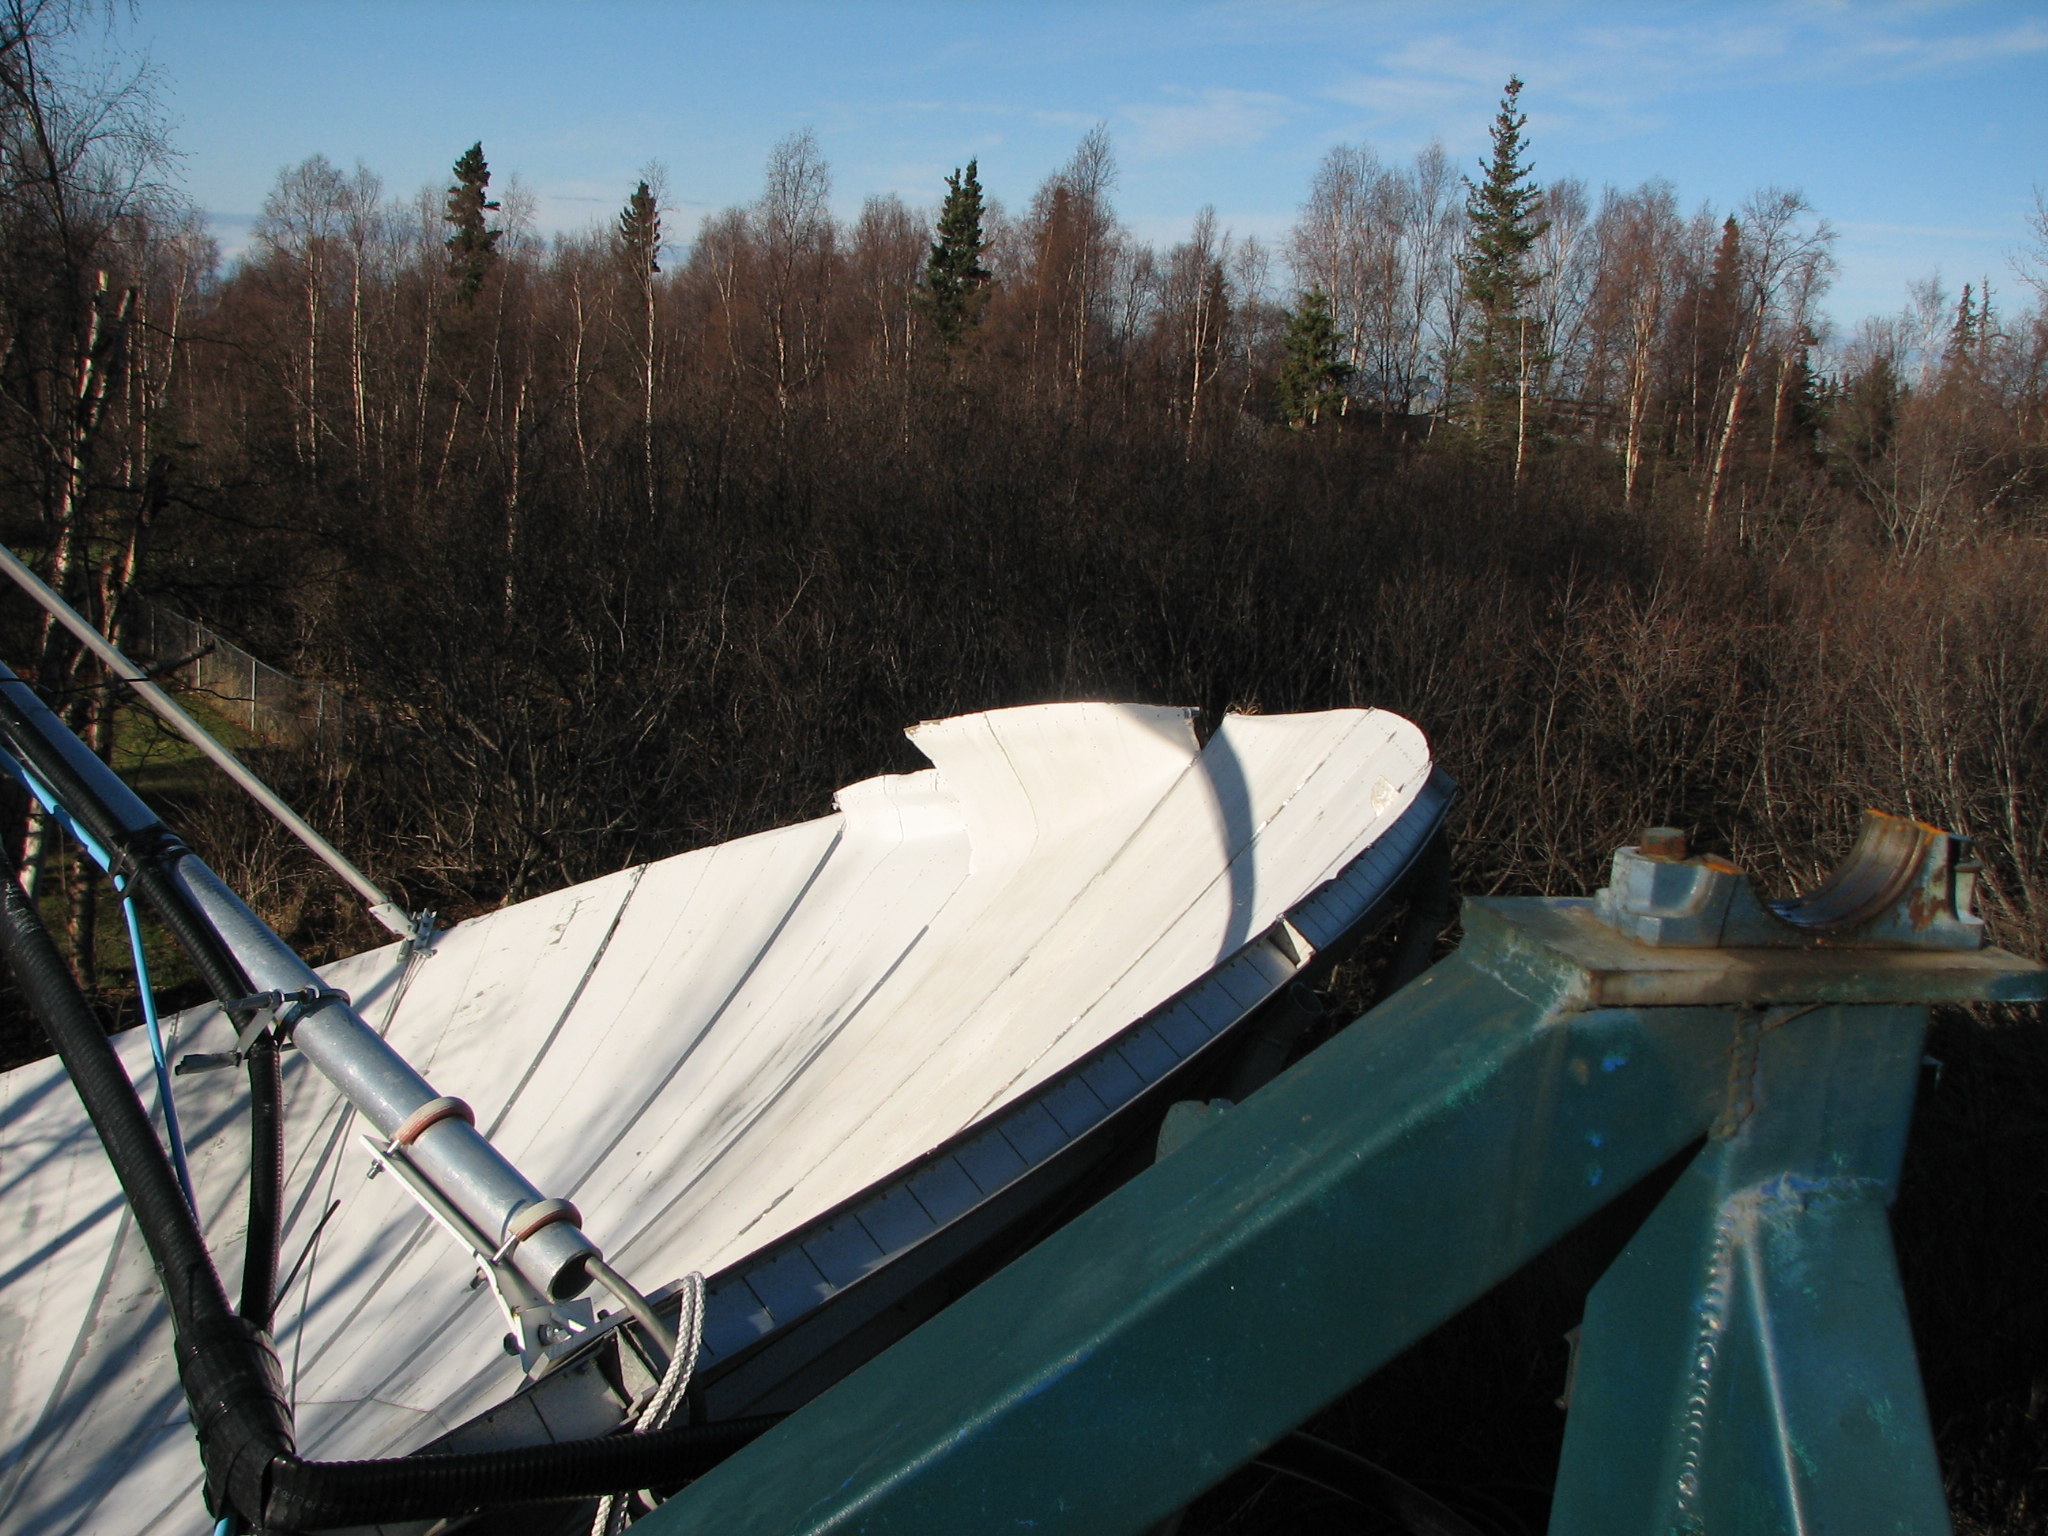
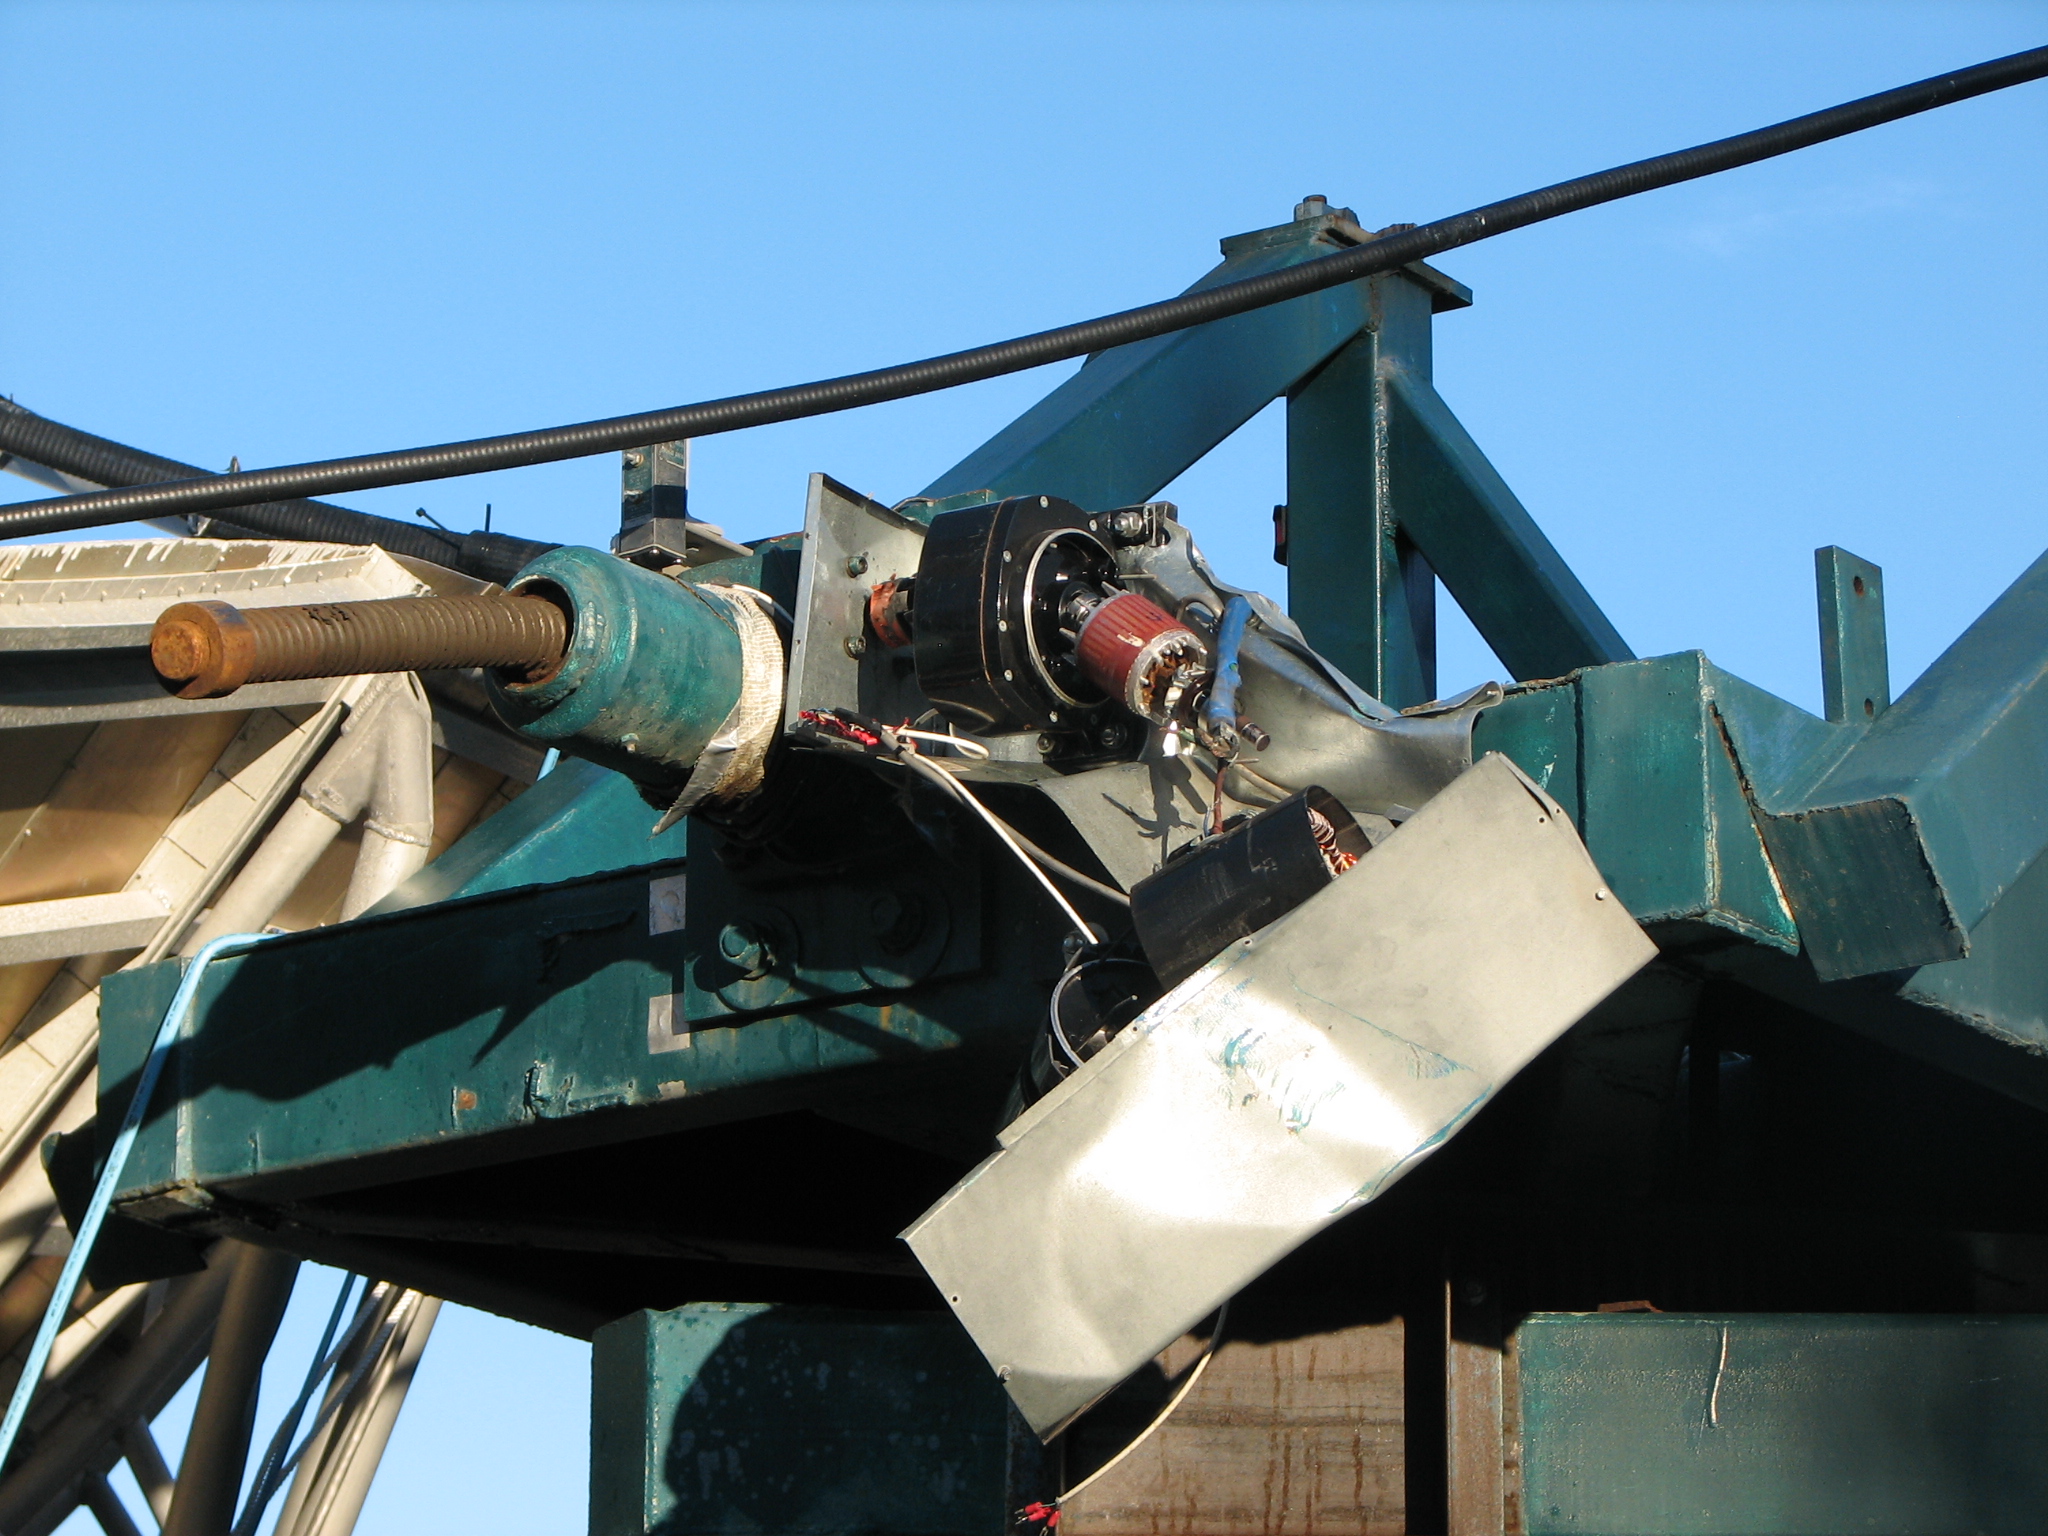
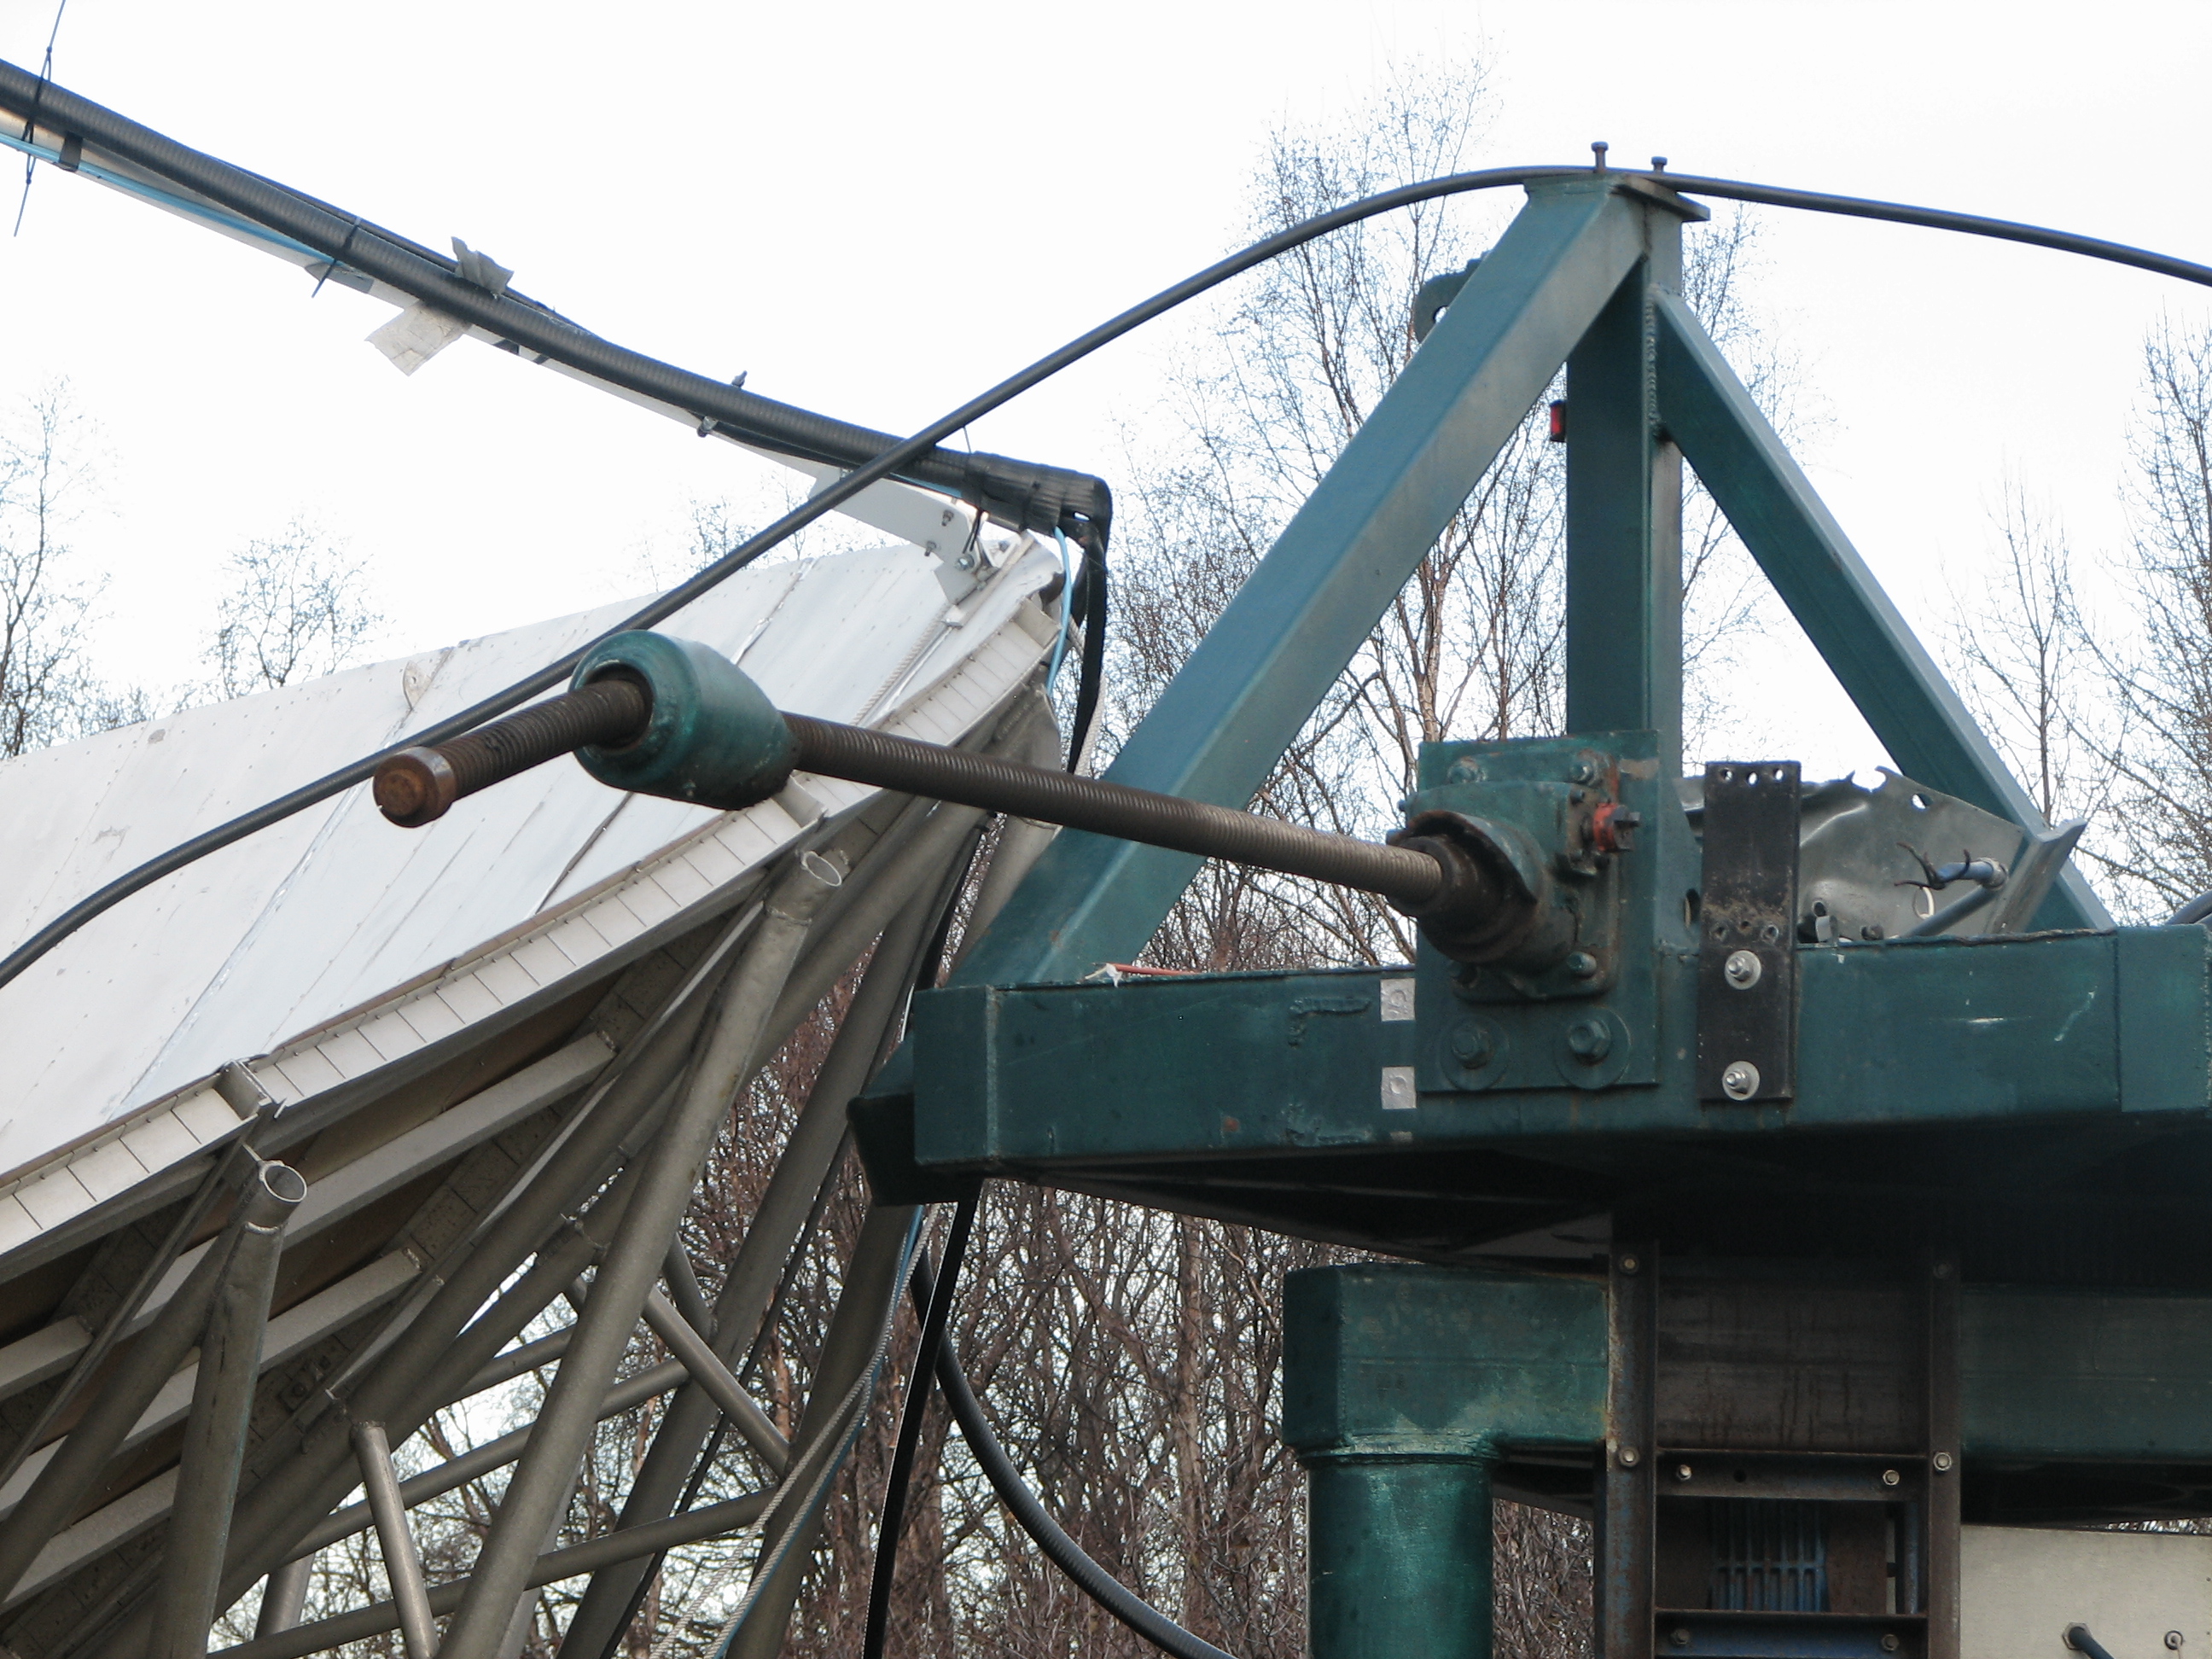
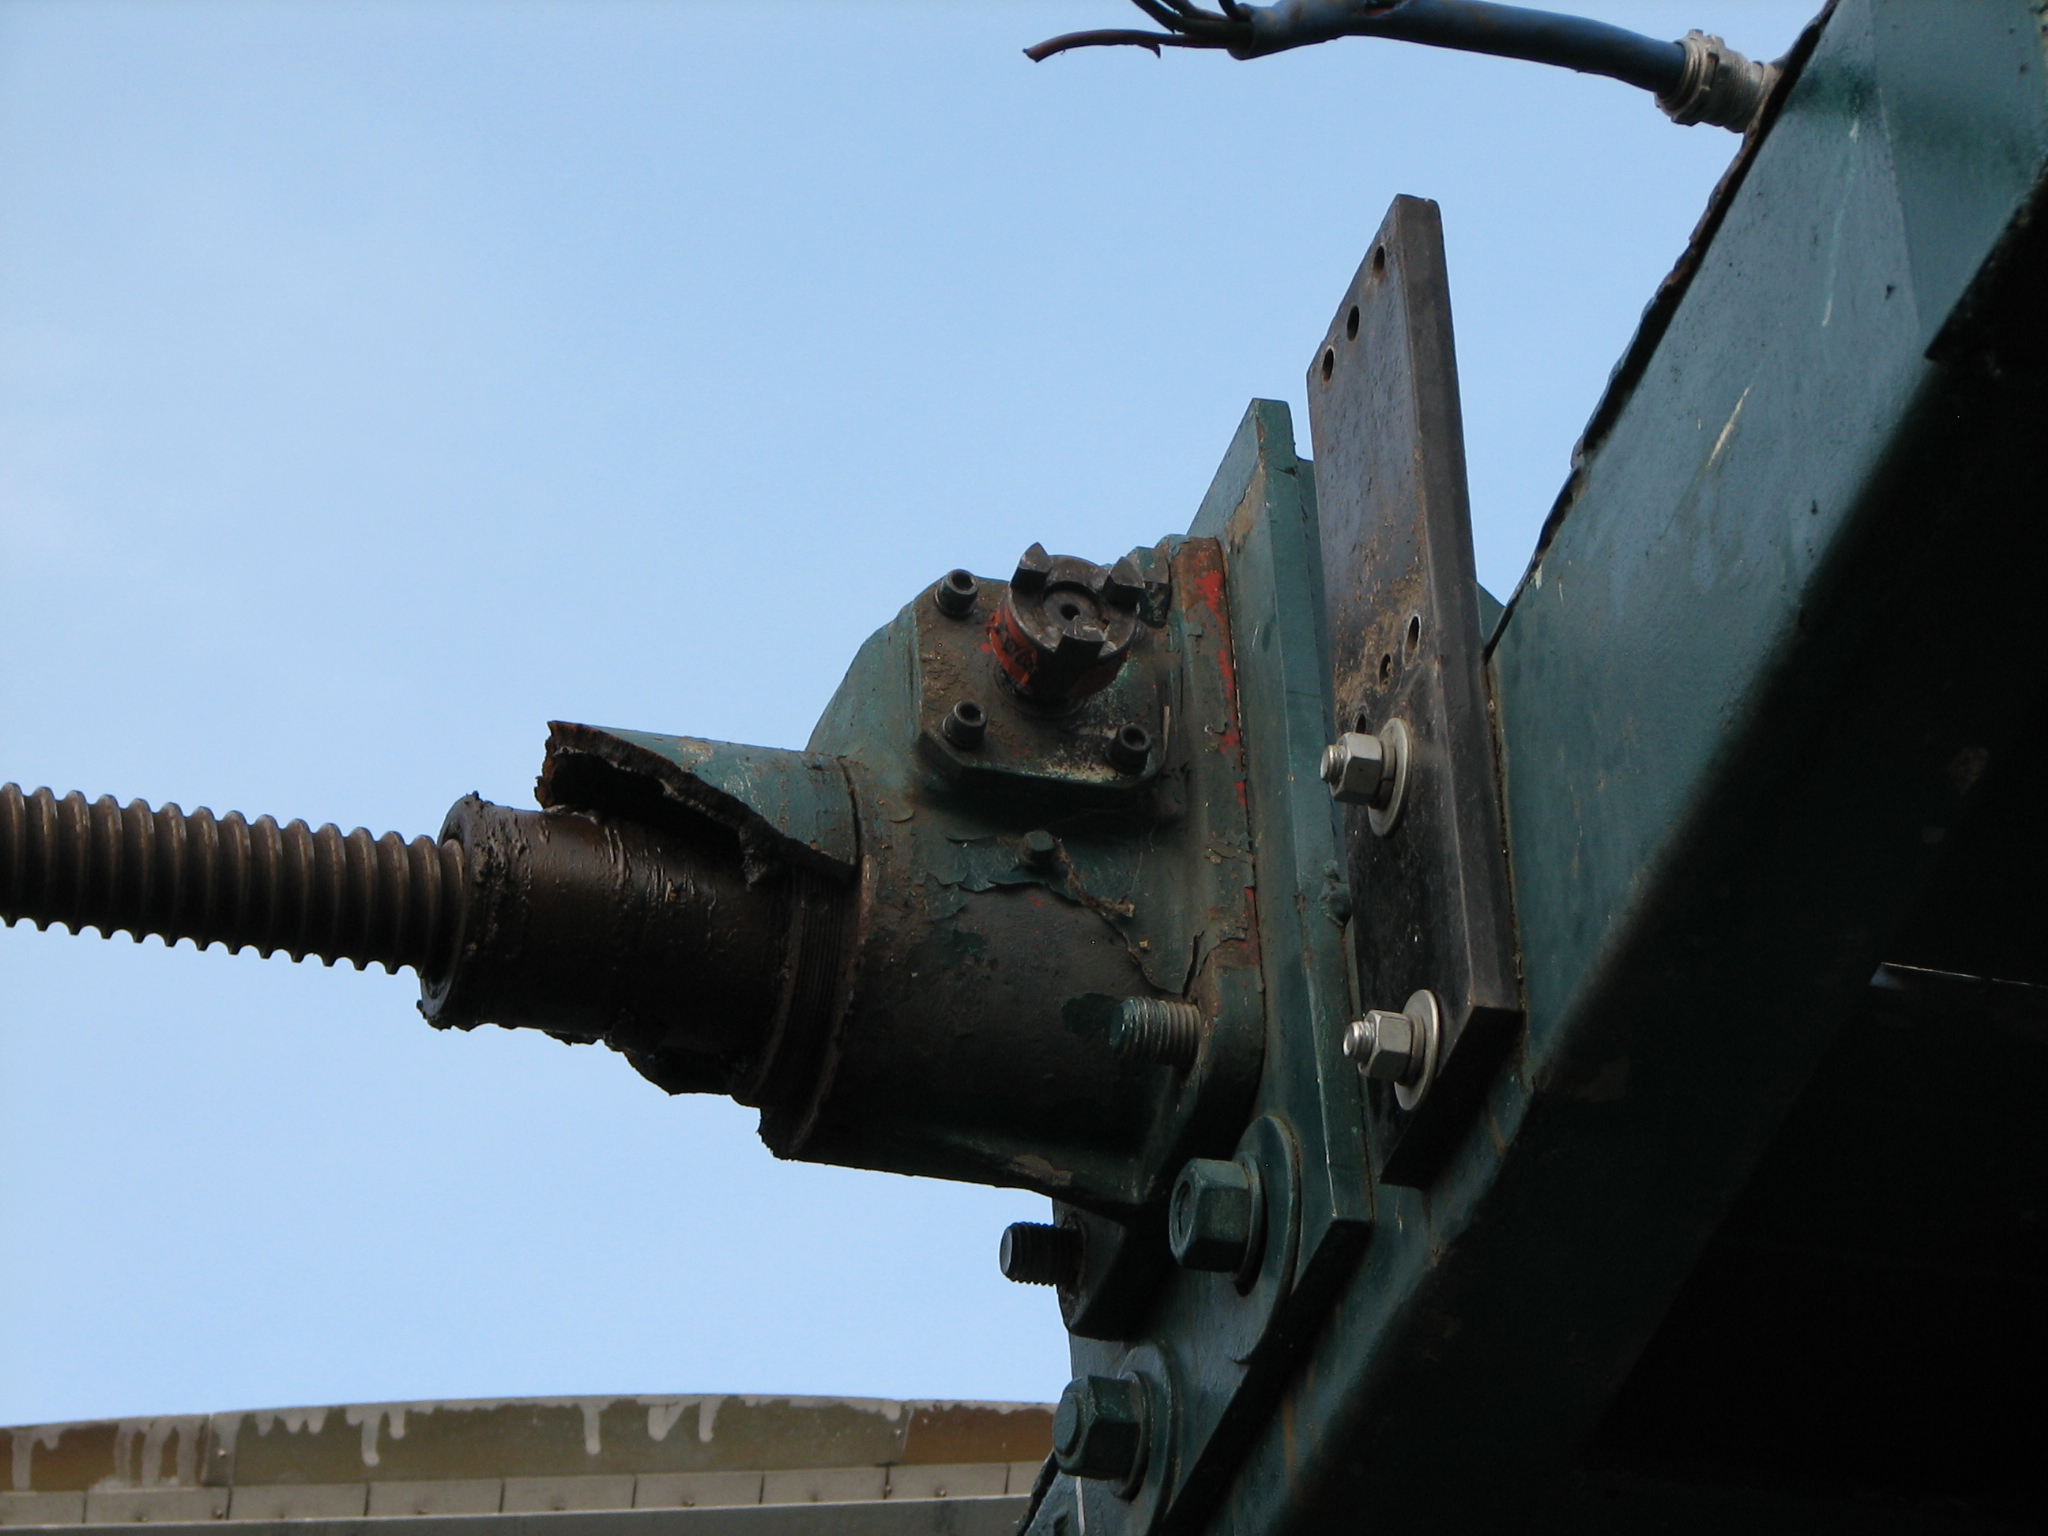
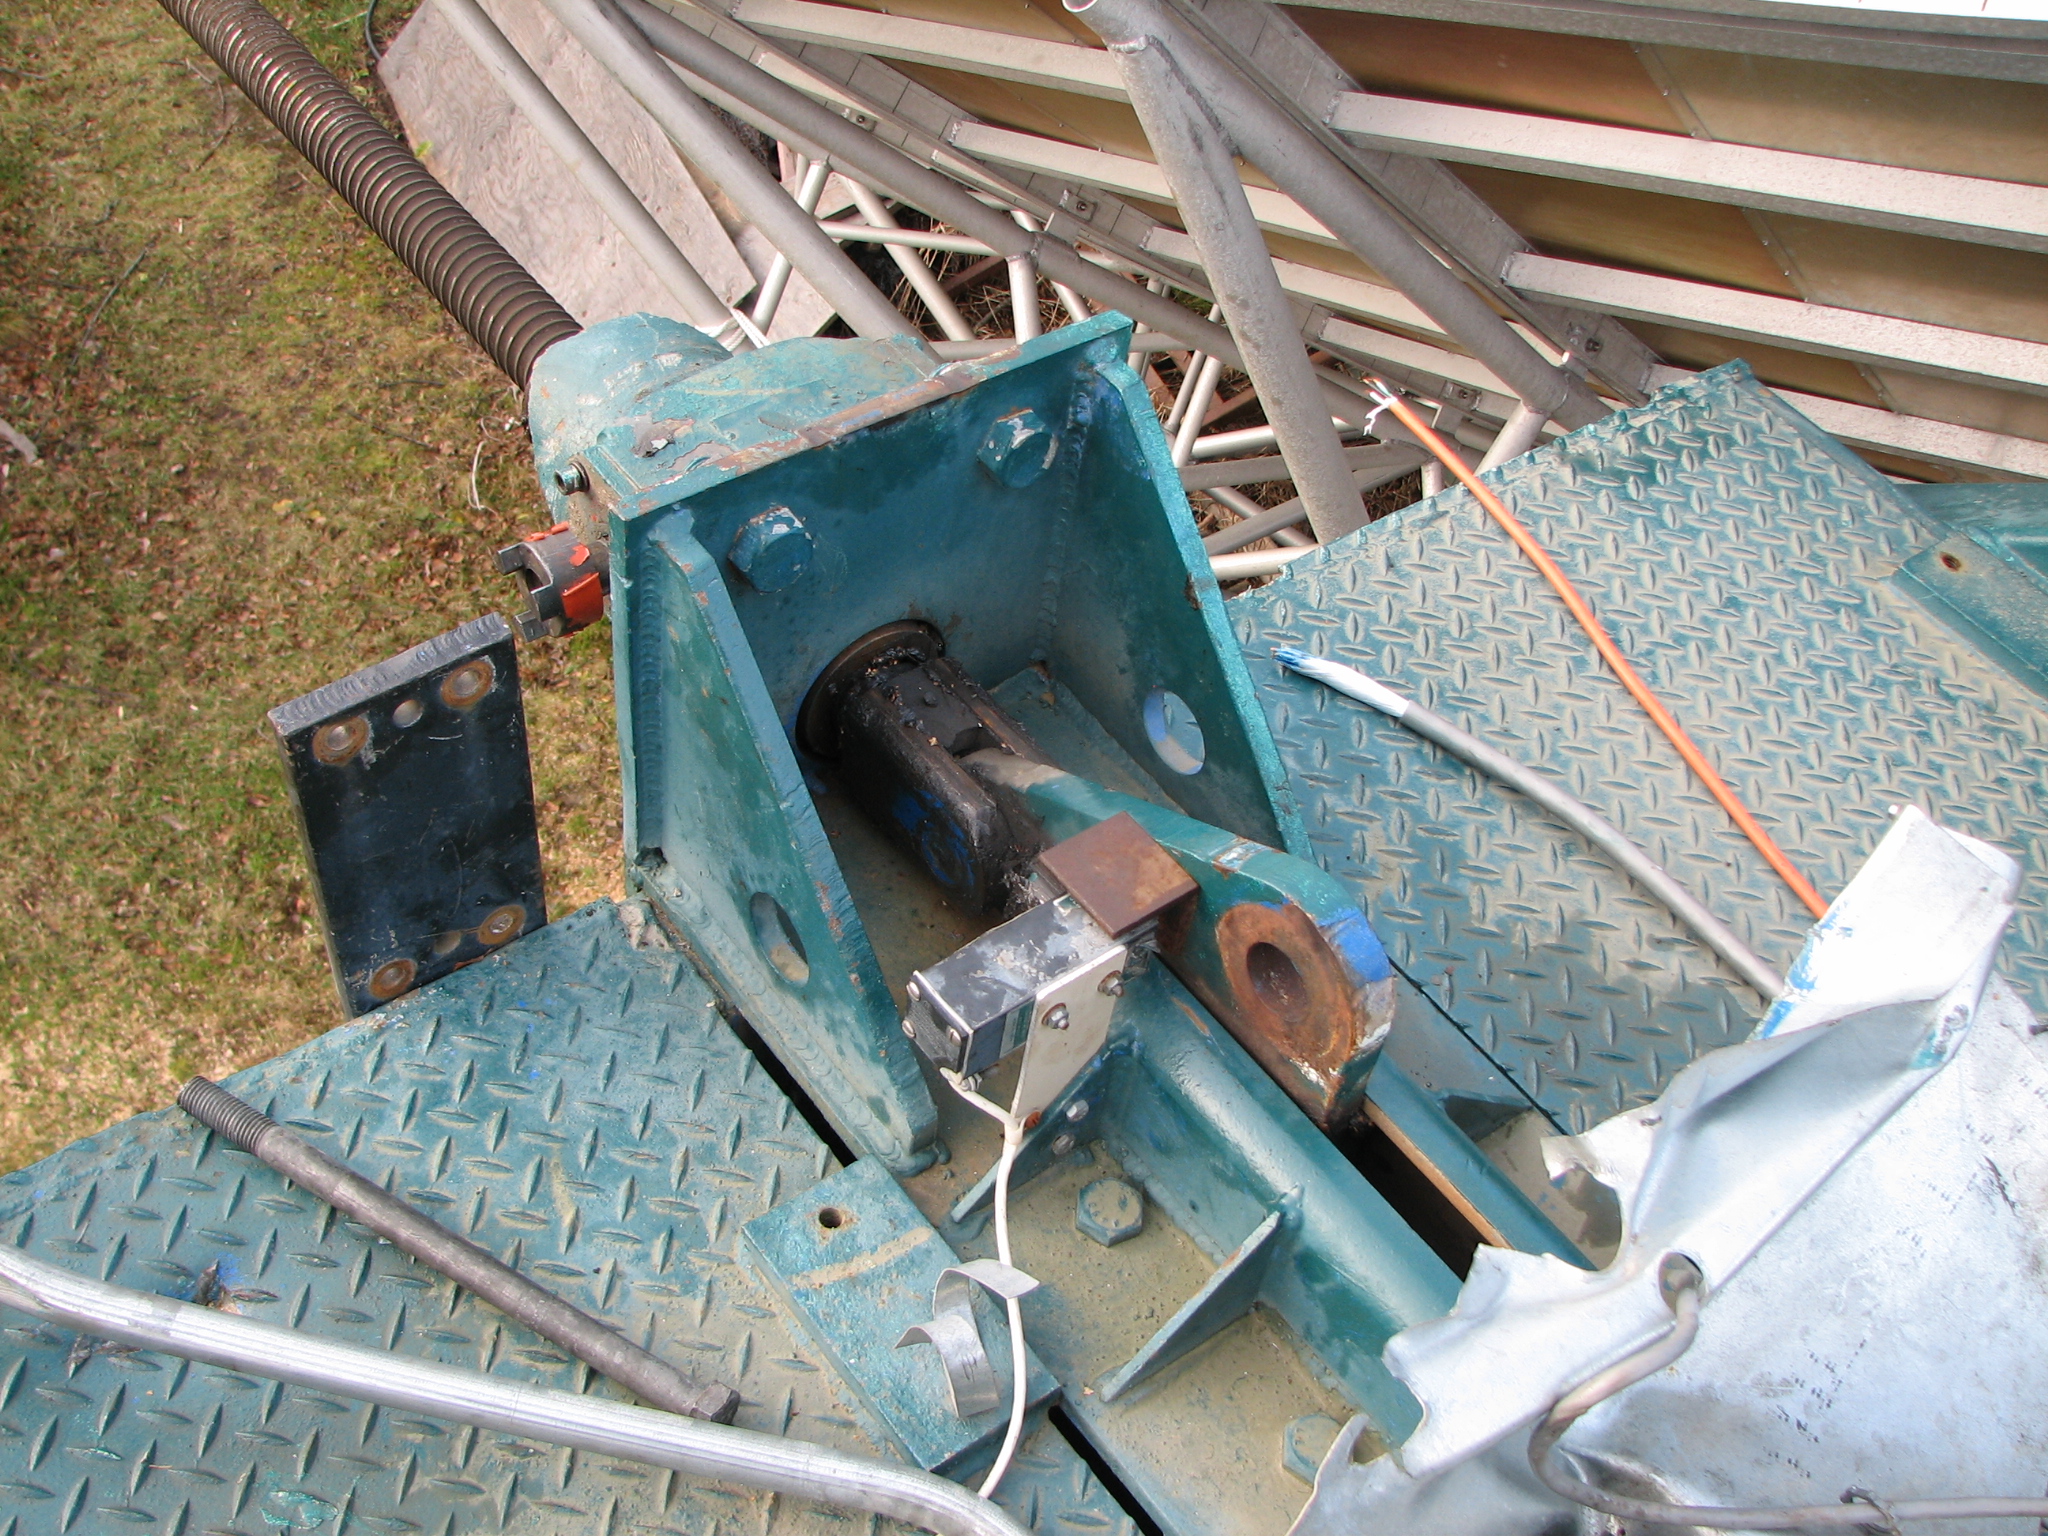
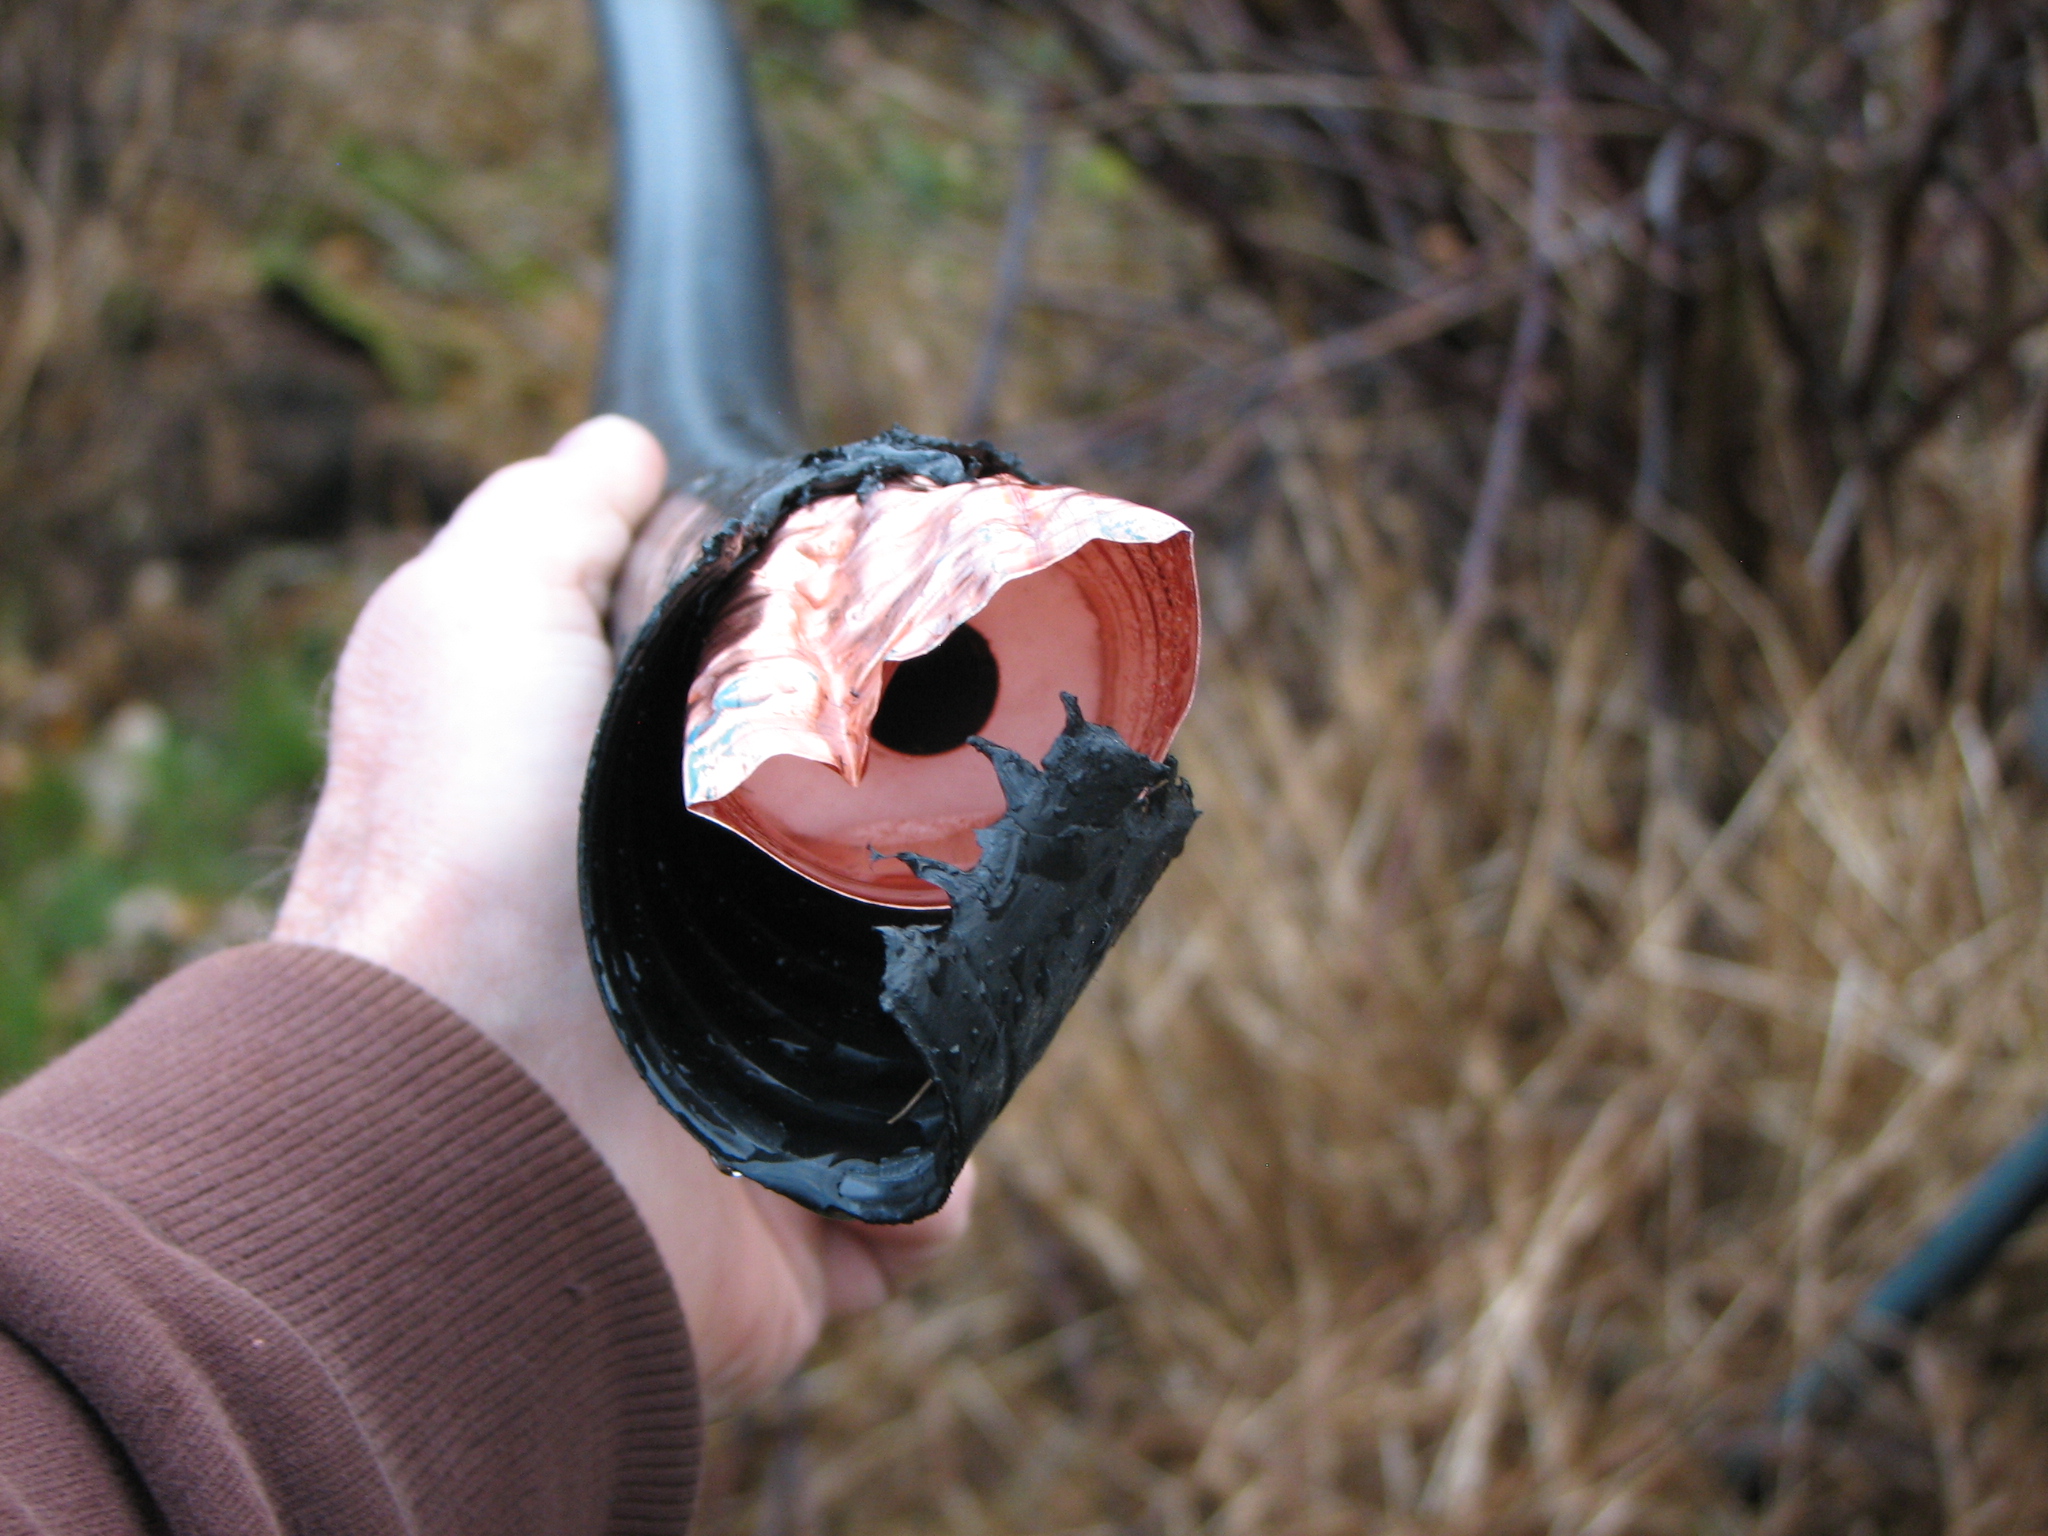
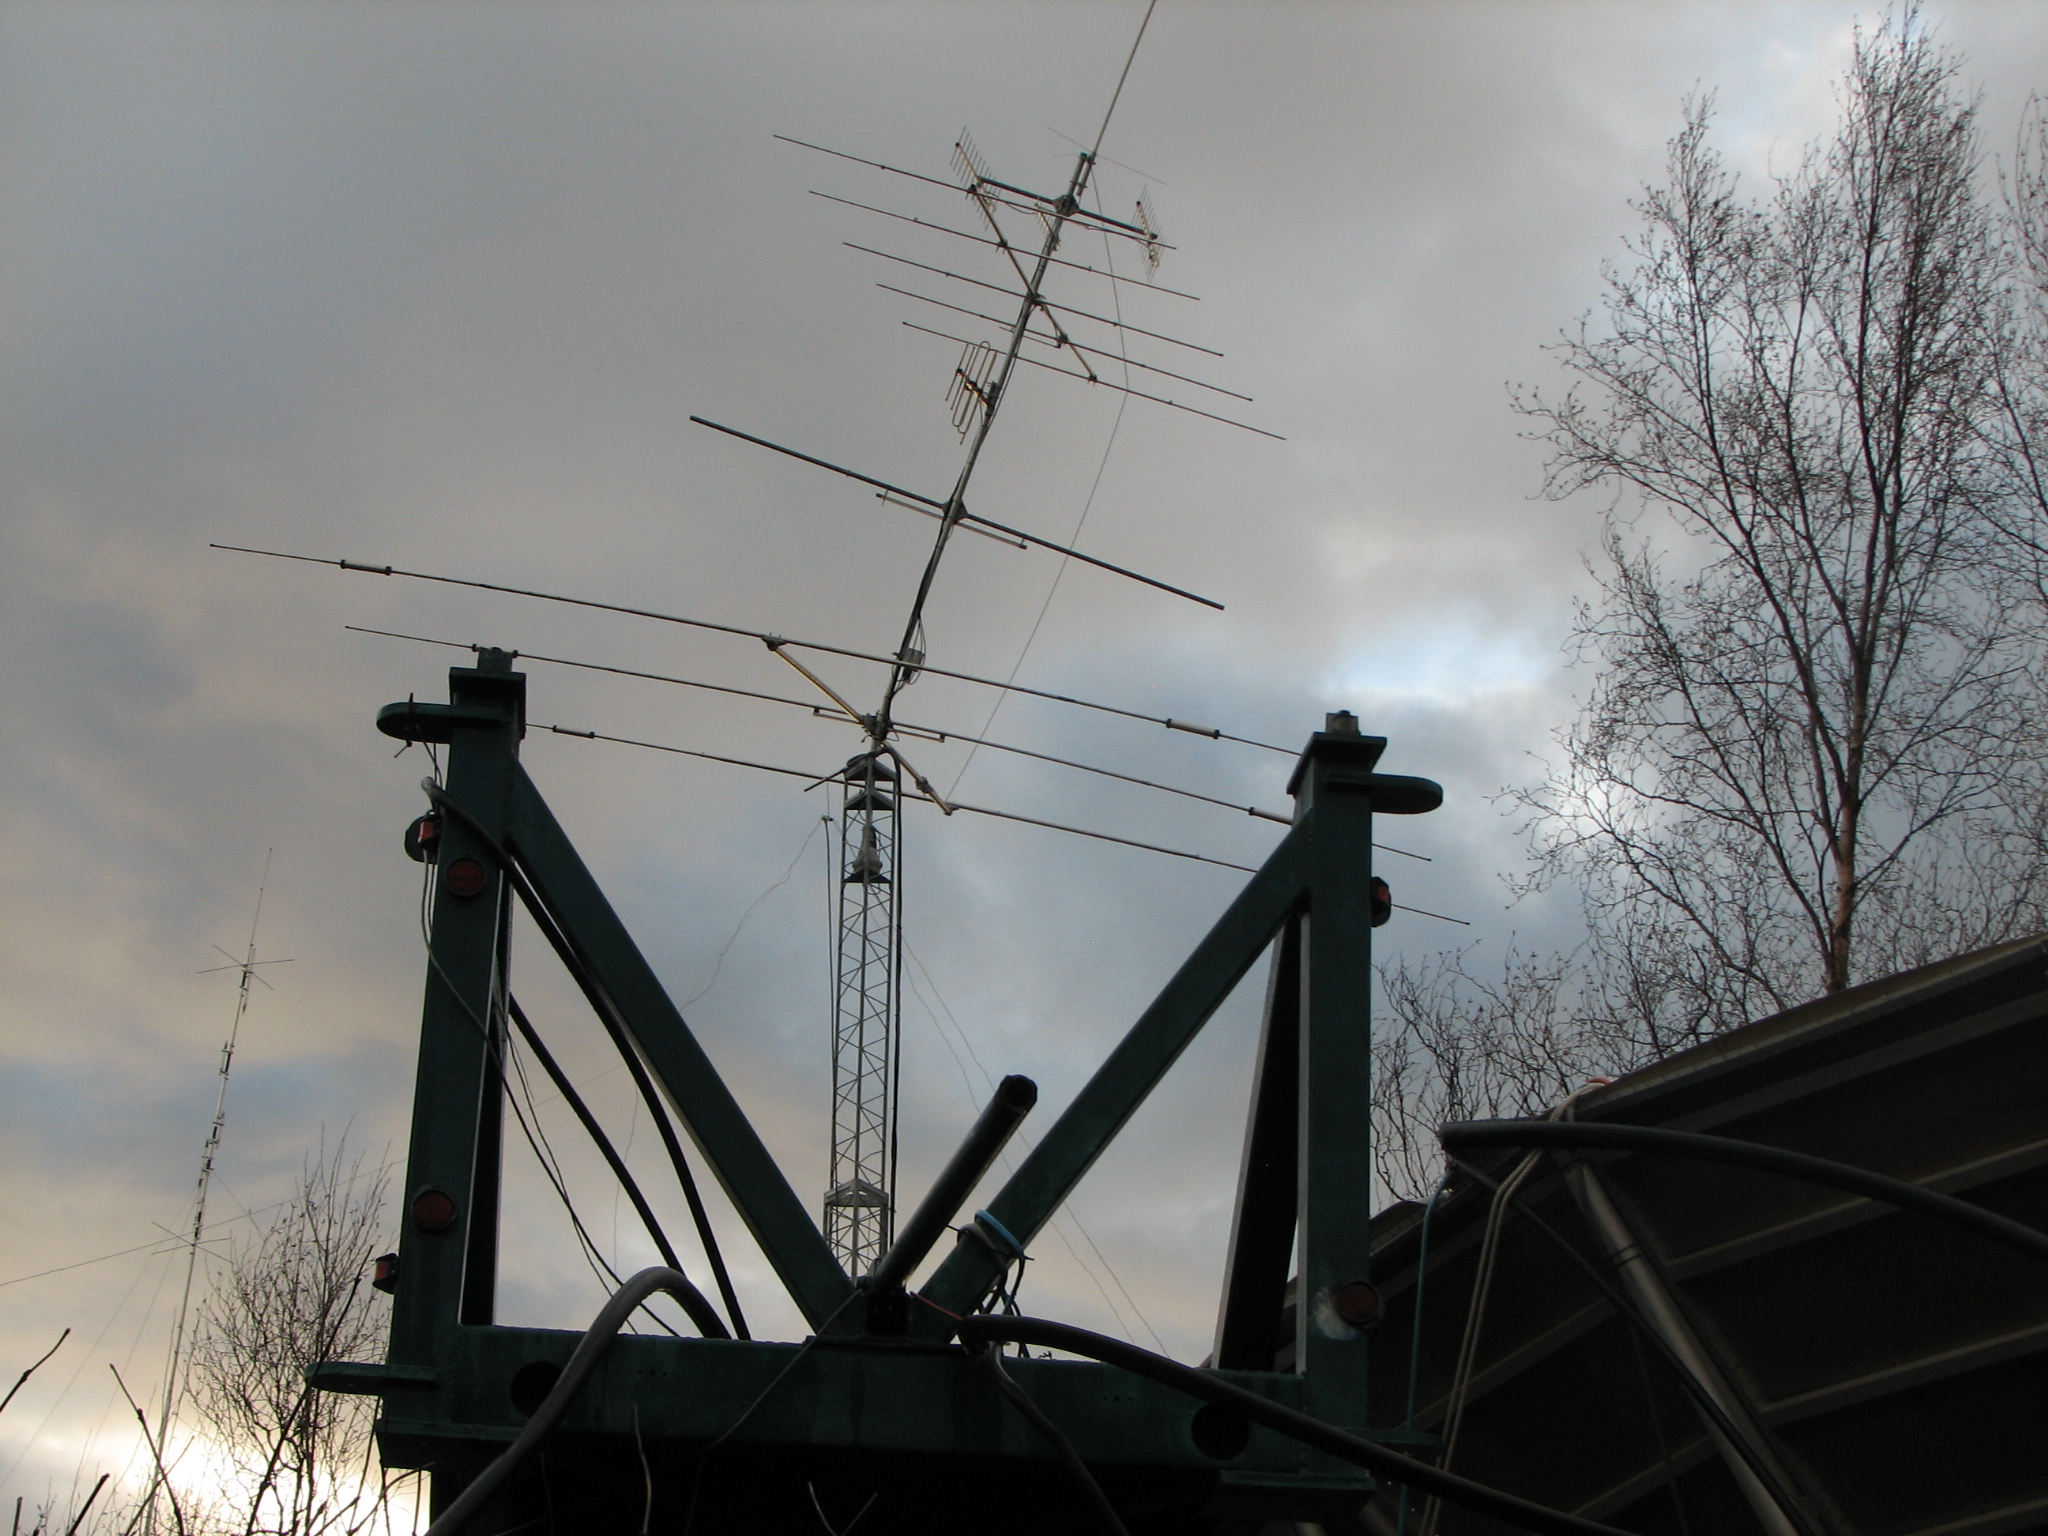
A 106 mph gust blew my 6000 pound antenna off its mount !!
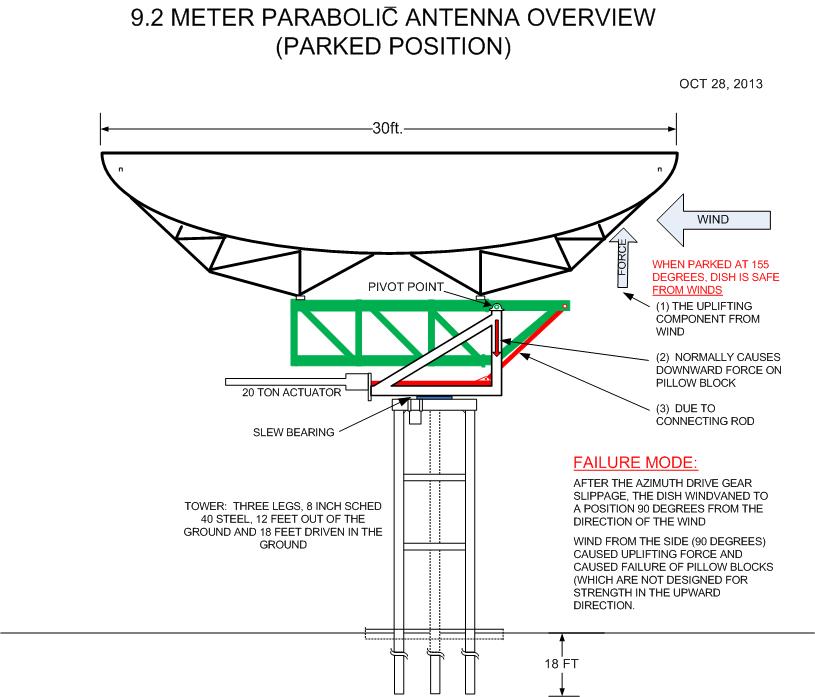
The worst fear of a big dish owner happened to me on Oct 28 at 5:30AM local in the midst of a terrible wind storm with winds reaching 106 mph. My 30 foot (9.2M) dish blew off its mount. It was a combination of things that caused it, but the first thing was a huge gust that caused my pinion gear to separate from the main gear on the slew bearing. I normally park the dish at 155 azimuth which is the typical direction of high winds, +/-5 degrees. But with the gears separated, the dish “wind-vaned” to 90 degrees from the wind direction and another huge gust blew it off sideways. More information, pictures and some diagrams which further explain the cause are detailed below. I have overcome my depression and I am now full speed toward repairing the system. Amazingly, the dish surface has very minimal damage. However there are dozens of small things that must be repaired in order to become operational again. I am hoping I can be QRV by the end of July. Many thanks to over 80 fellow EME’ers for your messages of support, and special thanks to a few folks who actually donated to the repair effort. Mike, KL6M
THE FIRST TWO DRAWINGS EXPLAIN WHAT HAPPENED
This provides an animation of how the dish elevation system works: http://ptt-ak.com/test/dishup.gif
|
|
|
|
||||||||
|
|
|
|
||||||||
|
|
|
|
||||||||
|
|
|
|
||||||||
|
|
|
|


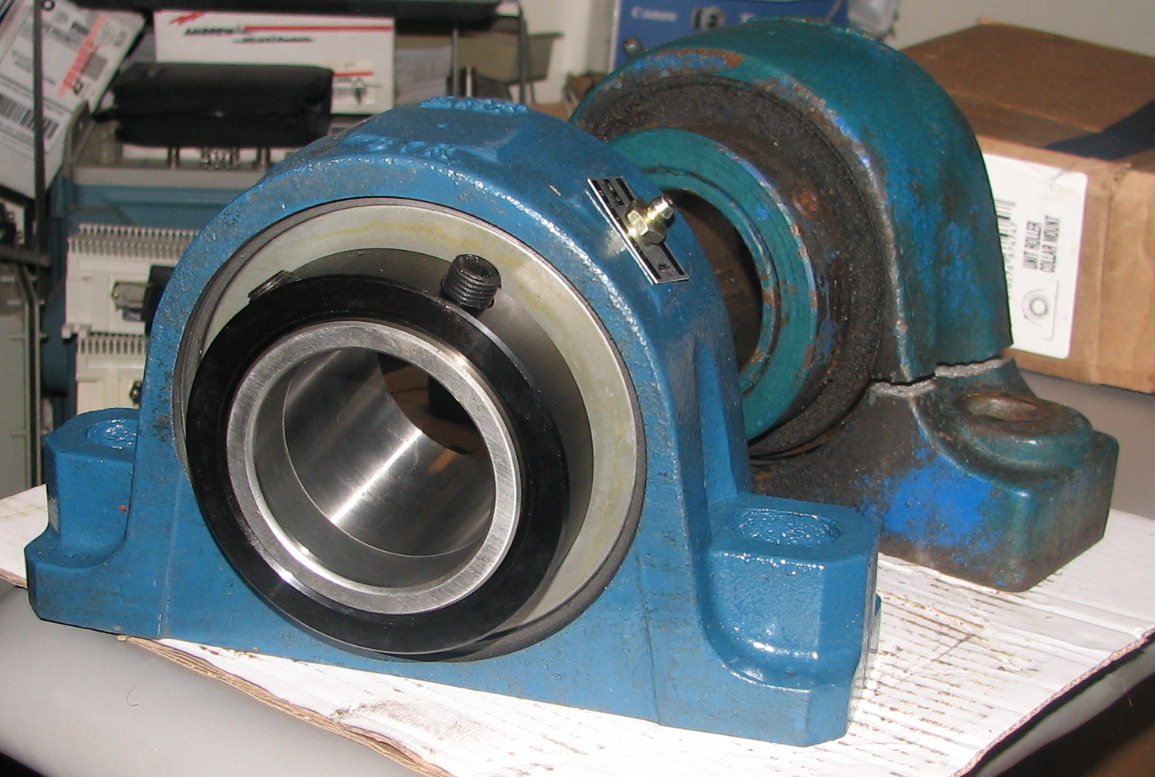
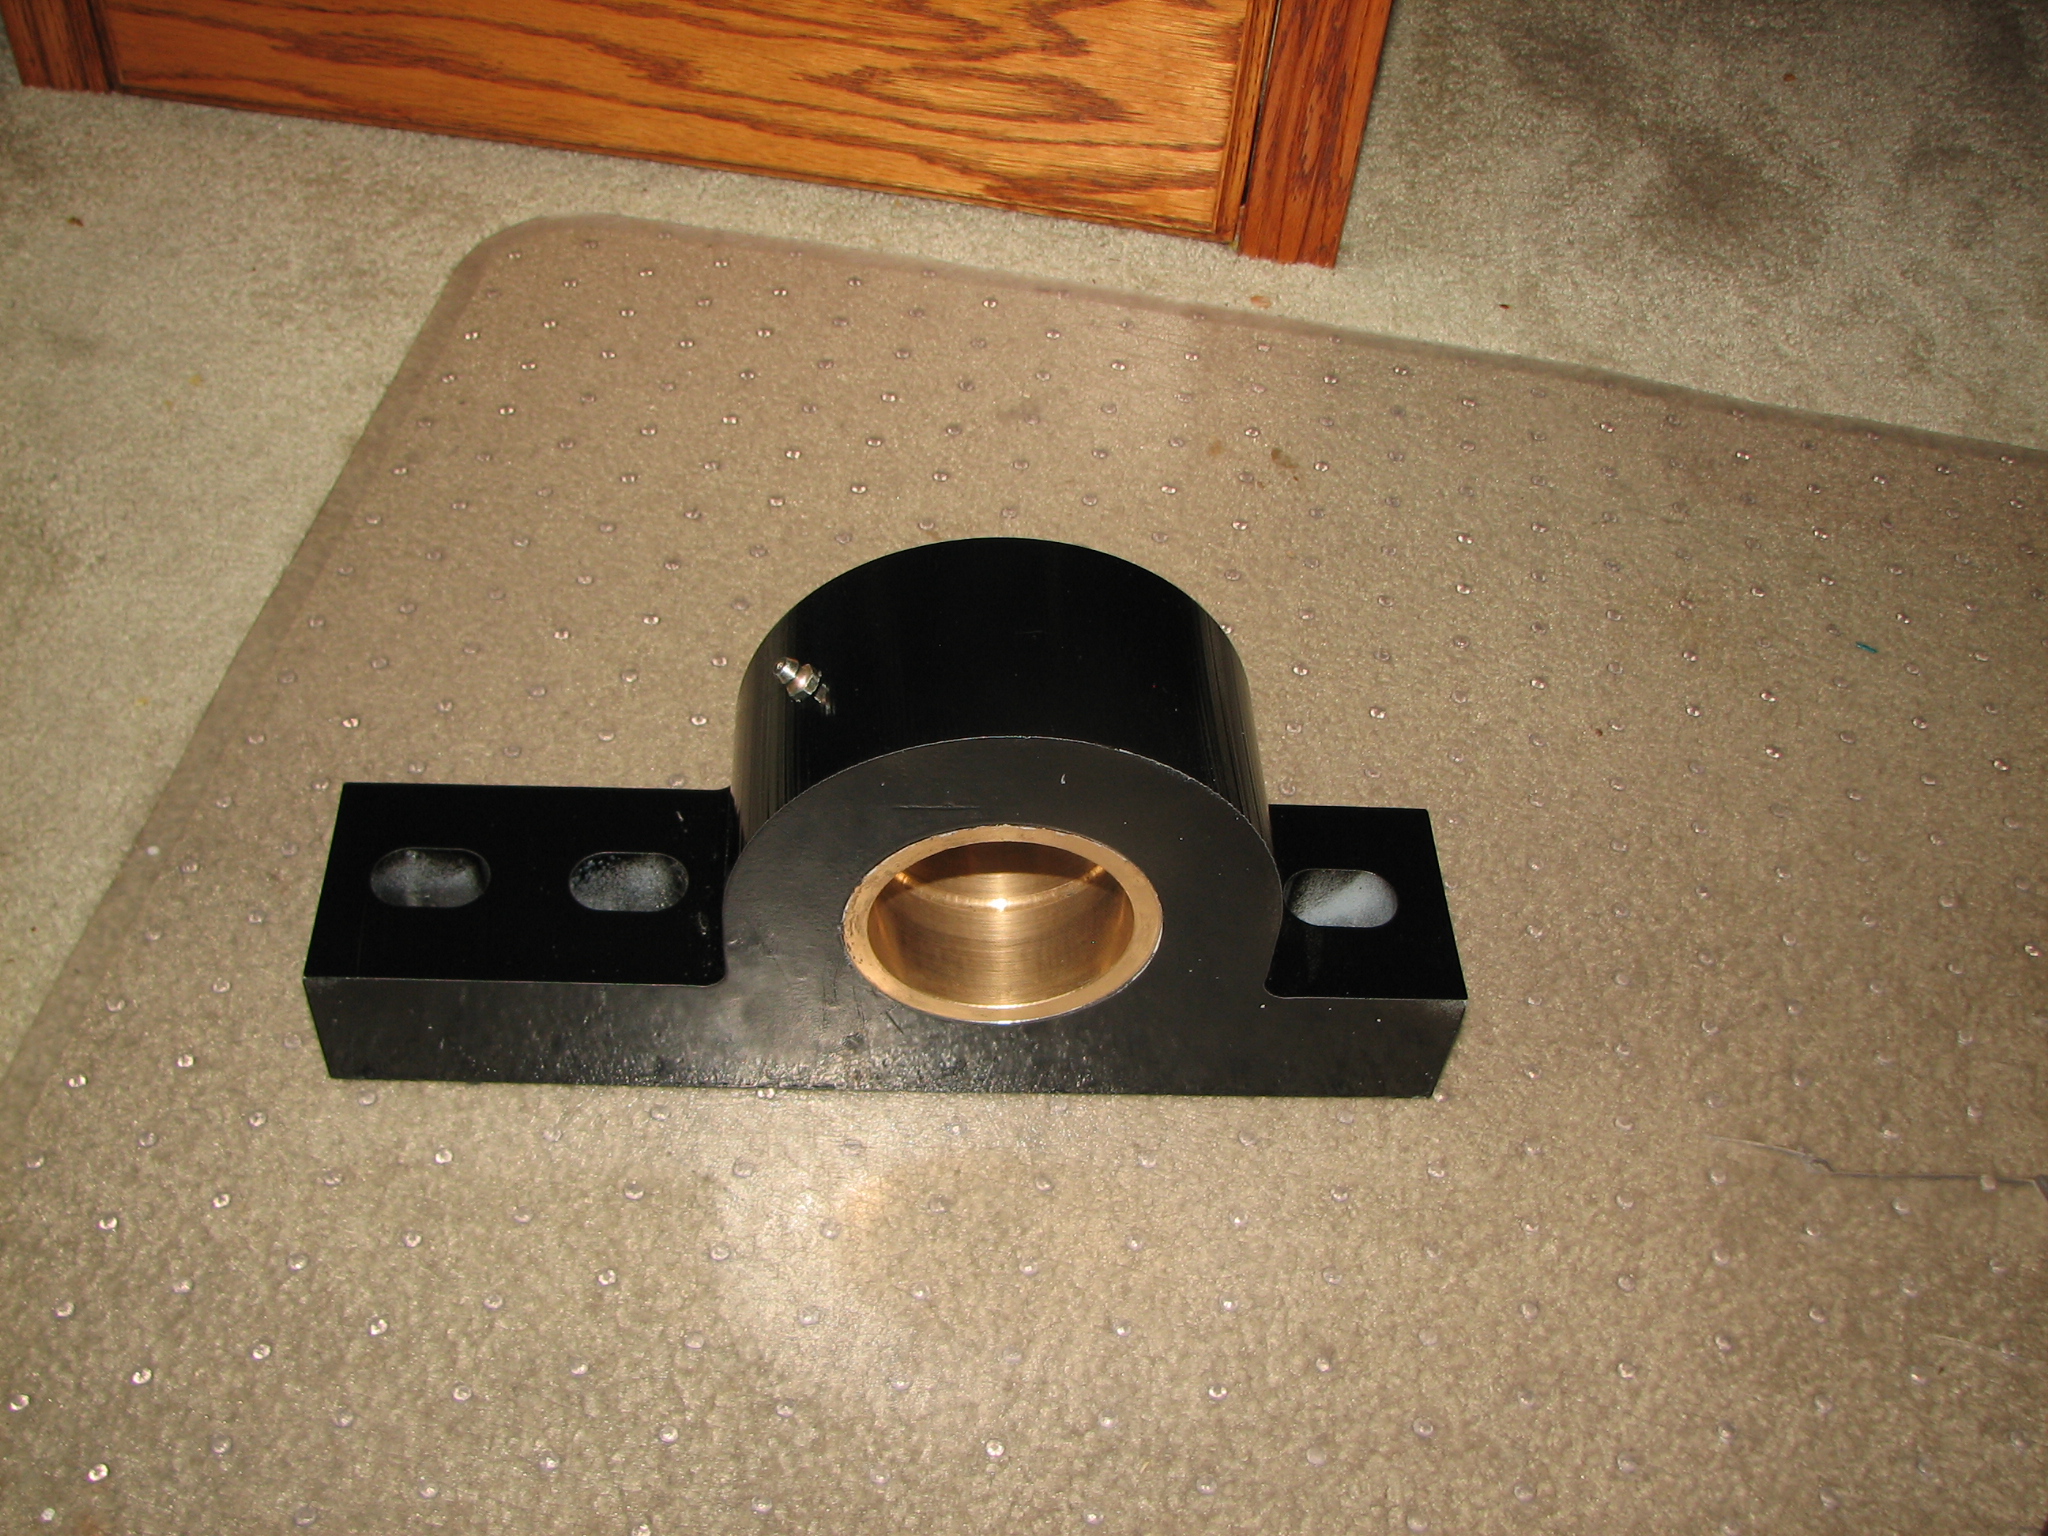
NEW DESIGN FOR IMPROVED PILLOW BLOCK http://kl6m.com/DISH/p-block5.pdf
REVISED TO DECREASE COST, AND IMPROVE DESIGN: http://kl6m.com/DISH/p-block9.pdf
Entire dump of photos of the crane by KL4E: http://alaska.net/~ptt/dish/
====================================================================
LATEST
STATUS: (24-July-2014): With
the help of my friend Richard, we hung my replacement 1-5/8 and 7/8 up one of
the feed struts. The three hangers
closest to the feed can be done from ground level and on a step ladder, then
the last two are installed from inside the dish after raising the feed and
returning dish to zenith.
I spliced the feed control
cable, yet to be tested. I mounted the
Elevation inclinometer, yet to be tested.
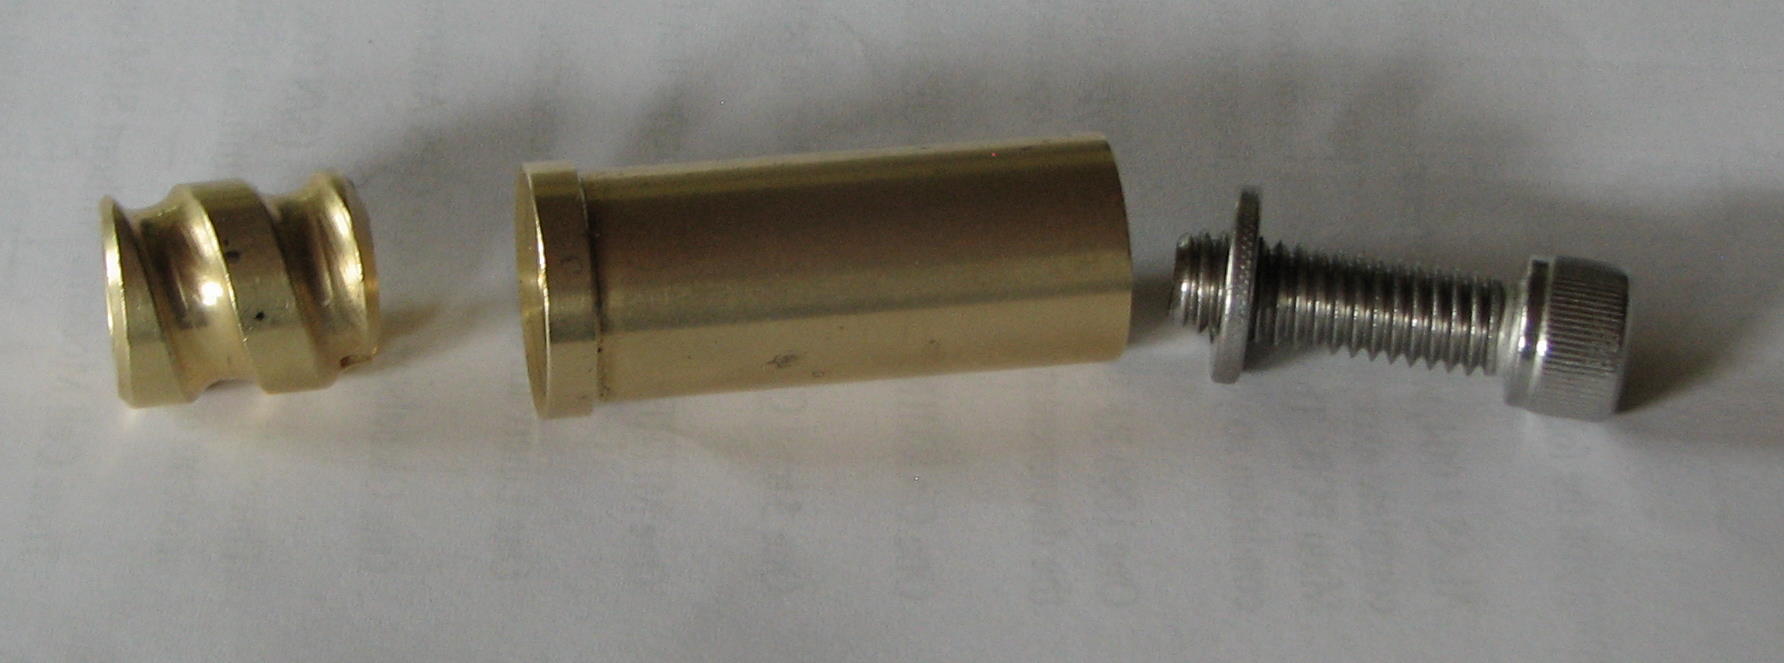
I never did find an L47R EIA Flange for LDF7 Heliax, but I do have one
with no center pin. So
on my lathe/mill I fabricated the center pin for the EIA flange. This is what the factory version looks
like: http://kl6m.com/DISH4/L47RcenterPin.jpg I made the receptacle part with hobby store
brass tubing, two telescoping pieces for thickness, and made an end piece on
the lathe to be soldered in the end of the tubing. http://kl6m.com/DISH4/L47R-fab.jpg The hard part was
the screw which fits inside the Heliax center conductor. I made this out of a solid brass 5/8”
rod. http://kl6m.com/DISH4/CenterPinFab.jpg and http://kl6m.com/DISH4/L47Rpin.JPG
My stash of 1-5/8” Heliax
turned out to be the wrong kind. I had
only Cablewave and HJ7 (air dielectric). My pal KL7FZ has gobs of cable, and he had
some Comscope (bought out Andrew) AVA7-50, which
looks just like LDF7. I had never heard
of it before. It is surprisingly NOT
identical to LDF7, but close enough that the connectors work.
I managed to get one of the
four panels bolted. I still have not
bolted the last three. I think I have a
plan for that which doesn’t involve an expensive bucket lift.
I still need to install my
azimuth ‘flex loop’. Its very possible that I could finally be QRV this
weekend.
Previous Status: (10-July-2014):
I have all 4 panels replaced. I put the
last one in yesterday. I was hoping to
have pictures or even a video but I had no help, so no one to take a
photo. Replacing the panels was very
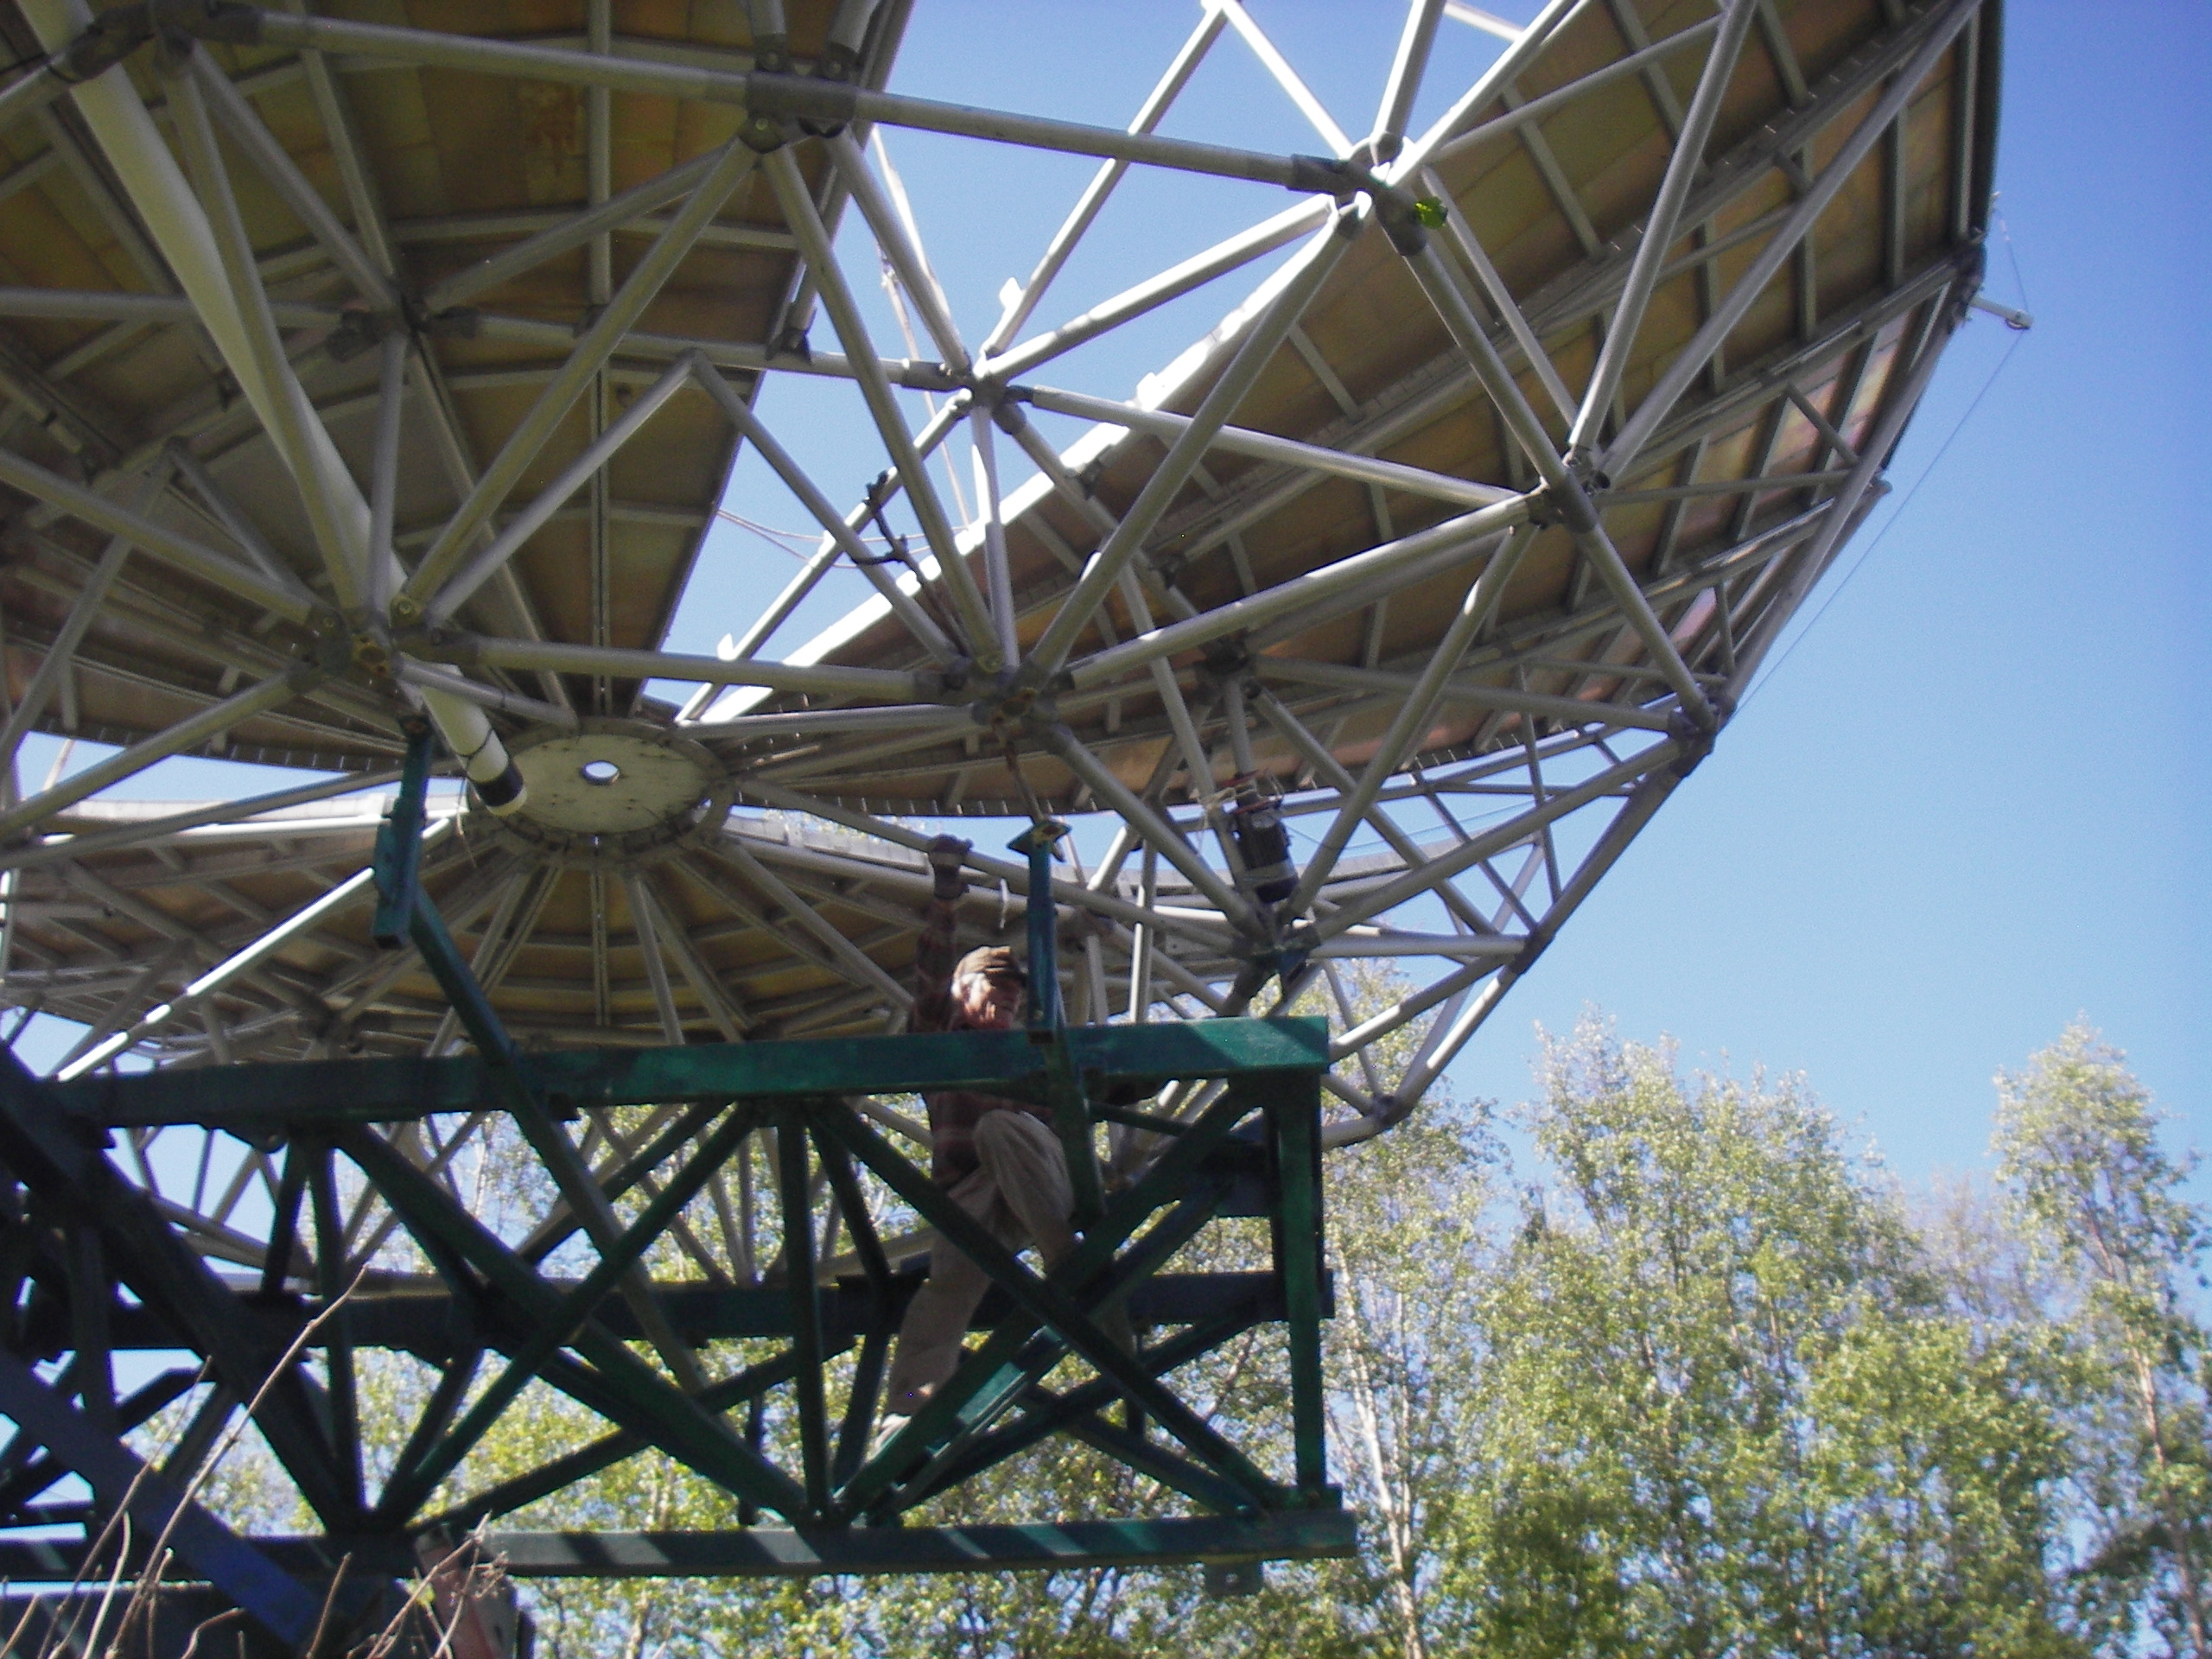
scary. It involved strapping myself in under the surface of the dish, as far out as I
could comfortably maintain a foothold and then muscle the panel into
place. I still have a few bolts left to
install that are very difficult to reach.
I have a picture of my original construction that shows this: http://kl6m.com/DISH4/DishBolts.jpg
. This was taken back in 2000. But it shows the outer two bolts that are
hard to reach. The very outer ones are
the issue right now. I think that
before, from inside the dish I climbed to the outer edge and reached over the
edge and put them in. The problem is
that my body weight tends to misalign the bolt holes making it difficult to
install them this way. I’m considering
renting a bucket truck. I could probably
operate this way, but I prefer not to.
Also, two of the panels are not seated flush. This one needs to be levered into place on
both sides: http://kl6m.com/DISH4/IMG_8976.JPG I have a couple of climbing harnesses but way
out on the edge underneath is a very precarious climb.
Otherwise, my AZ/EL system is
now working. I replaced and wired the
feed winch. Mechanically I am close to
finished. It is raining today with 60
mph winds predicted so I am taking a break.
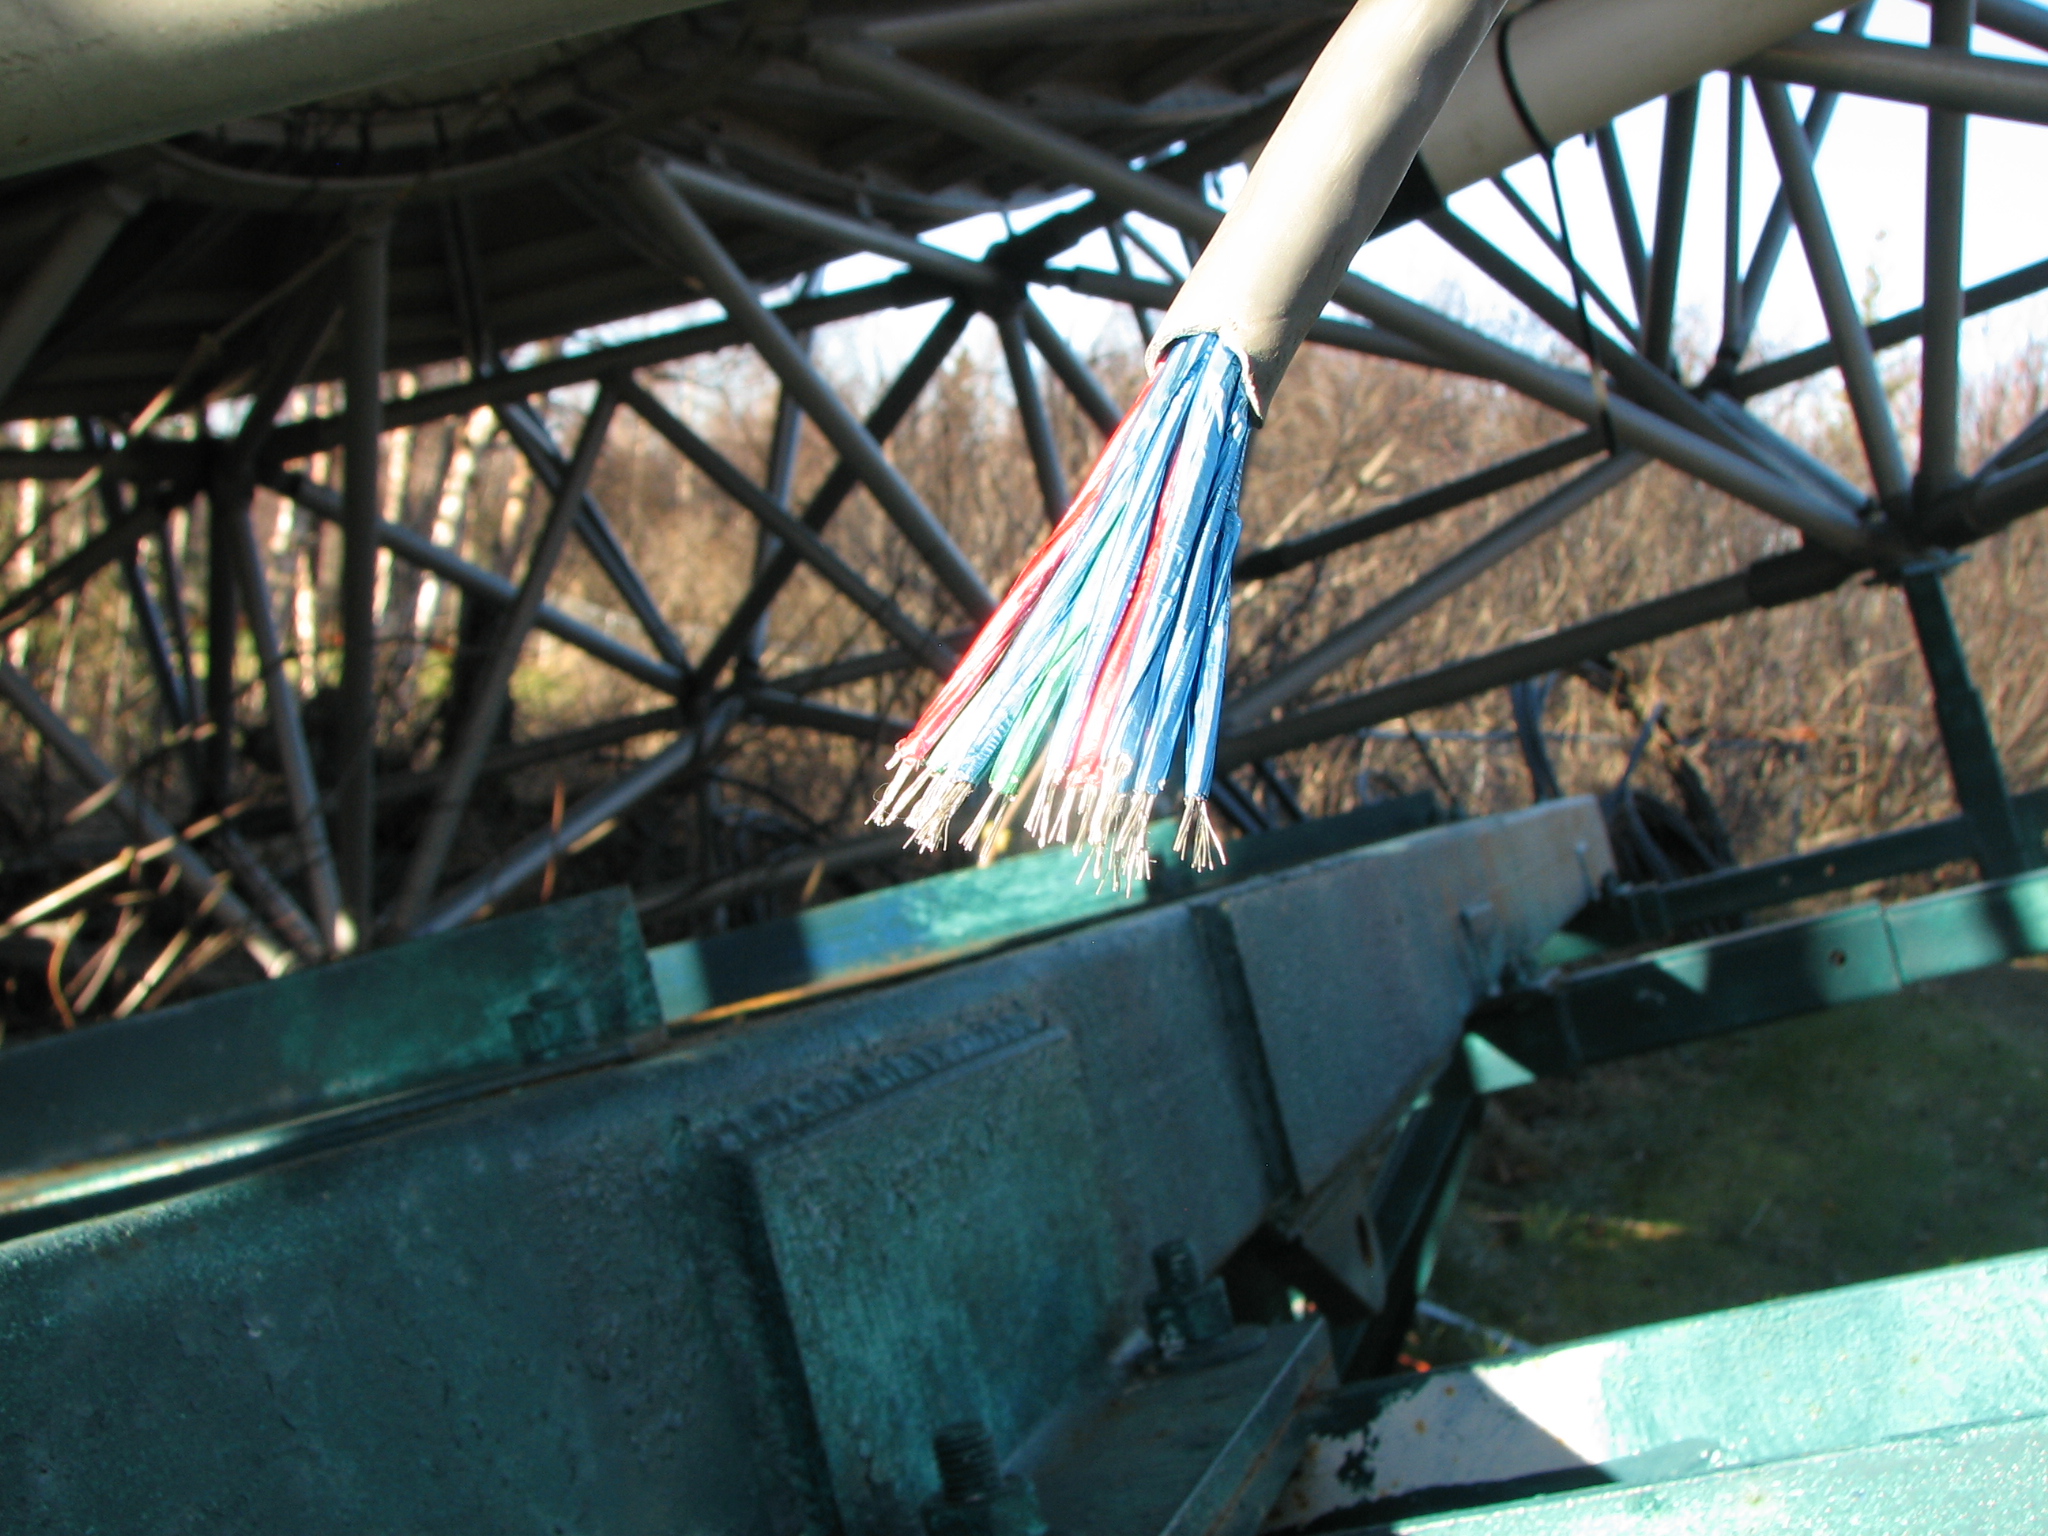
Electrically I plan to try splicing my 12 pair control cable to the
feed, rather than replacing it. It was
stretched to the breaking point, so there is a risk that it is damaged
elsewhere. I need to raise the dish and
lower the feed to remove the two LDF5, the LDF7, and the elliptical waveguide,
and replace them with new pieces. I then
need to re-connectorize at the tower, and implement
my new transmission flex loop: http://kl6m.com/DISH4/tx-line.gif
and put new ends on the LDF5 and EW52 lines and install my new hangers (link
below). Weather permitting I could be
operational next week.
Previous Status: (3-July-2014):
Beautiful sunny and 72 today. In spite
of numerous interruptions, I have managed to get the two bent panels riveted
back together. My pal KA1NVZ, Tom,
helped me bang the dents out them. I
hoisted all four panels up on the dish today with the help of WL7YO, Pat. We also tested my rewired limit
switches. I also torqued down the rest
of the bolts holding the aluminum trusses to the steel frame. I have built 5 of my new Heliax hangers: http://kl6m.com/DISH4/hanger.jpg These will hang
LDF7 and LDF5 from the schedule 80 aluminum feed strut. I plan to make more to hang another LDF5 and
a EW52 waveguide on another strut. It is
really apparent that I am 14 years older than the last time I climbed around on
that dish.
Previous Status (22-June-2014):
Finally climbed up with a torque wrench and tightened the new pillow blocks
down. I put 160 ft-lbs
on all six bolts. My plan was to wire
and reconnect the feed winch but I got caught in a DOWN POUR and small
hail. Called it a day
for outside. Inside working on
elevation inclinometer repair (finished).
Previous Status (21-June-2014):
I have not been inclined to
climb around on the dish since I hurt my ribs.
So I have been working on other preparations.
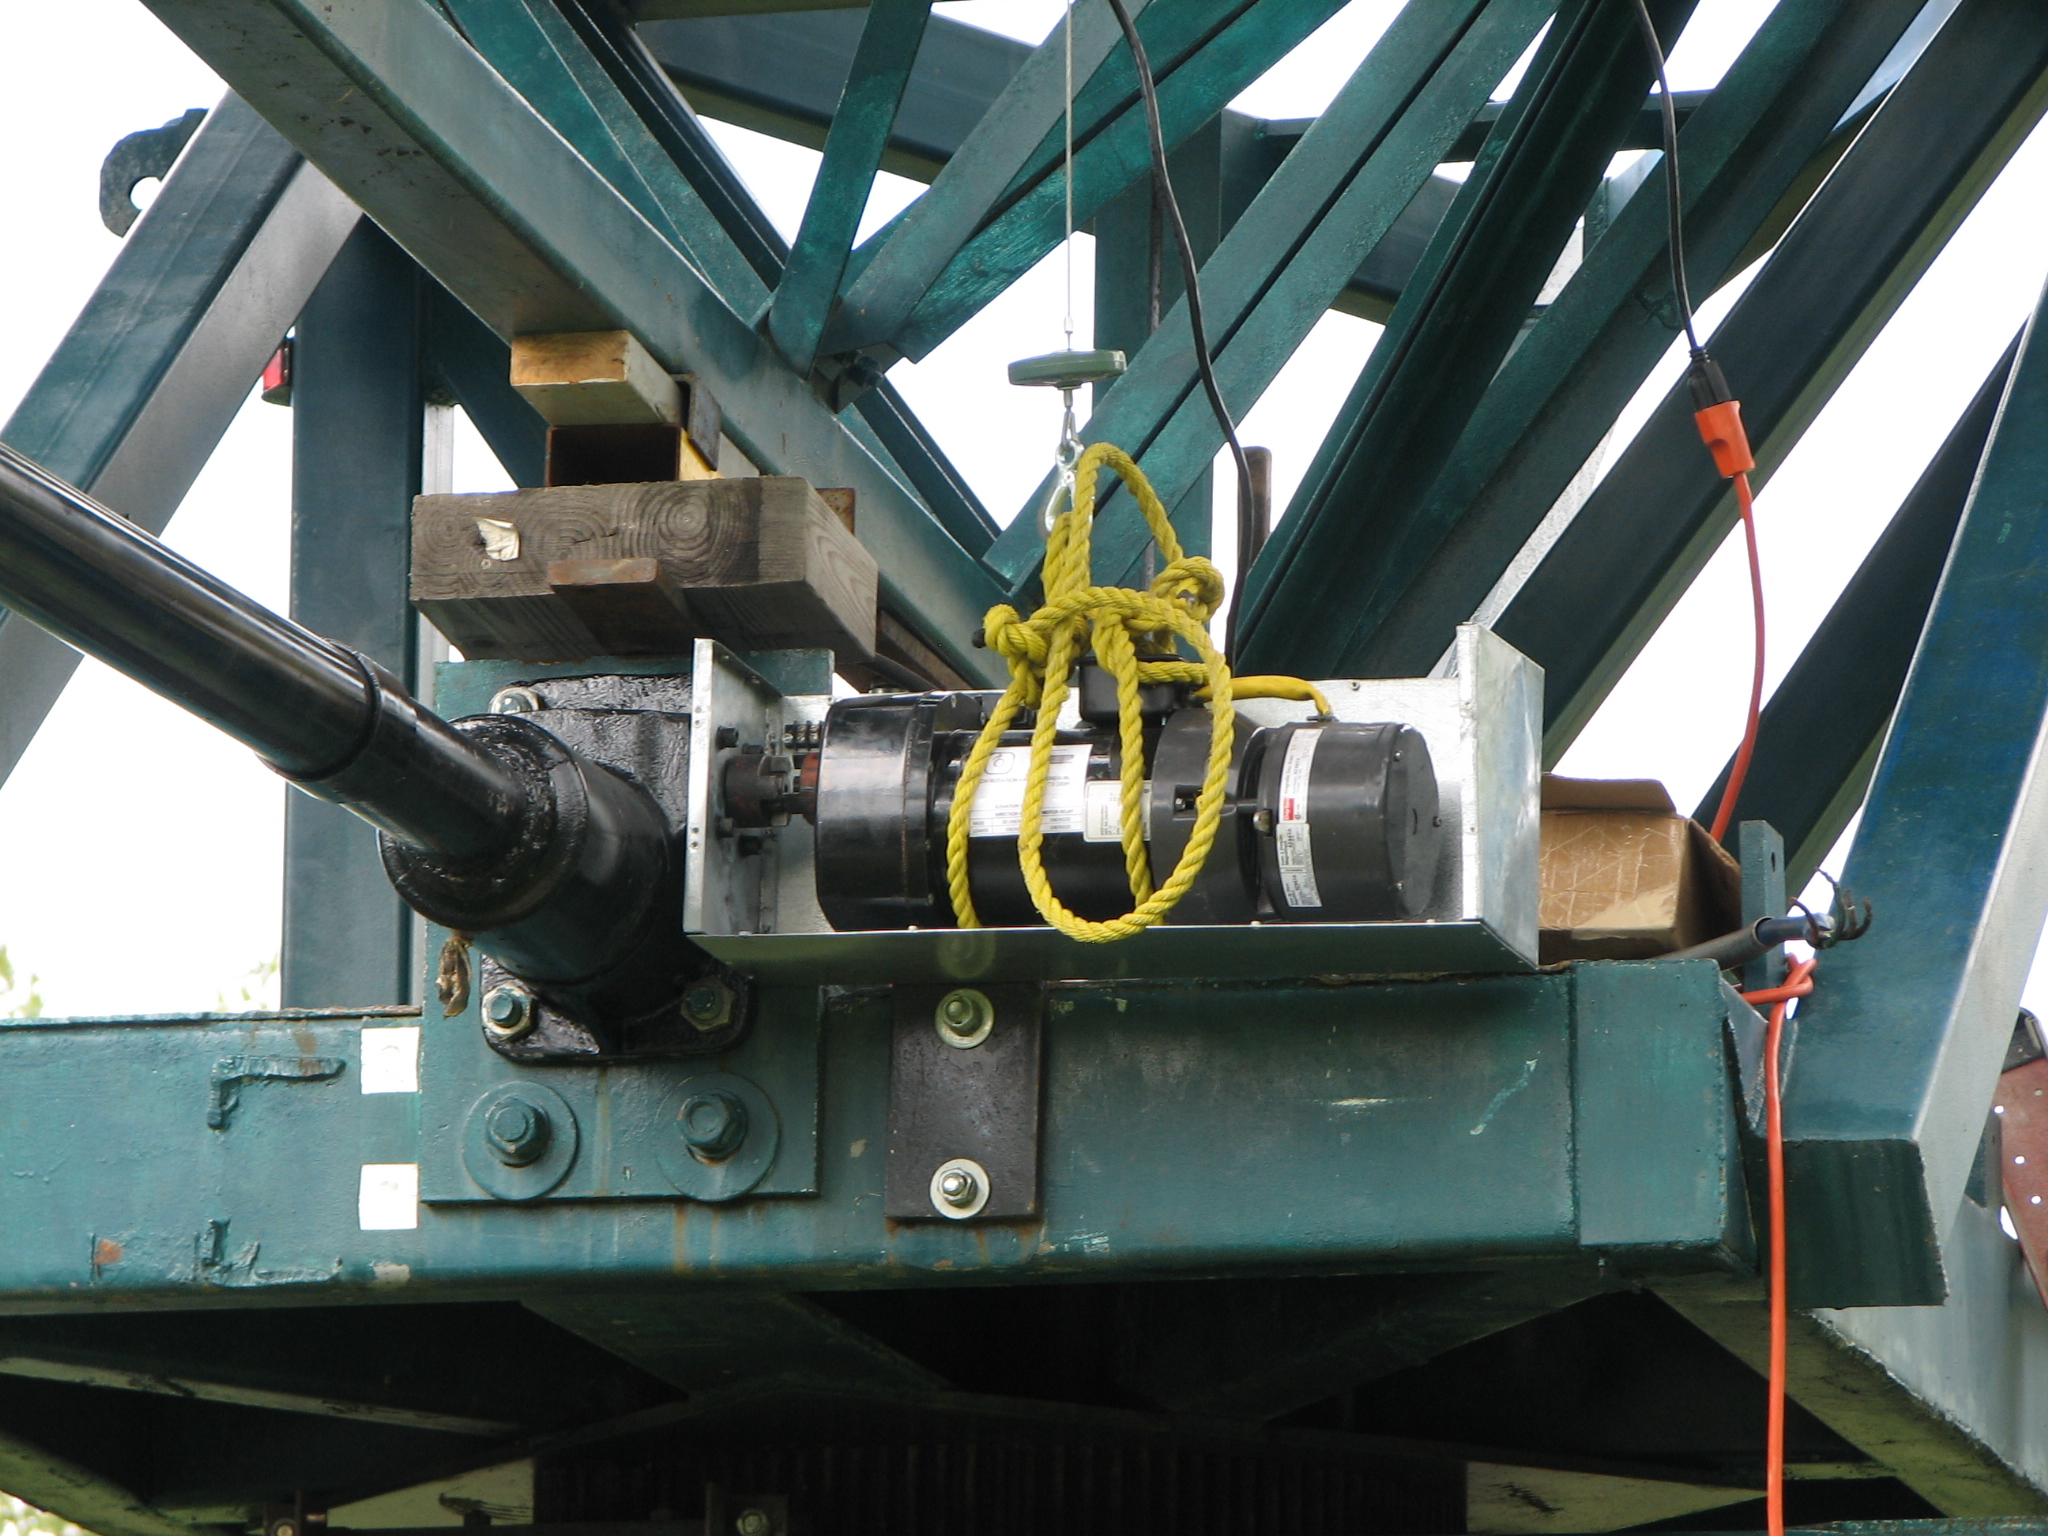
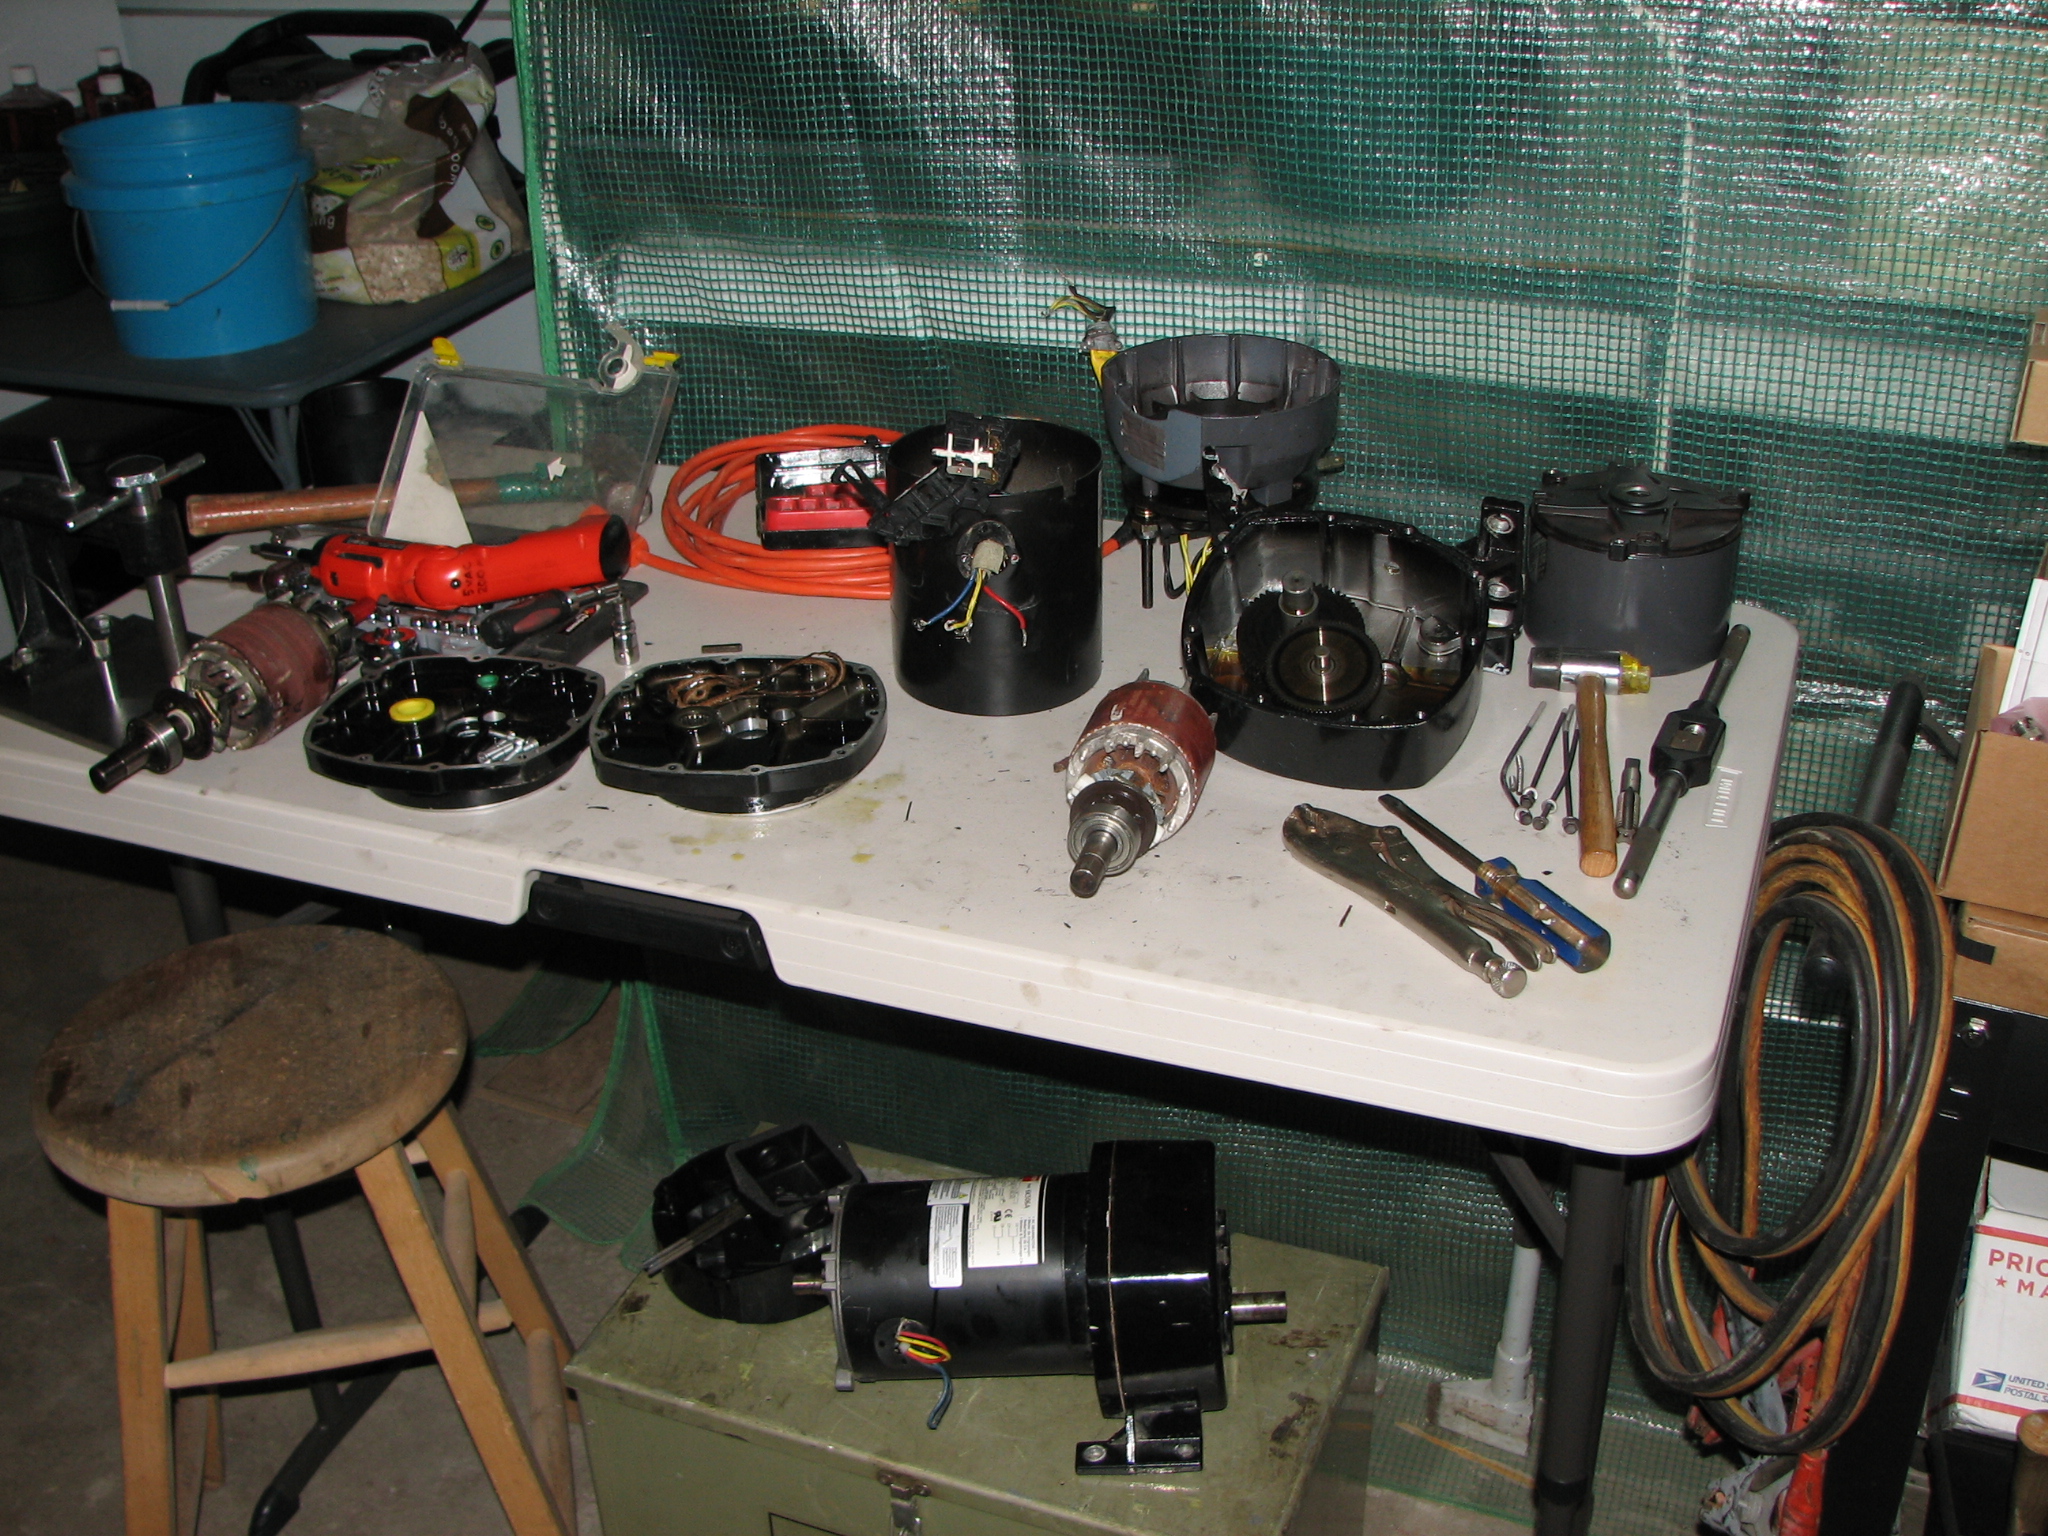
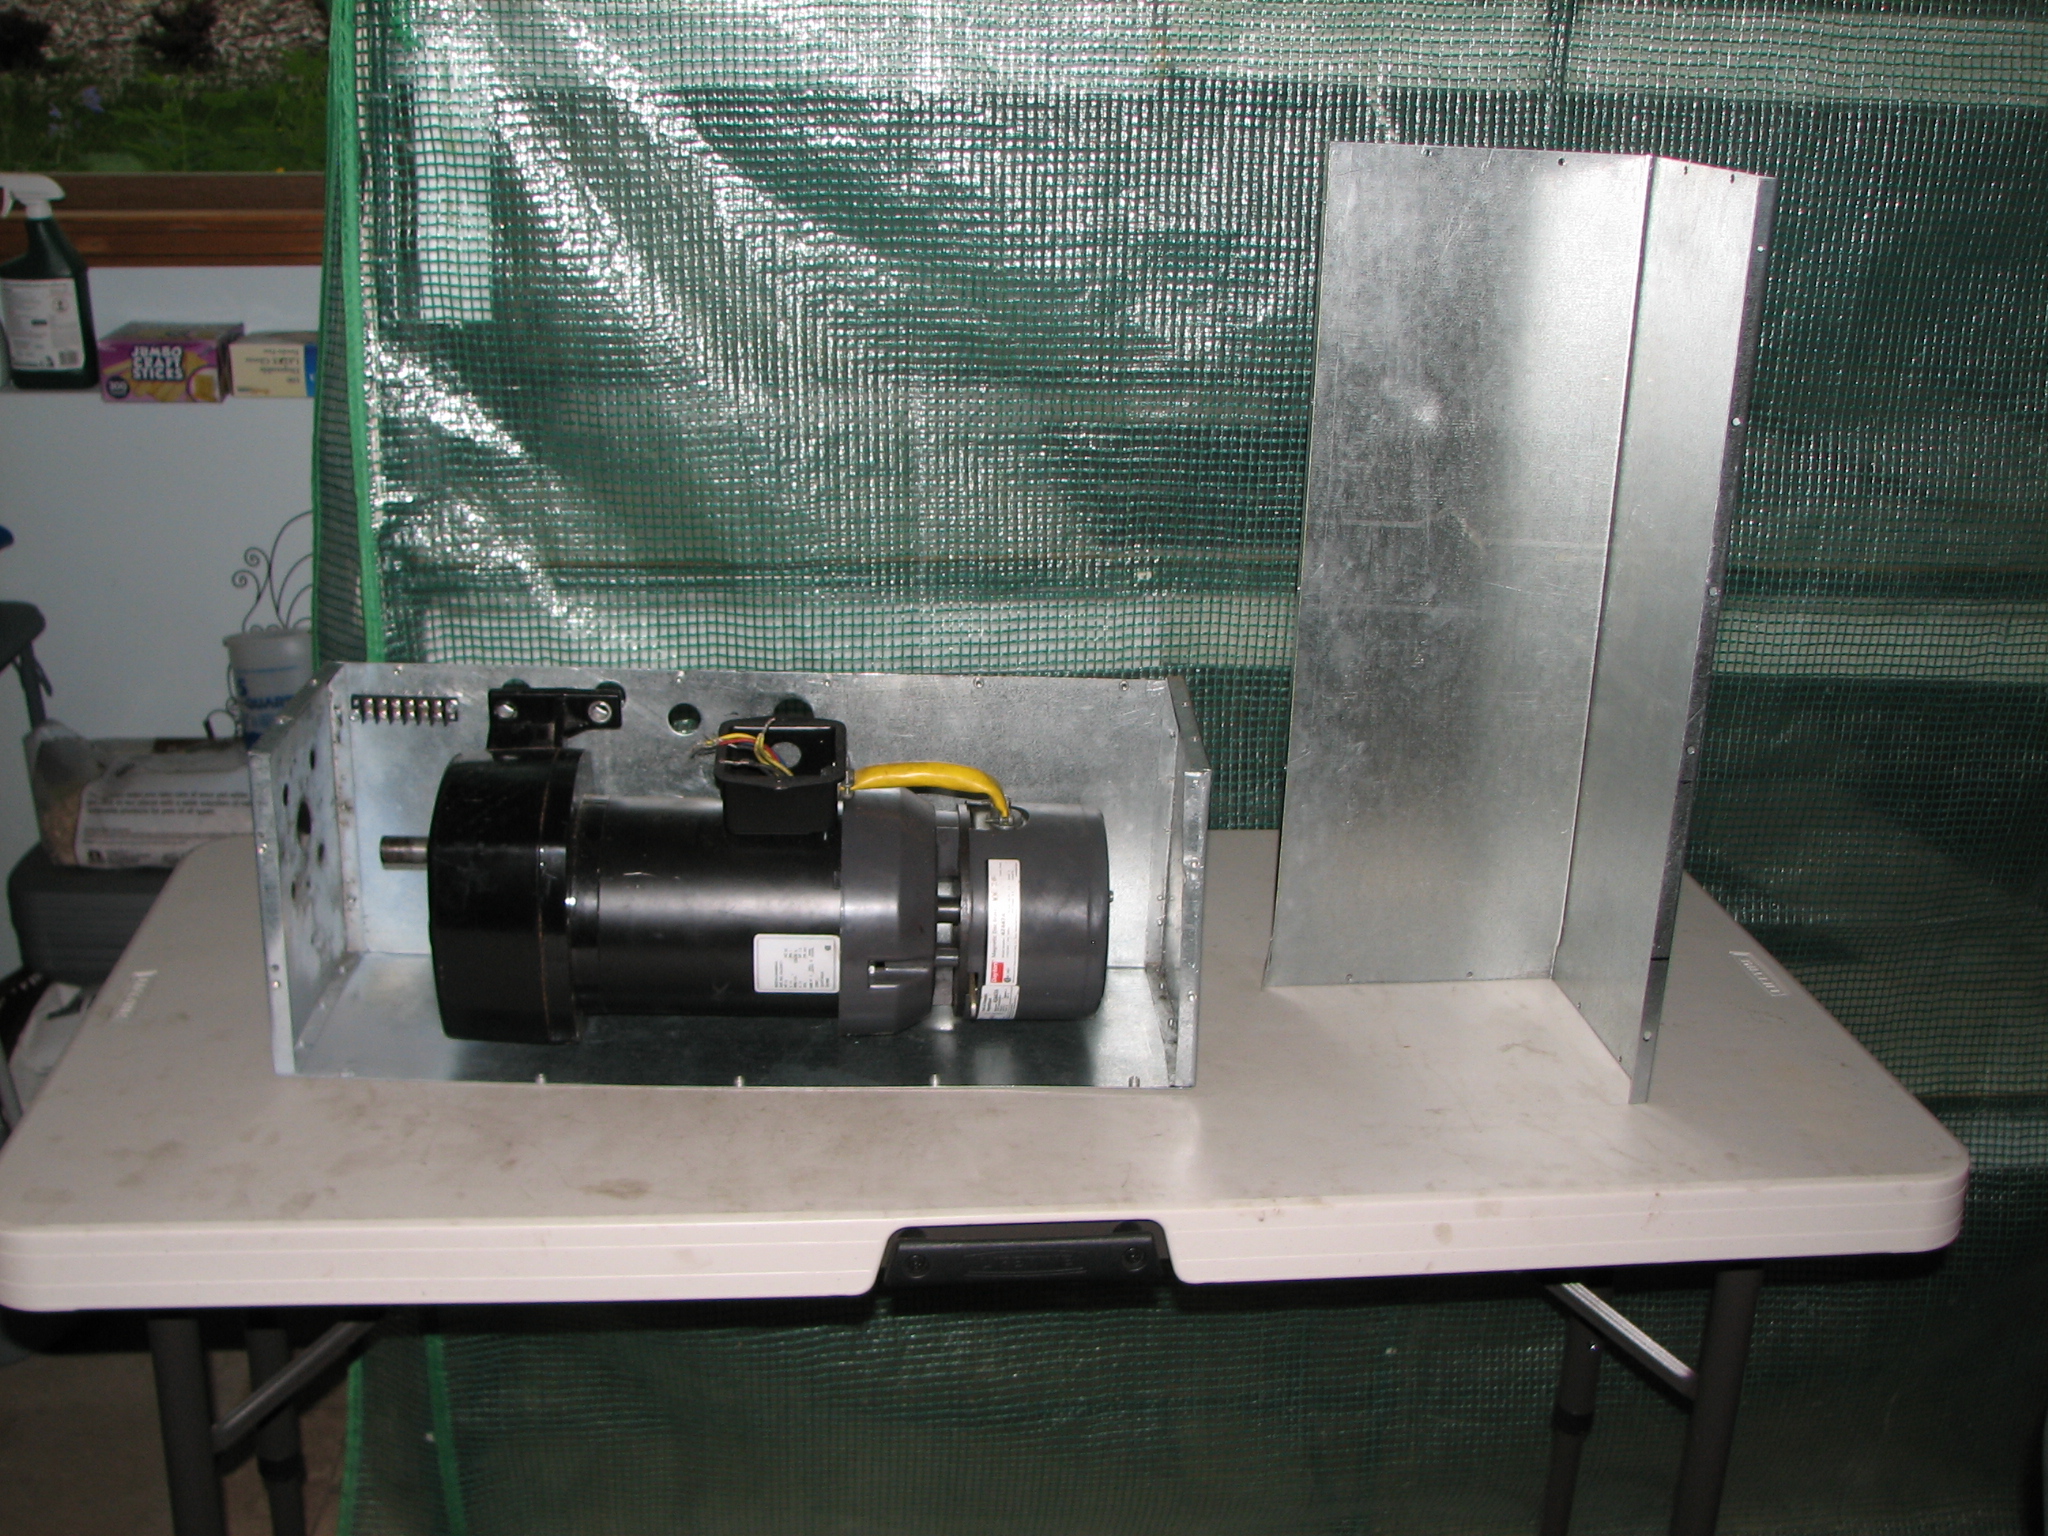
I did hoist the motor up and
fastened it down. I used the same shims
and it fell right into place. It is
wired and I also installed the limit switches.
The 90 degree limit had to be modified since my maximum elevation is now
87 degrees.
Motor pictures: http://kl6m.com/DISH4/IMG_8965.JPG http://kl6m.com/DISH4/IMG_8966.JPG http://kl6m.com/DISH4/IMG_8967.JPG
I started working on new coax hangers to replace the old clamps I used before. I am making them out of very hard plastic and
using hole saws to cut exact shapes for LDF7 and
LDF5. I will use a scroll saw for the
EW52 shape. http://kl6m.com/DISH4/hanger.pdf
Rain and wind today (21-June) so I am
inside working on my replacement elevation inclinometer.
Previous Status (15-June-2014):
The dish is up, but it was not totally smooth. First problem was getting the bolts through my new pillow blocks. 5 out of 6 not a problem, the 6th was only a 32nd off, but I could not get it to budge. I finally got it in after hammering on a wood splitting wedge. http://kl6m.com/DISH4/IMGp3795.JPG
Then we couldn't get the dish to line up on the steel support frame. Took about 2 hours but finally got it.
More photos:
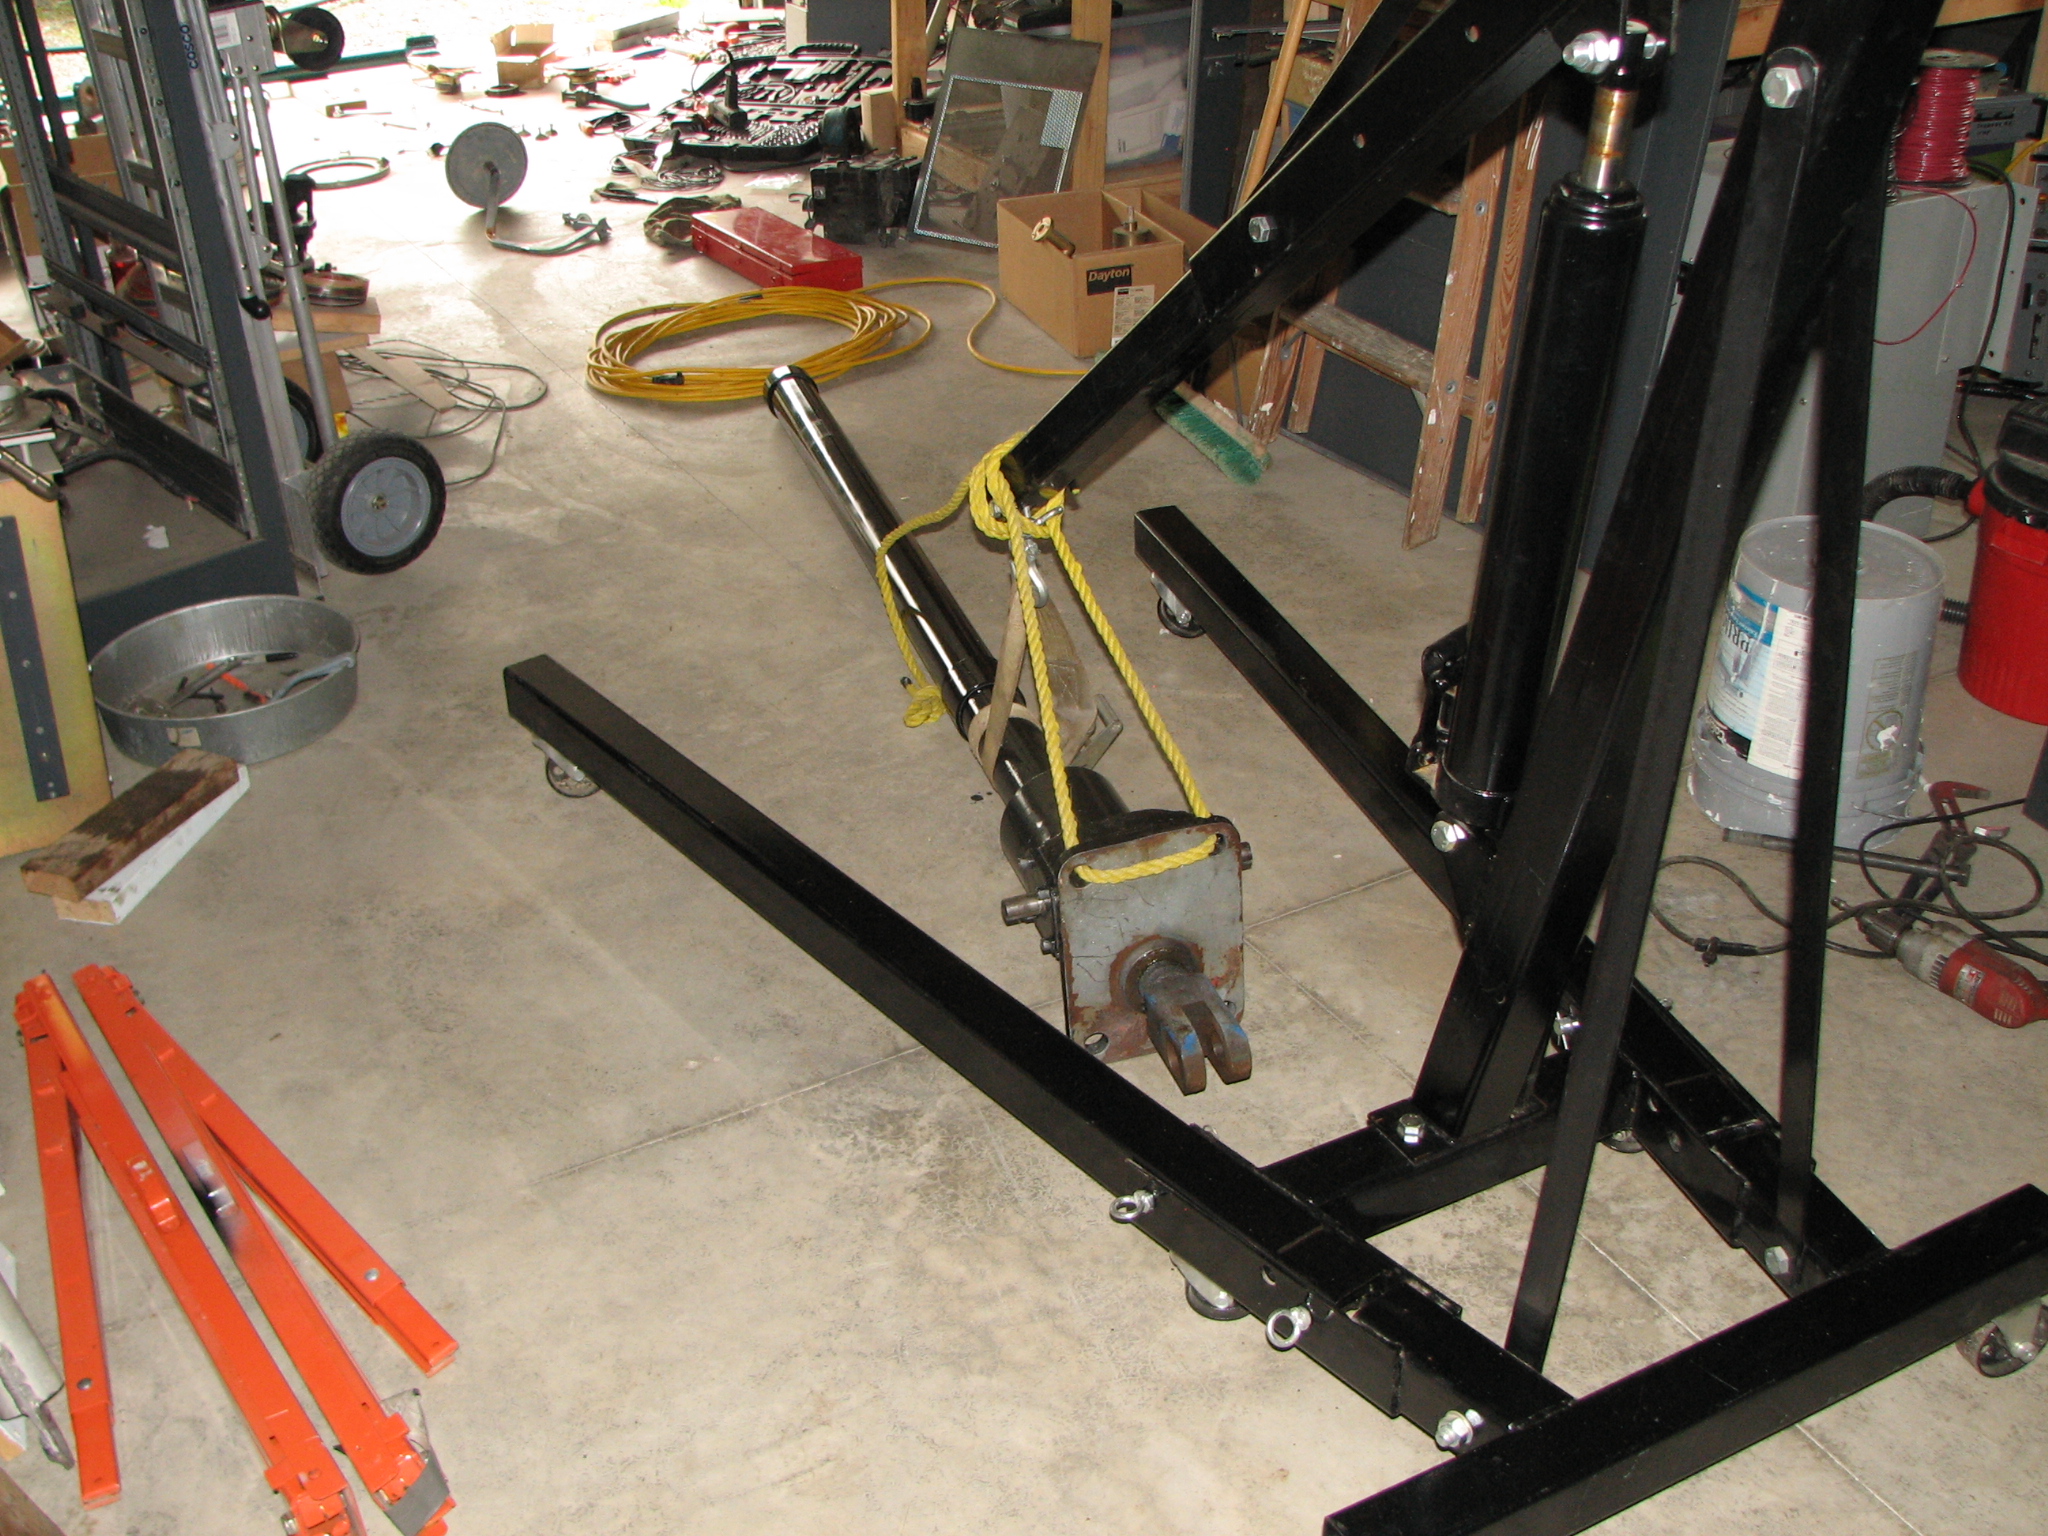
http://kl6m.com/DISH3/IMG_8943.JPG Using engine hoist to handle the 250 pound actuator
http://kl6m.com/DISH3/IMG_8927.JPG Finished rebuilding motor
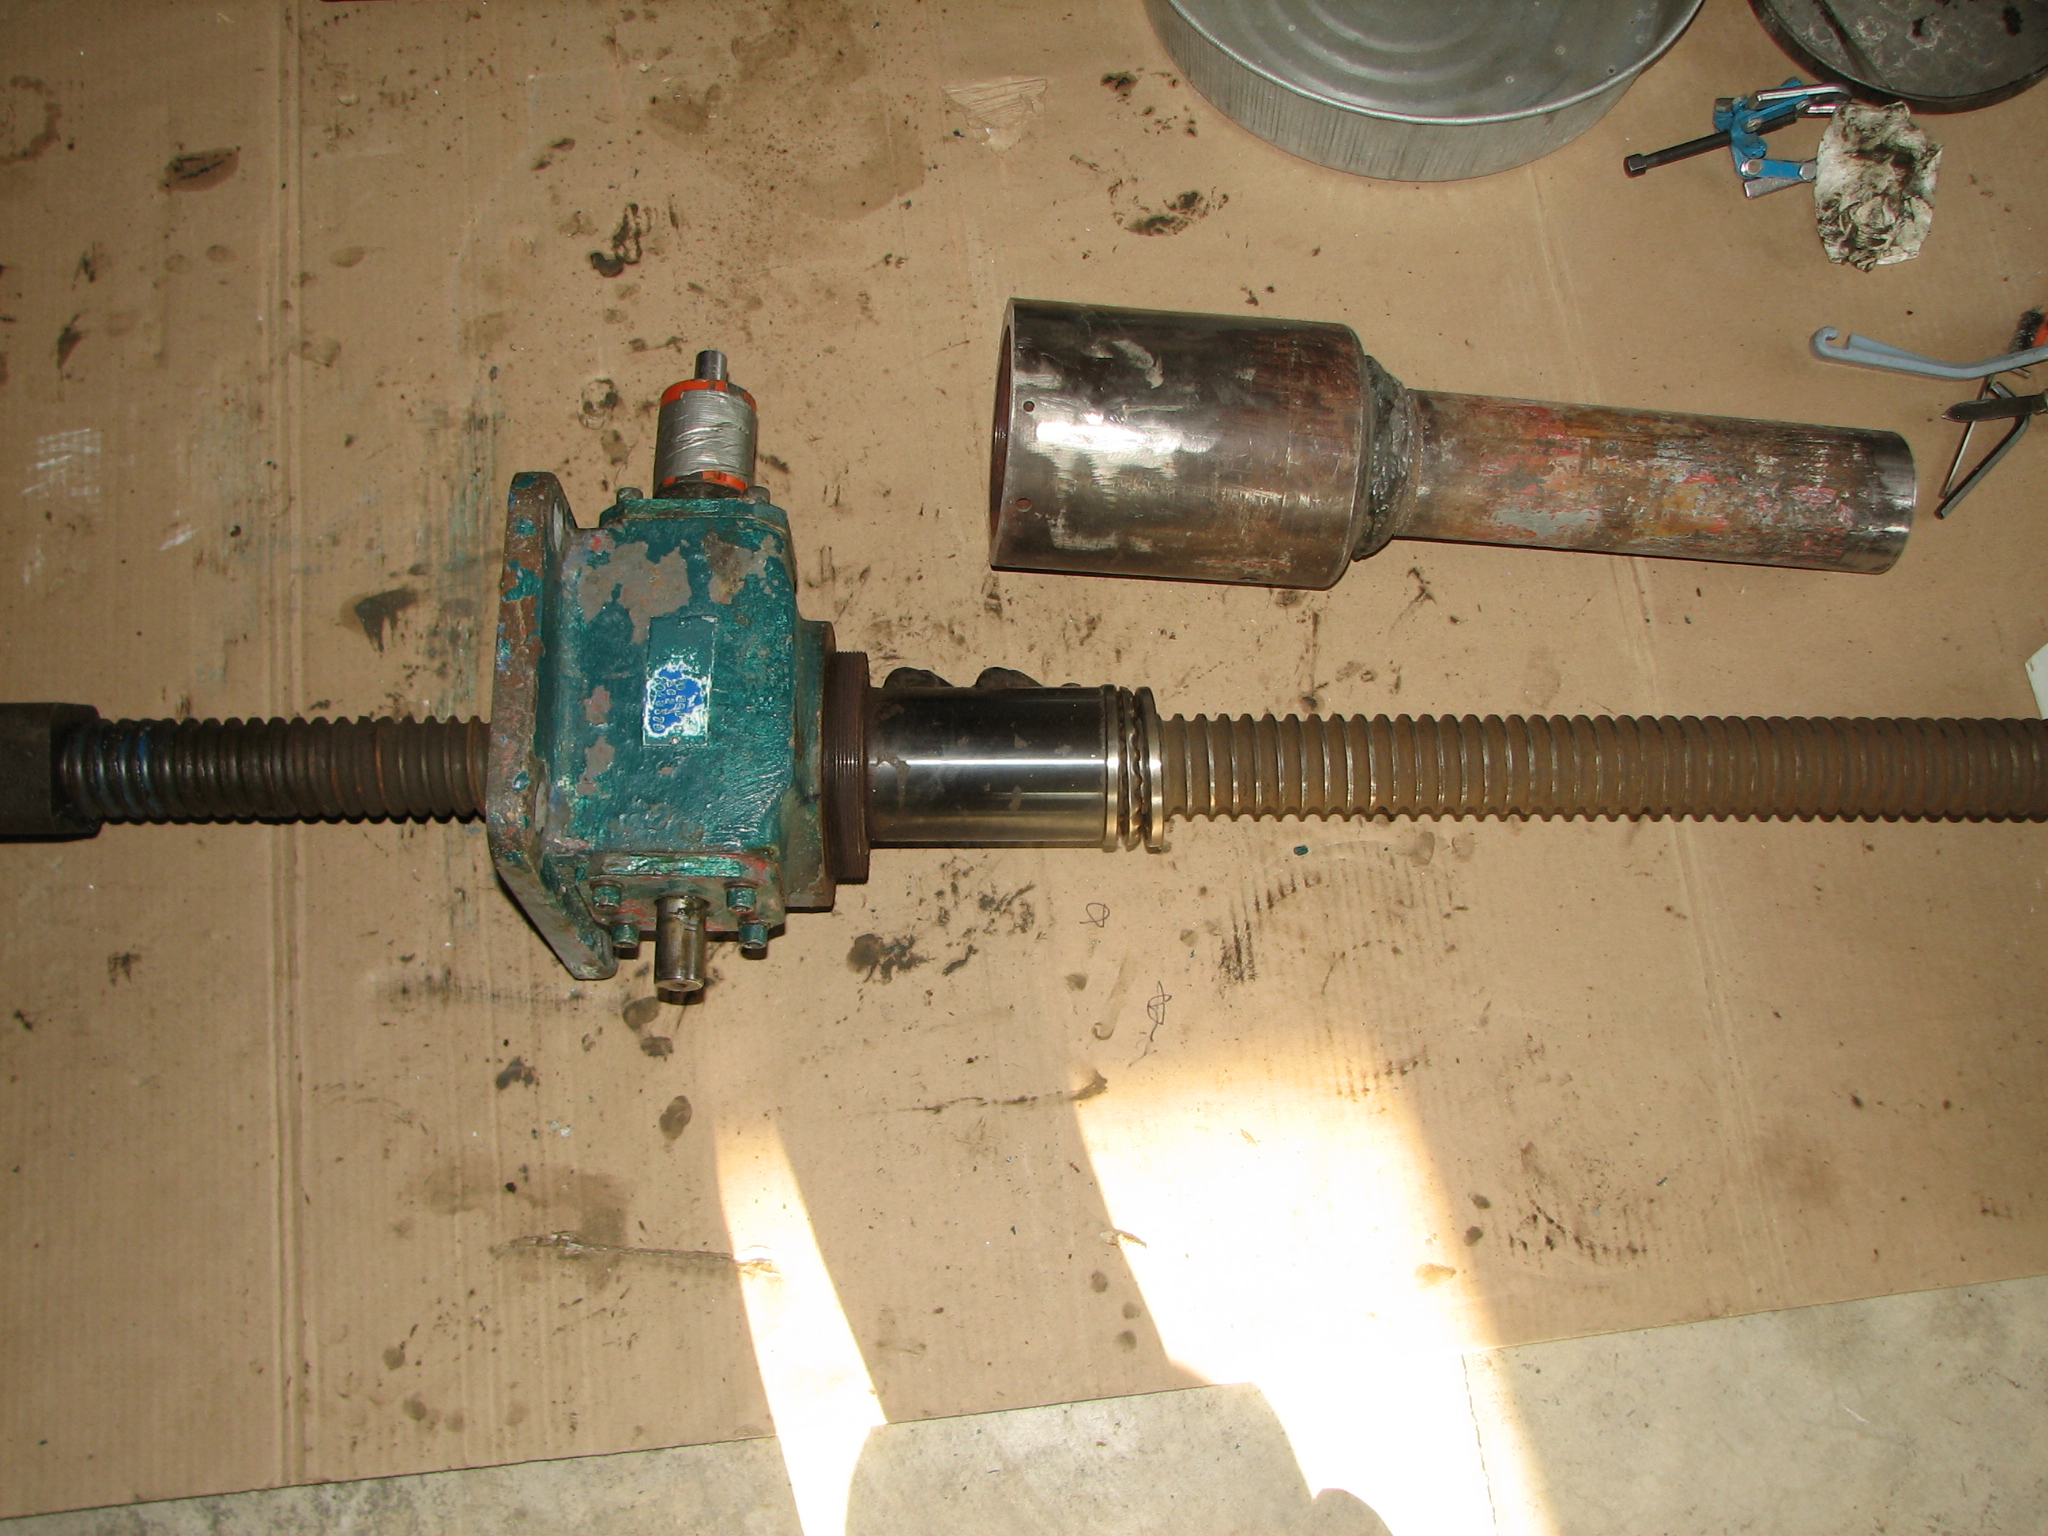
http://kl6m.com/DISH3/IMG_8929.JPG Actuator before reassembly and painting
http://kl6m.com/DISH3/motor.jpg Motor rebuilding
http://kl6m.com/DISH3/IMG_8941.JPG New pillow block ready for installation
http://kl6m.com/DISH3/IMG_8942.JPG Actuator
http://kl6m.com/DISH4/IMGp3779.jpg Lifting the steel support structure into place
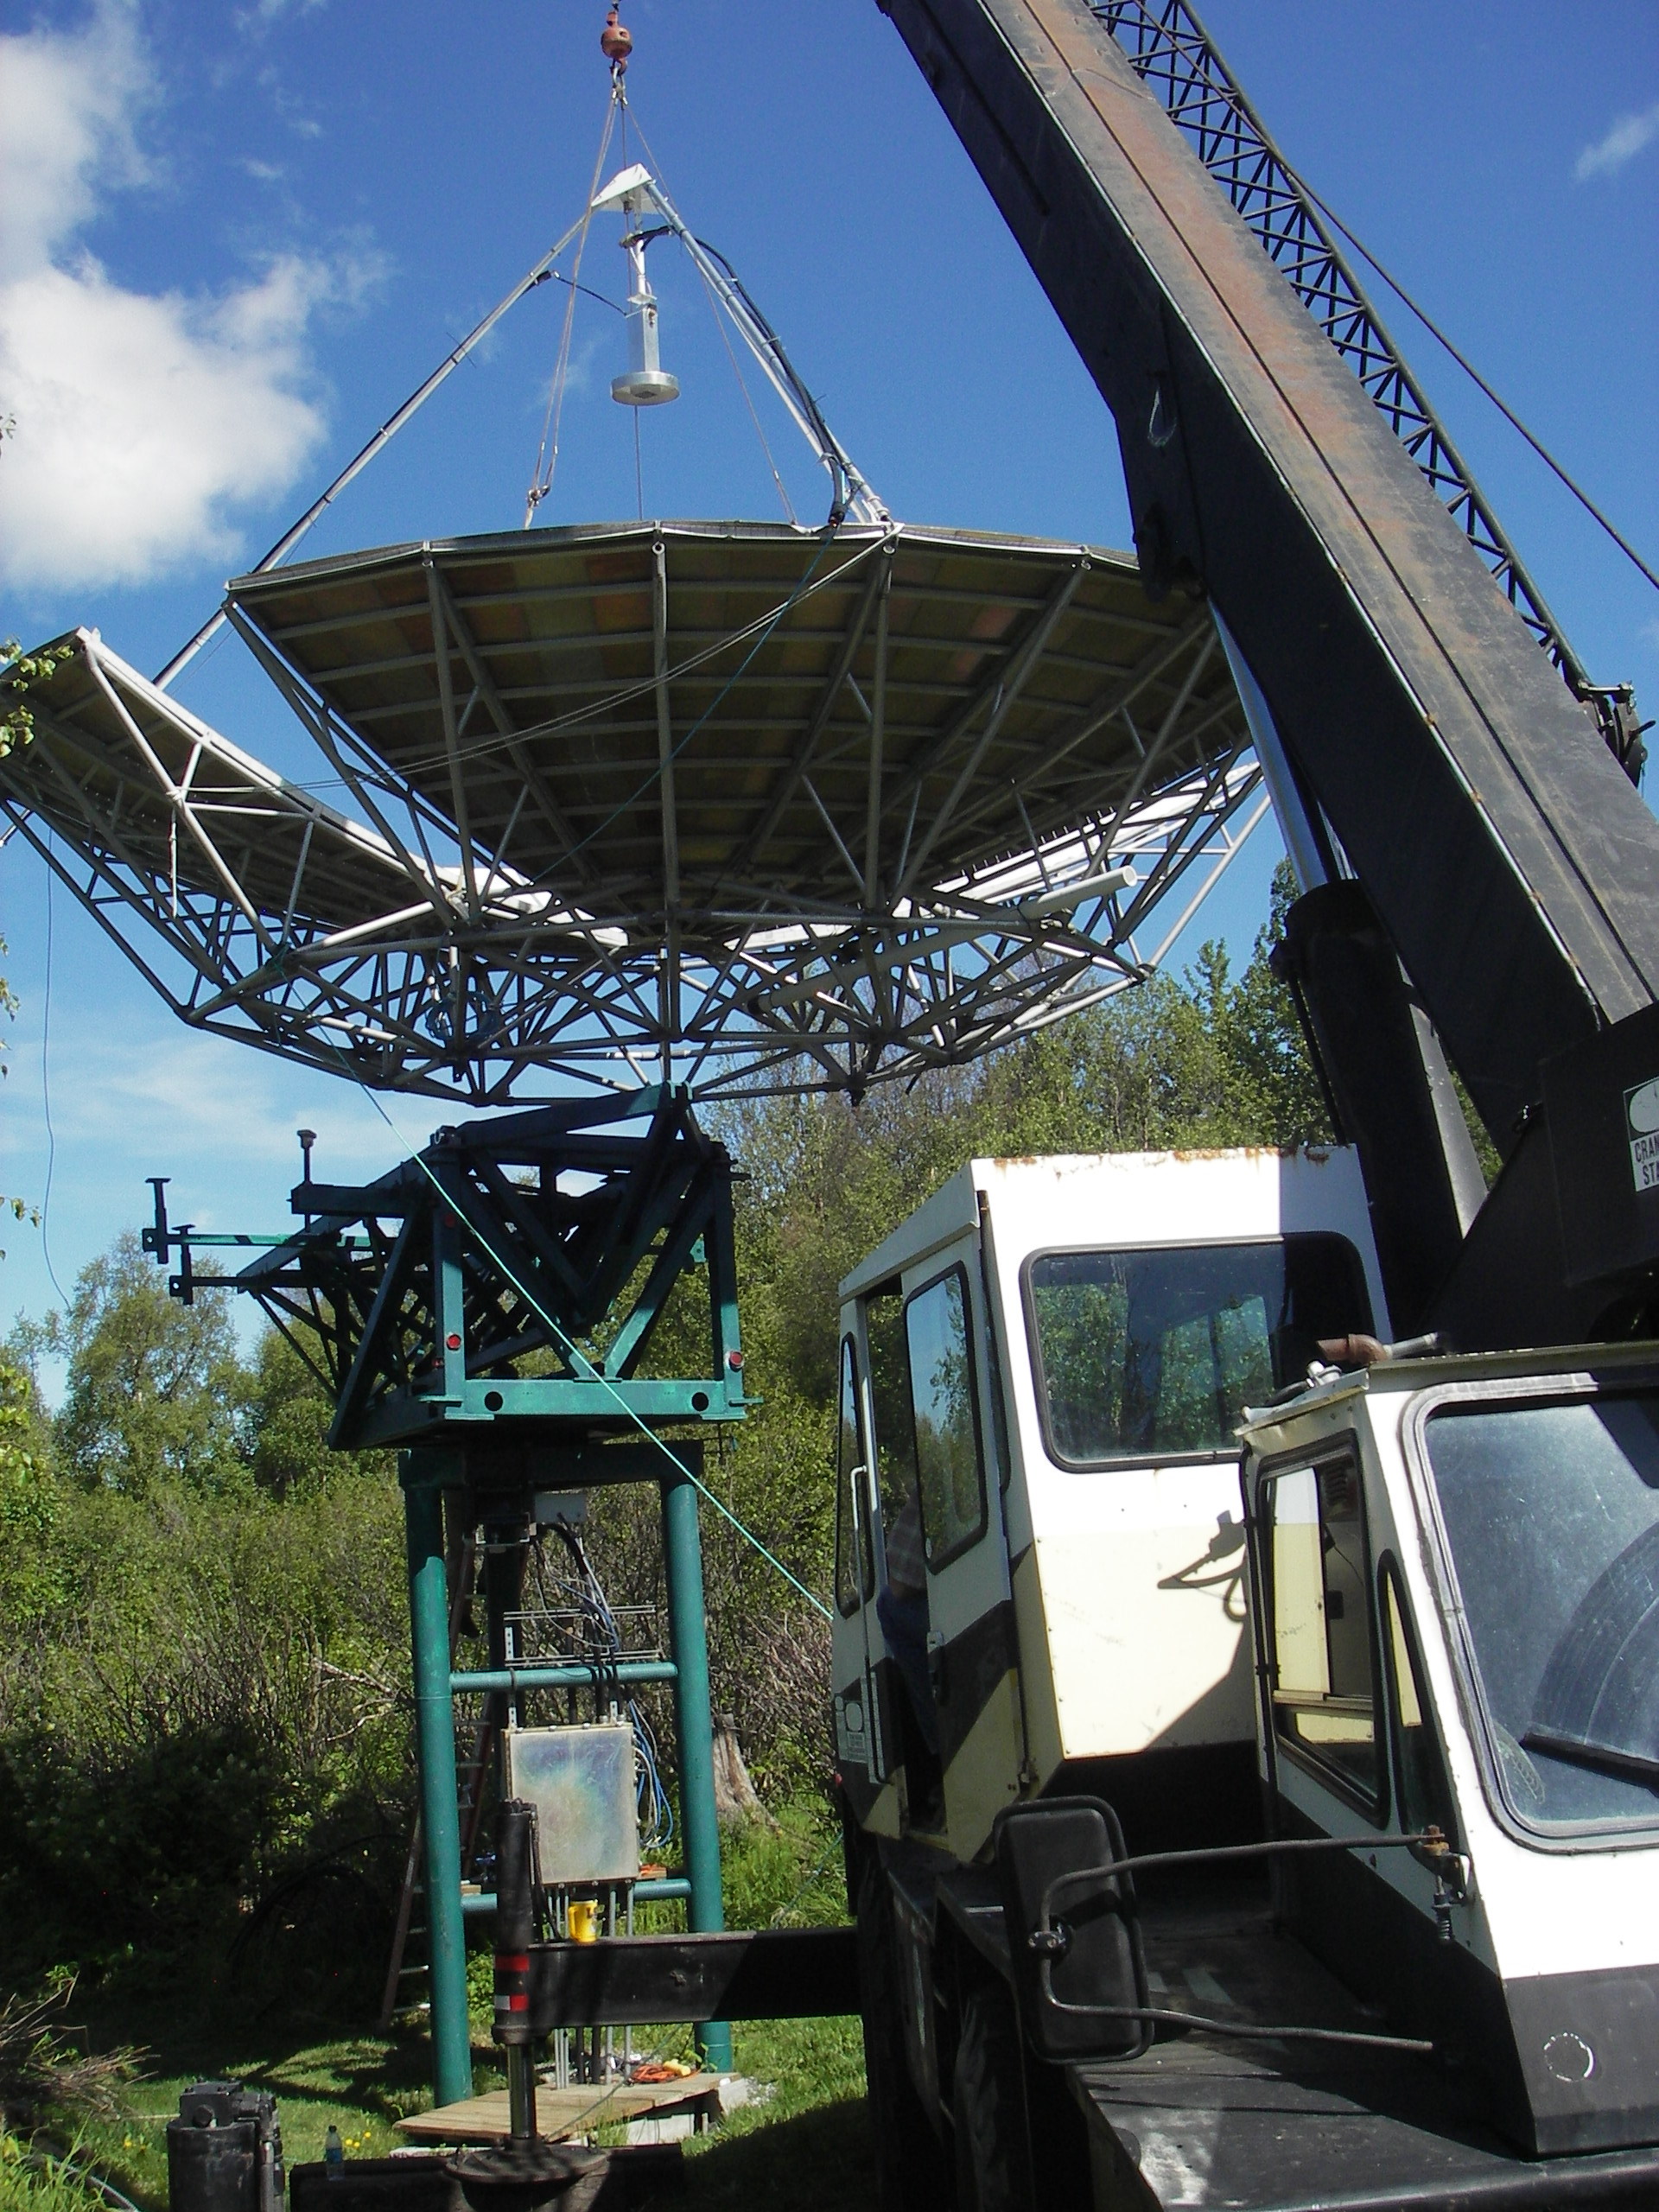
http://kl6m.com/DISH4/IMGp3805.jpg Lifting the dish into place
http://kl6m.com/DISH4/IMGp3813.jpg Attaching dish to steel frame
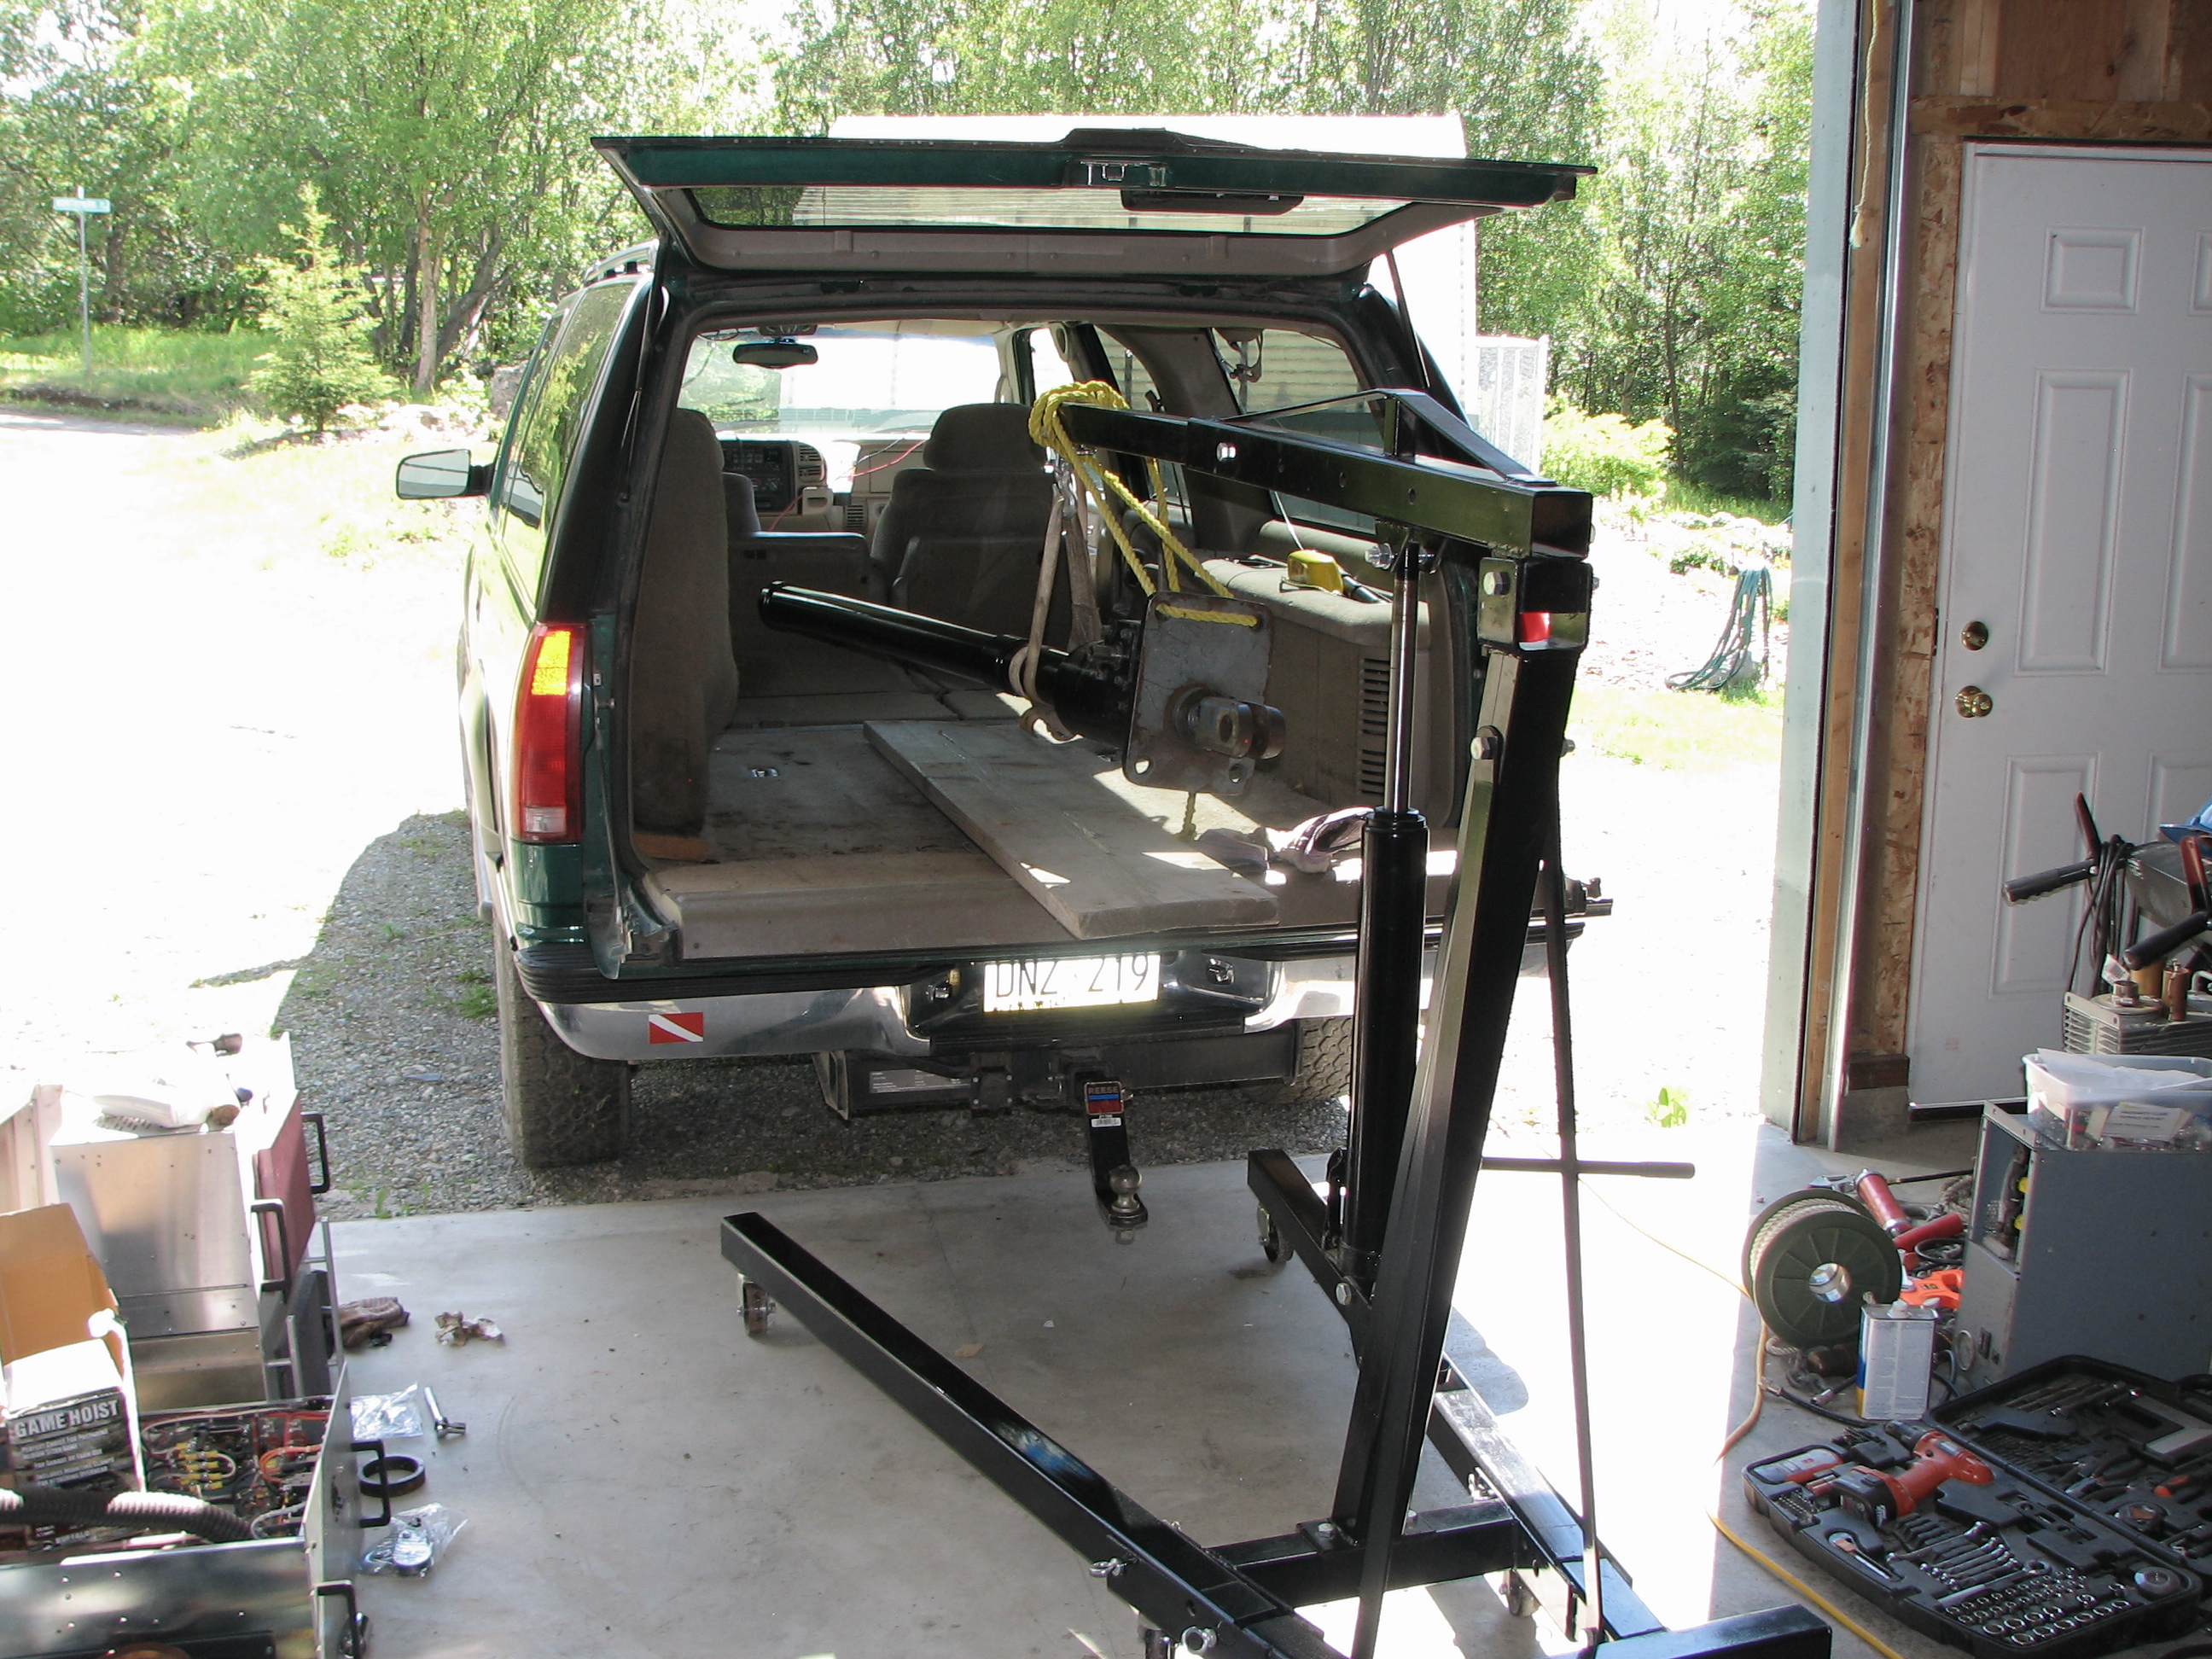
The next day I hoisted the actuator into place with an electric winch. When I wound the actuator screw out it was too short to get my linkage connected. Seems when I cut the bent part off, I forgot that when the dish blew down, it had been cranked up slightly.
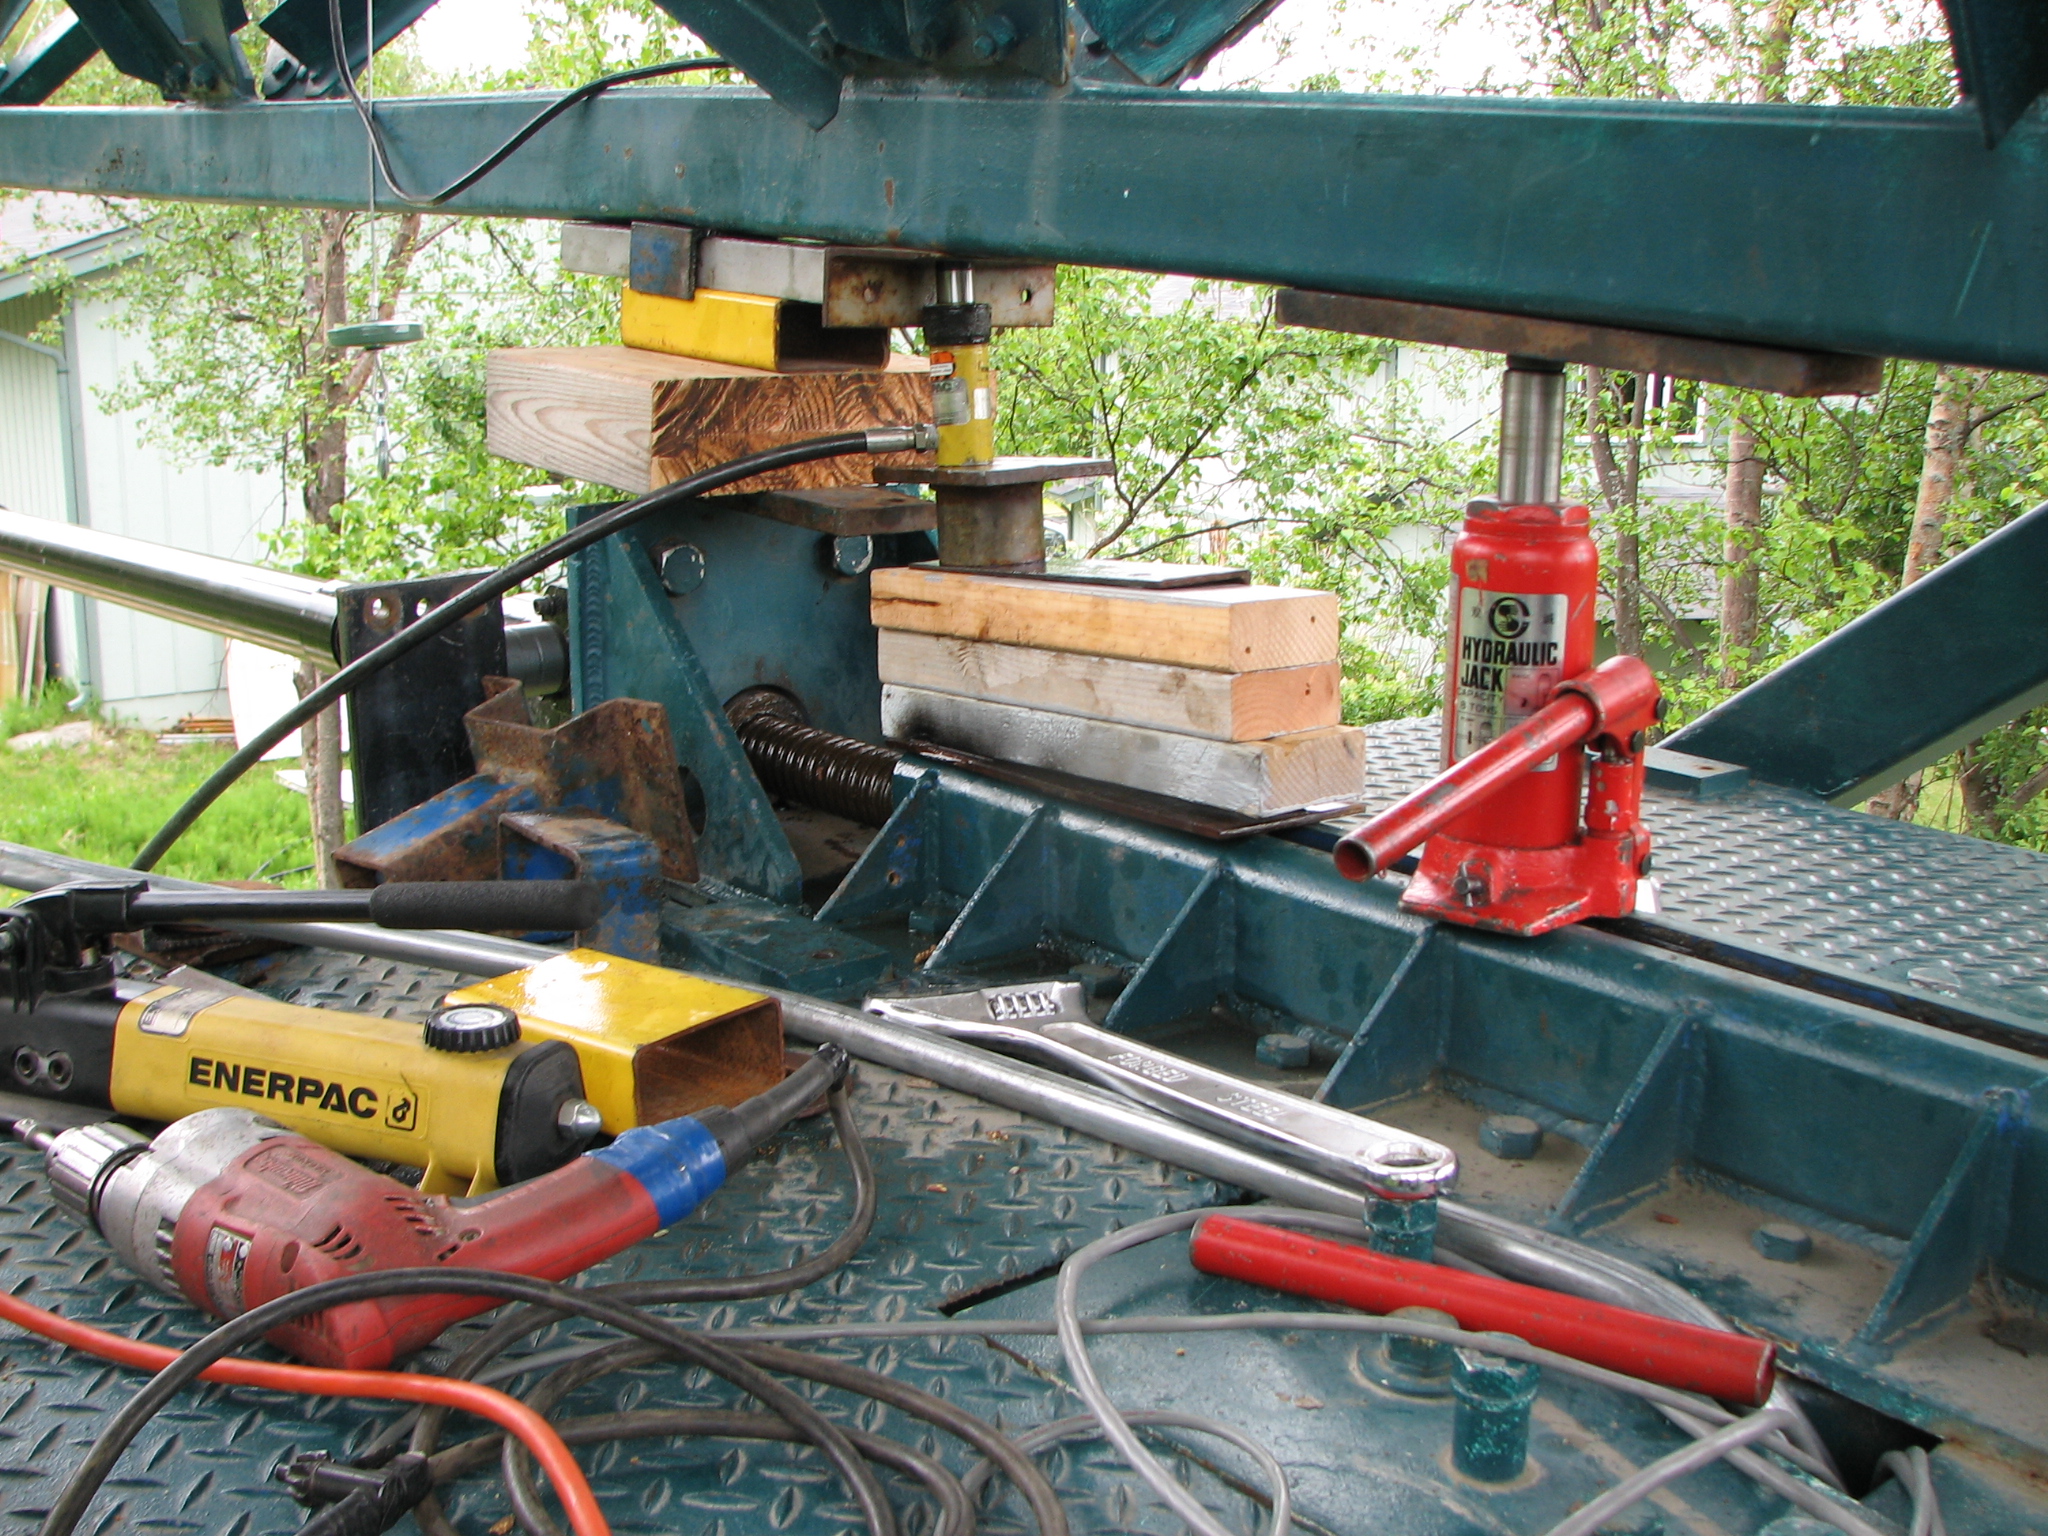
So I spent two days trying to figure out how to lift it up so I could connect the linkage. There are only two lift points, one clear out at the end, 14 feet above the ground. I figured I would have to get a big fork lift. I was not bringing the crane back, minimum $500. Or the second place is 2 feet from the center of gravity where I would need about 8000 pounds of force.
I went to all the rental places trying to find a jack rated at 8000 pounds that would fit in a 6" space. I finally found one with my pals over at the airport. The linkage is now connected.
http://kl6m.com/DISH4/IMG_8950.JPG Six inch space here for 4+ ton jack.
http://kl6m.com/DISH4/IMG_8961.JPG The little yellow one did the heavy lifting. The red one went in later as backup once I got enough room for it. The little yellow thing is rated at 10,000 pounds but only a 1" stroke. Took quite a few iterations. Now my max elevation is reduced from 90 to 87 degrees. Not a big deal here in Alaska.
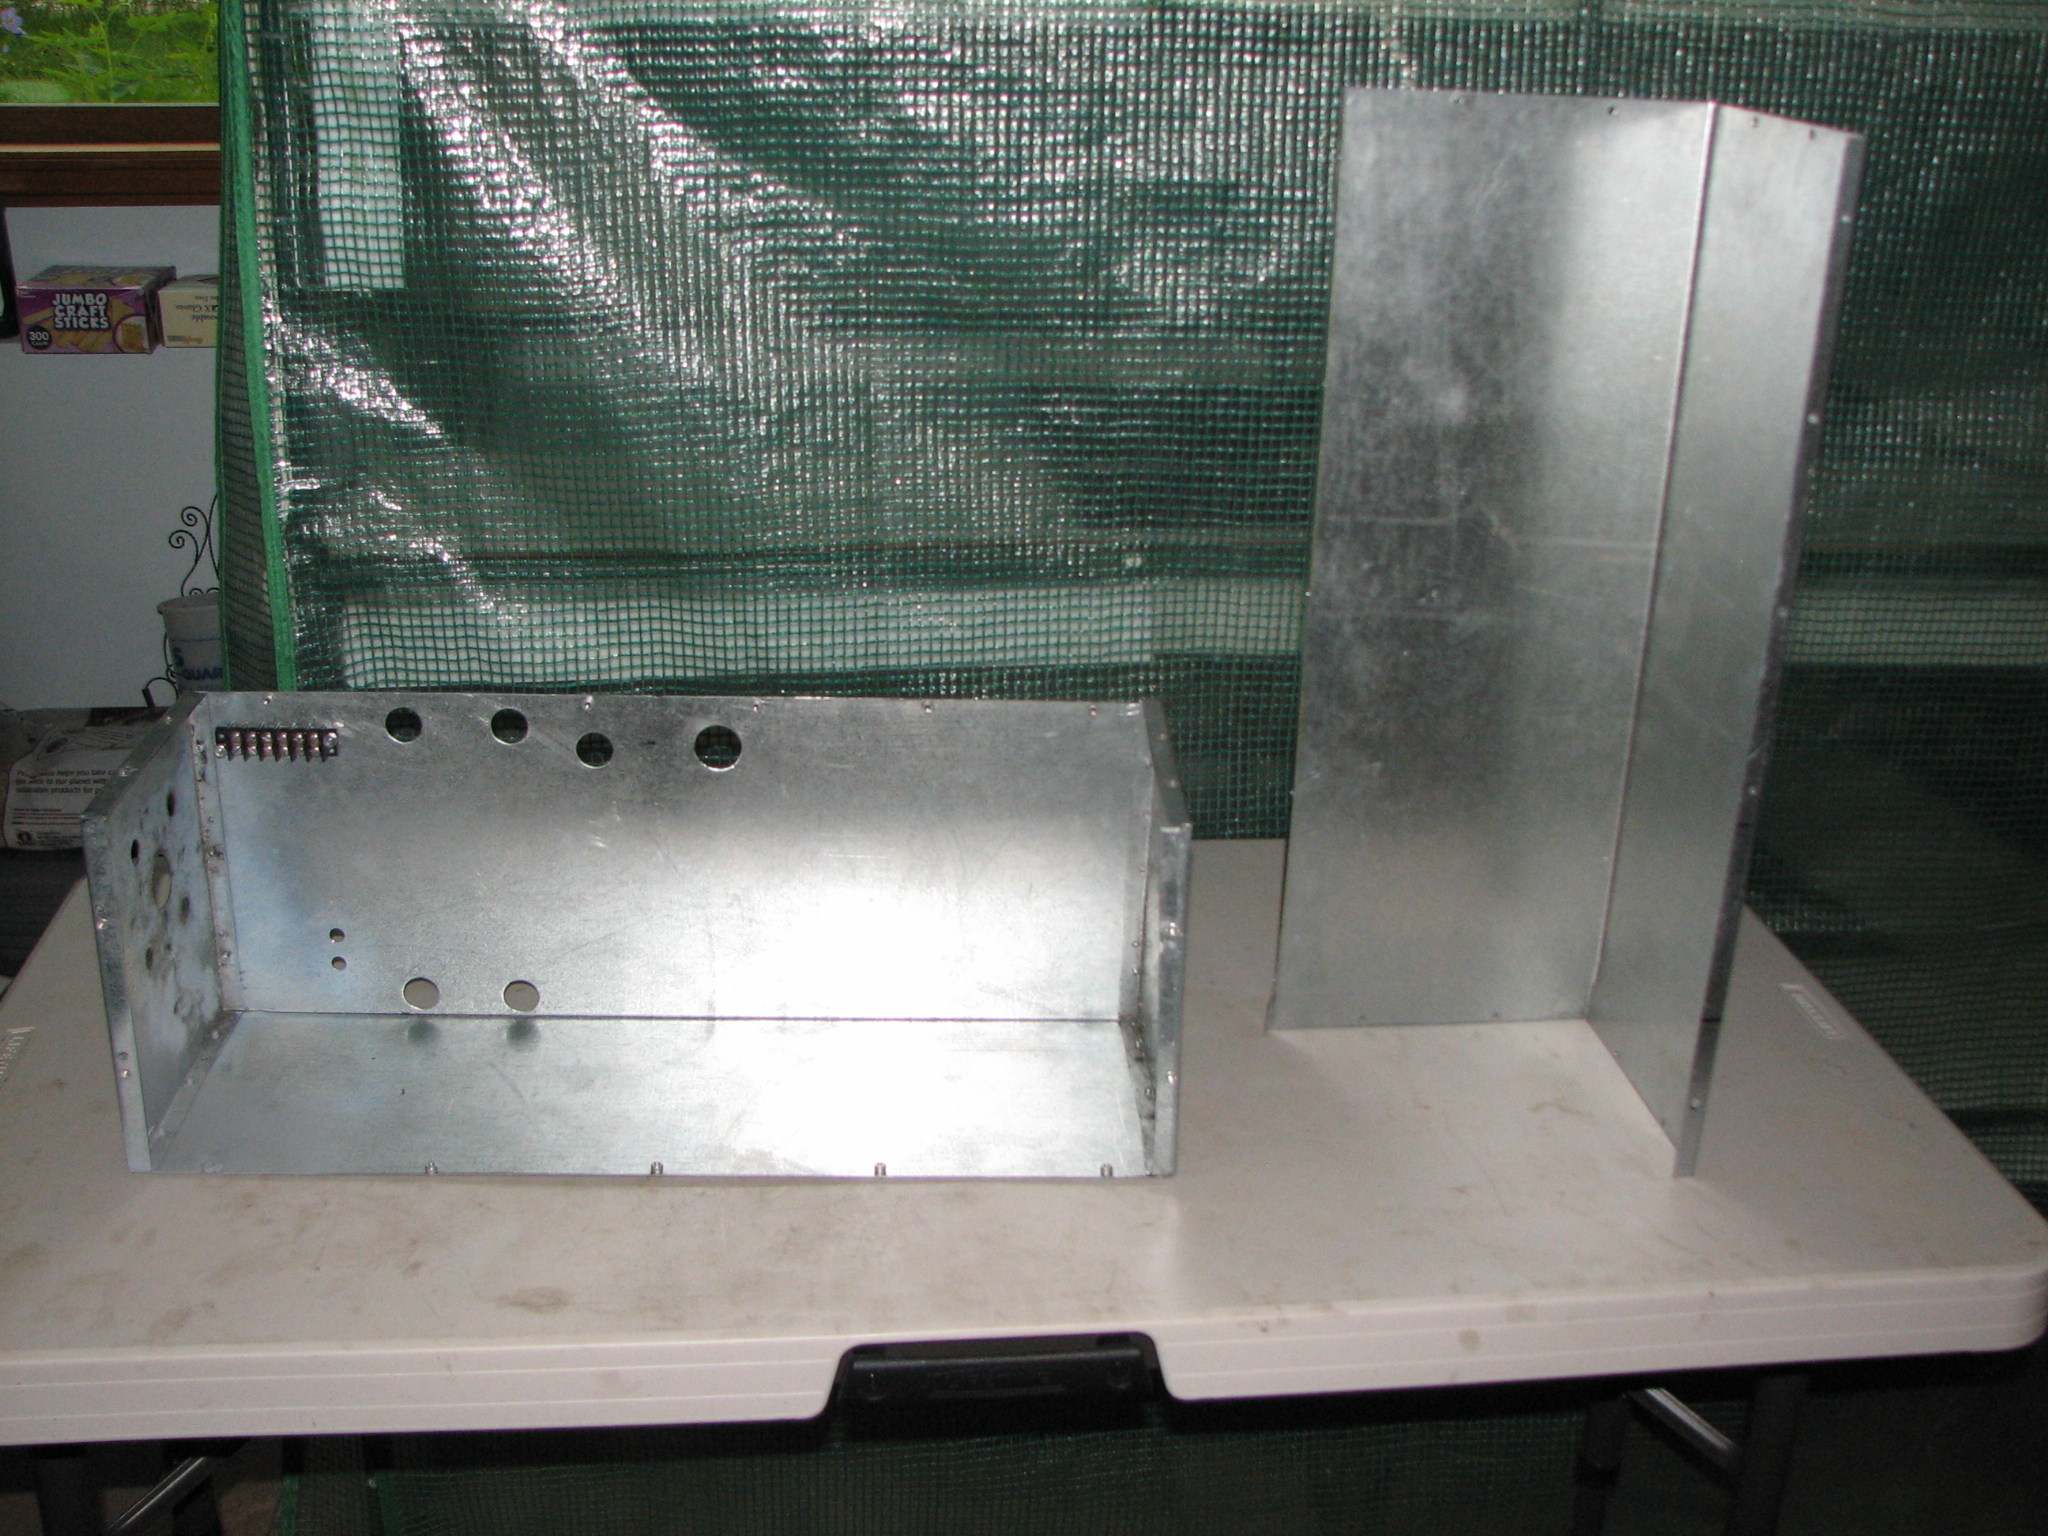
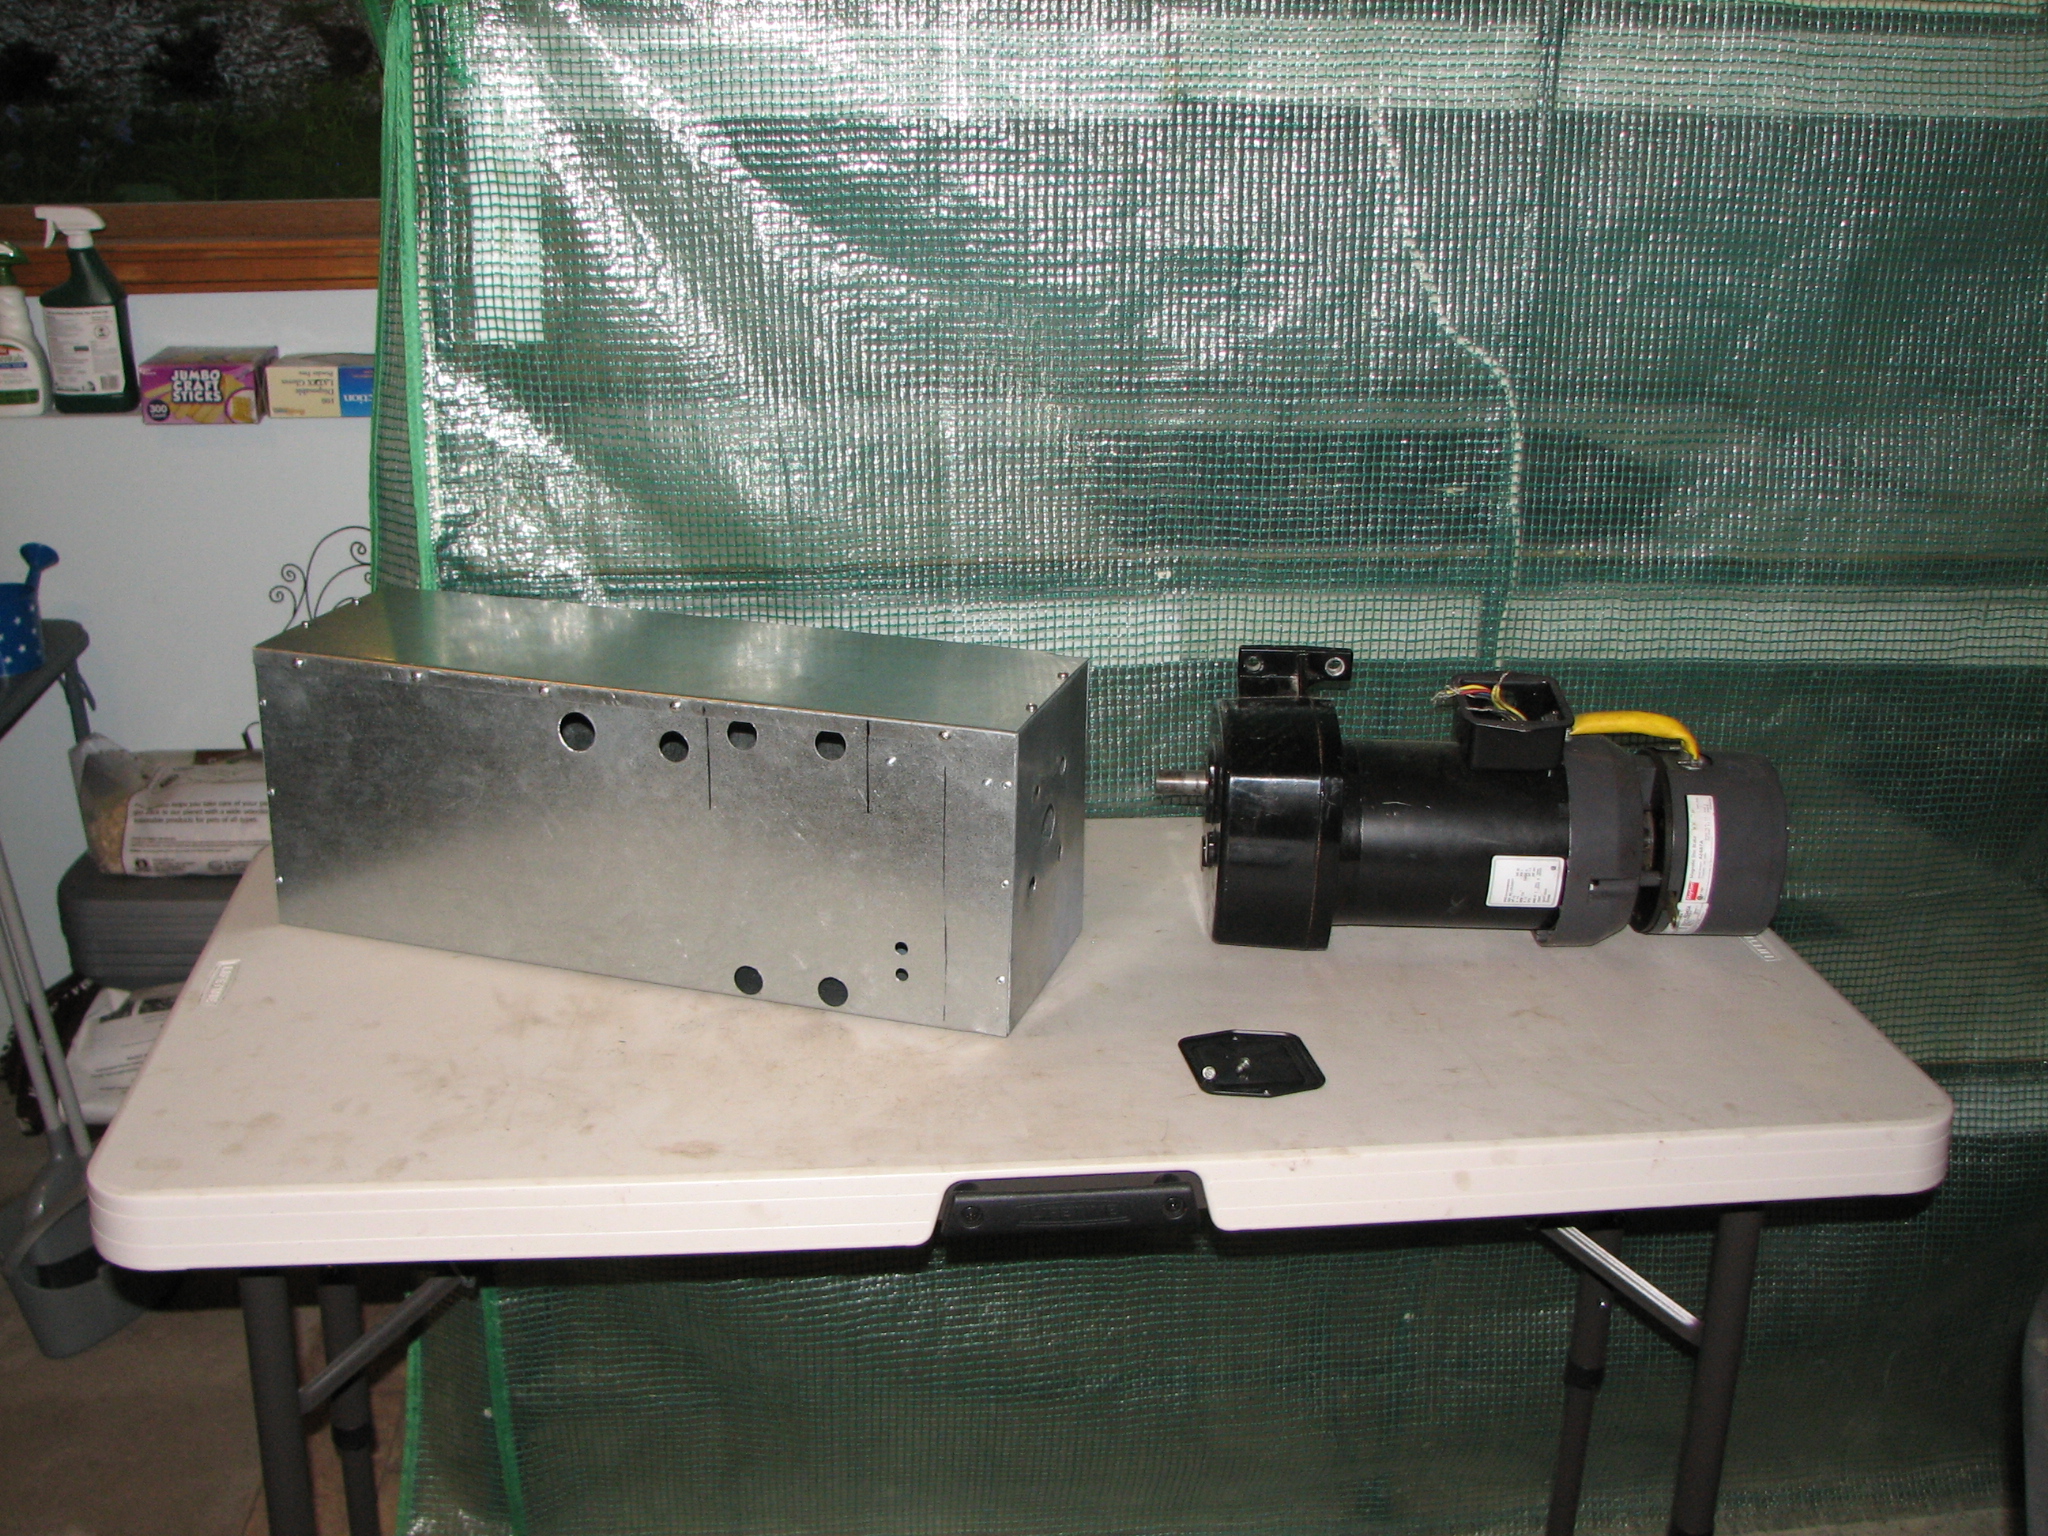
Just finished the Elevation motor shroud 6/14, hoping to get it installed today (6/15).
http://kl6m.com/DISH4/IMG_8962.JPG
http://kl6m.com/DISH4/IMG_8963.JPG
http://kl6m.com/DISH4/IMG_8964.JPG
The hard part is done. Tons of things to do before I am QRV again.
http://kl6m.com/DISH4/IMGp3819.JPG
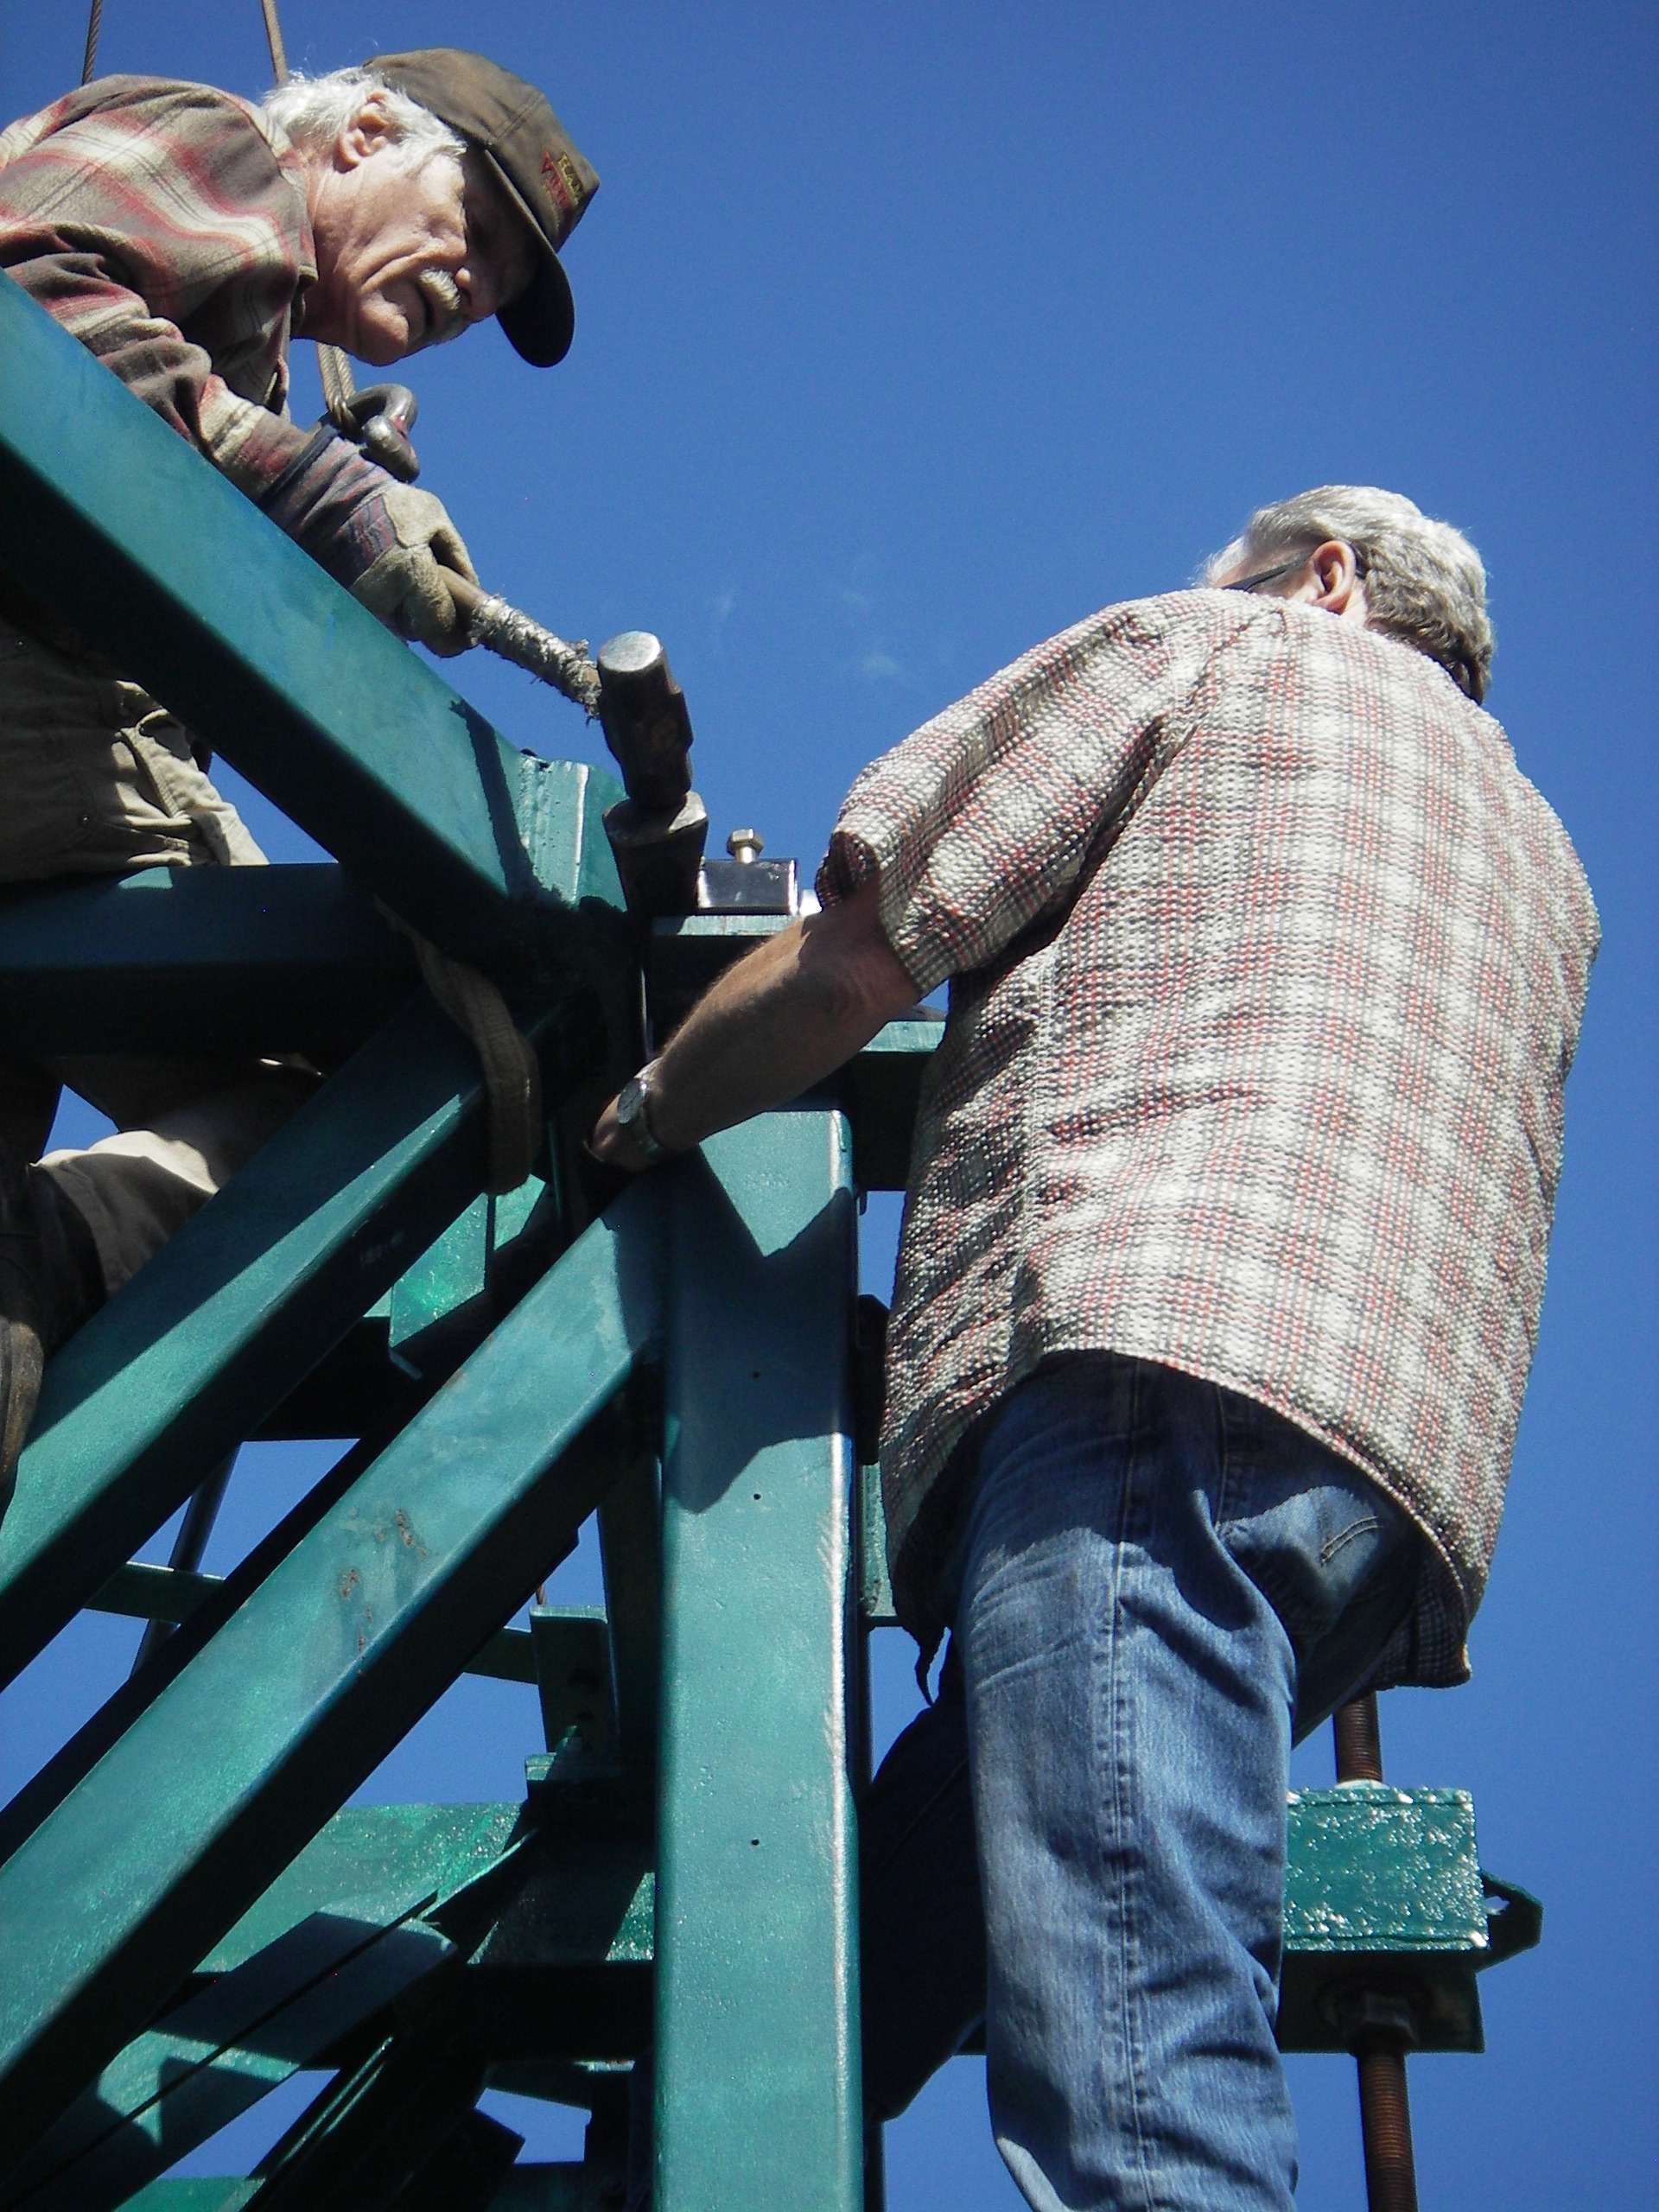
http://kl6m.com/DISH4/onlookers.JPG
Previous Status (18-Apr-2014):
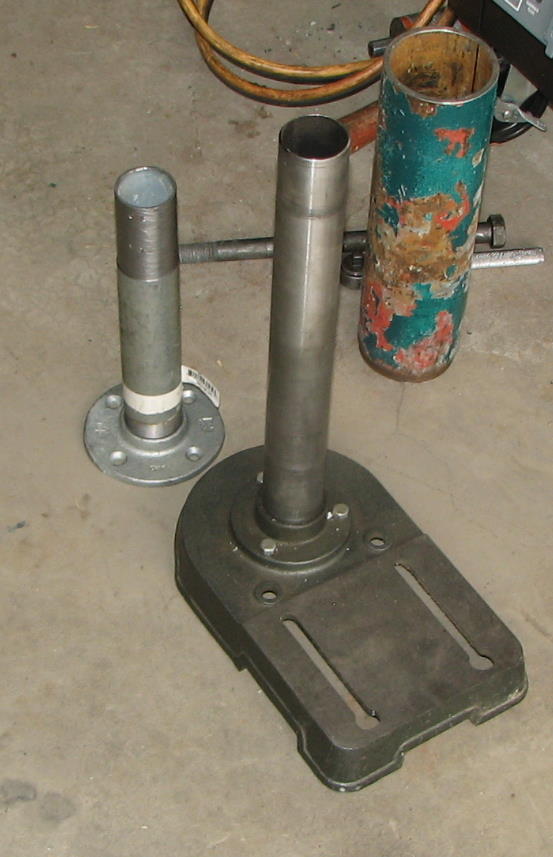
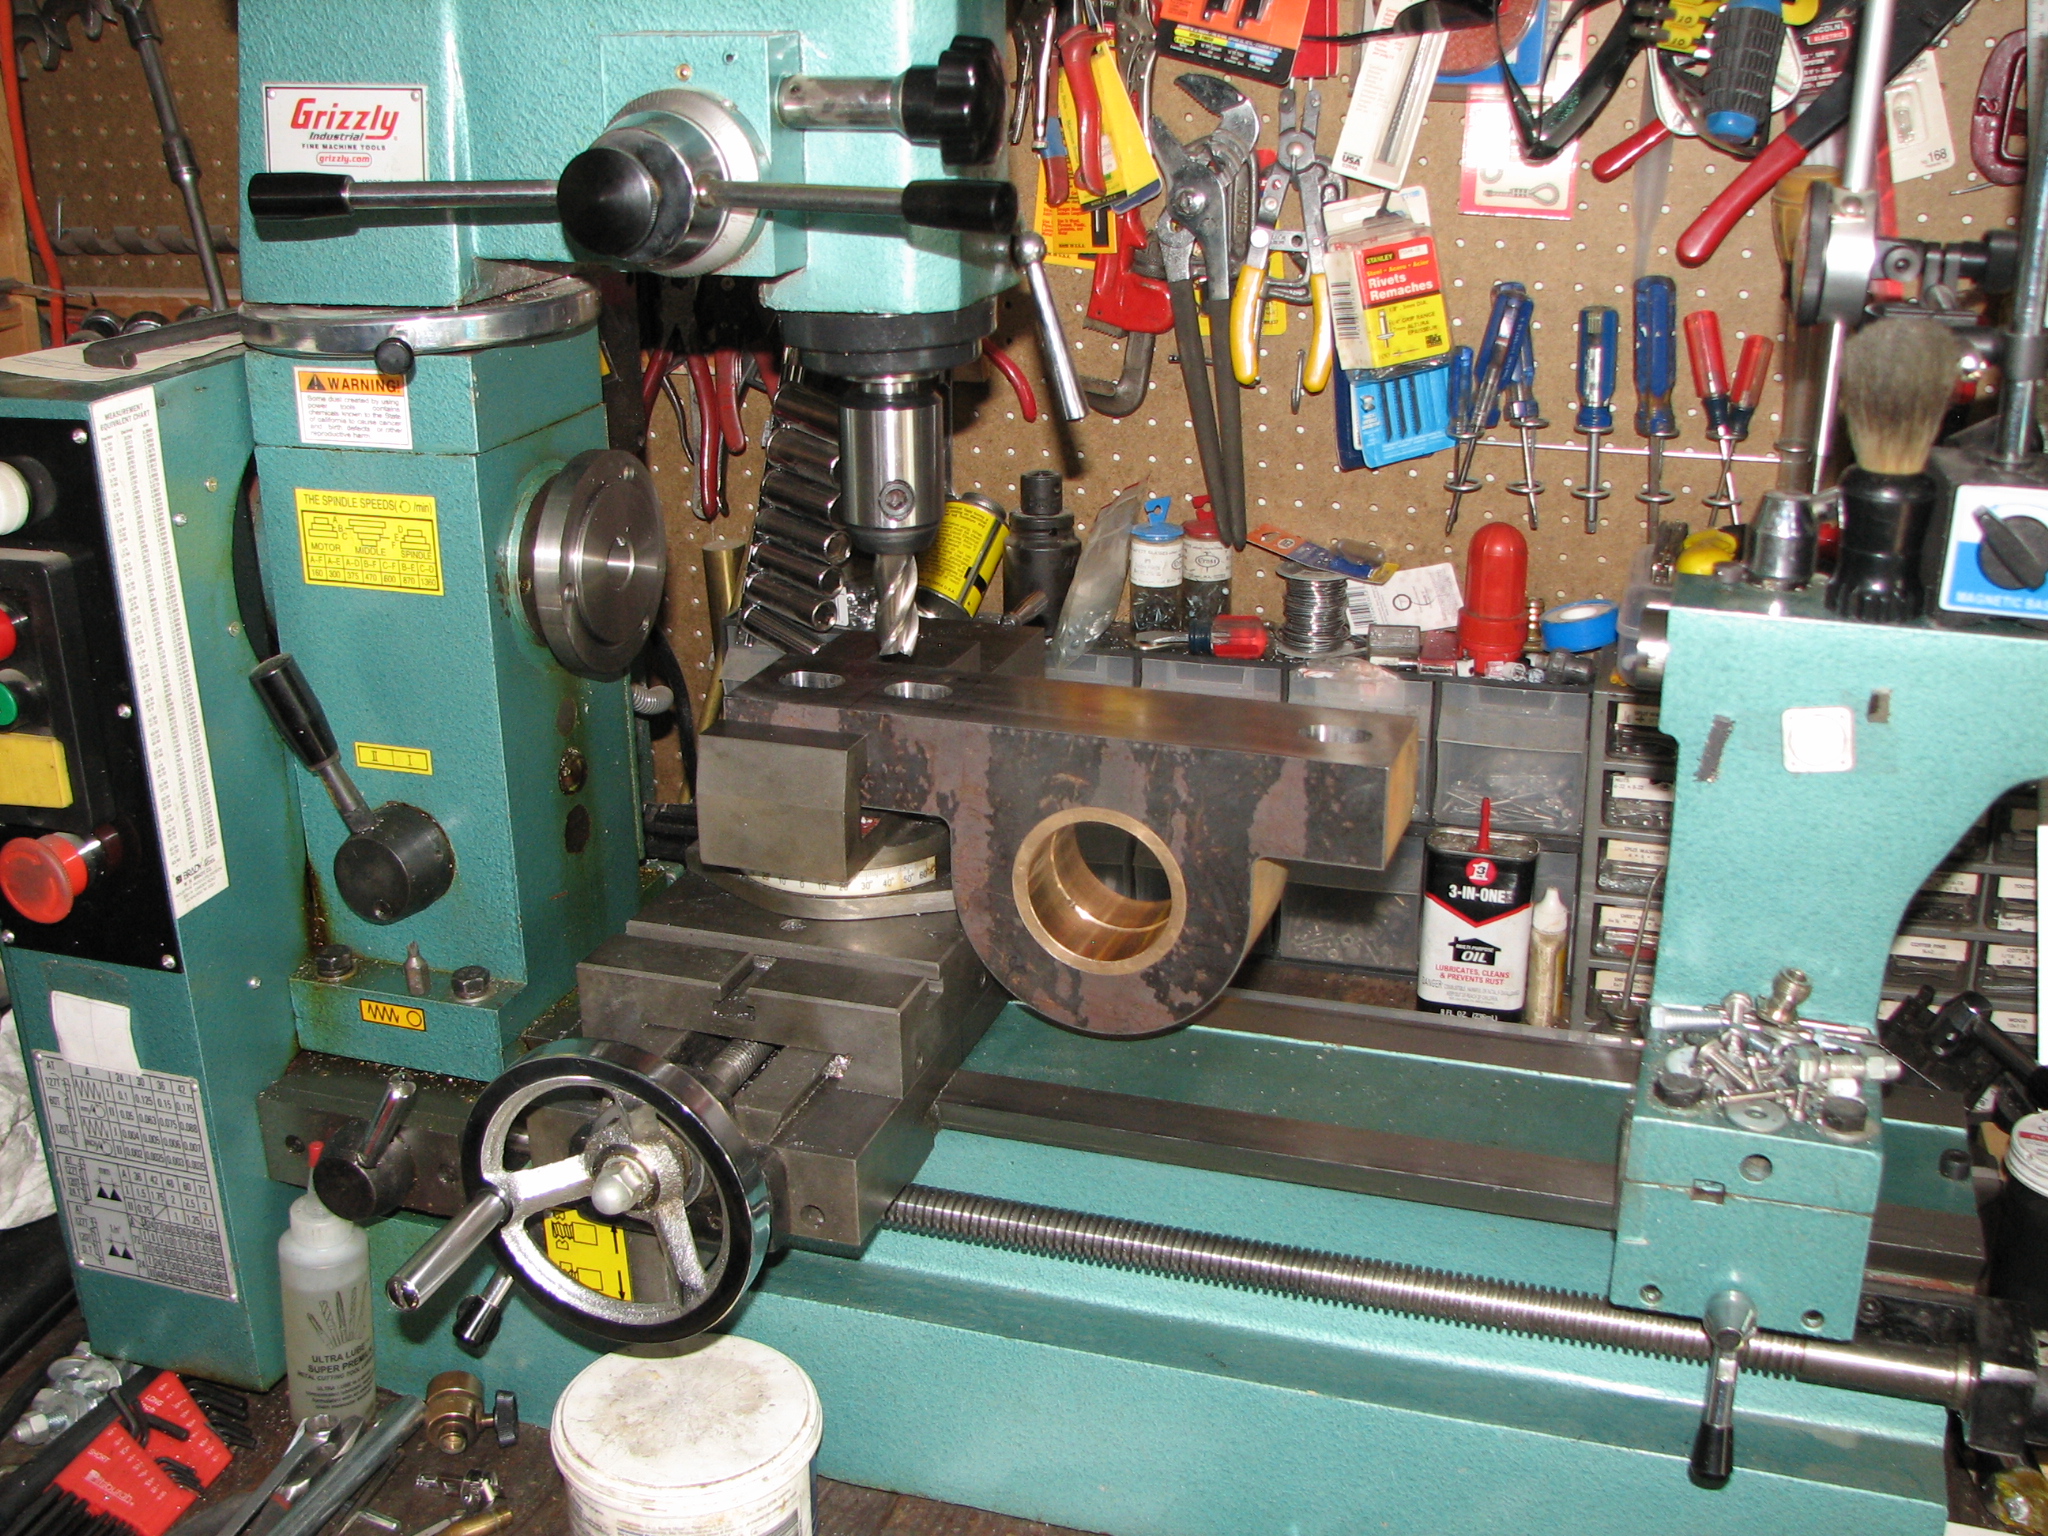
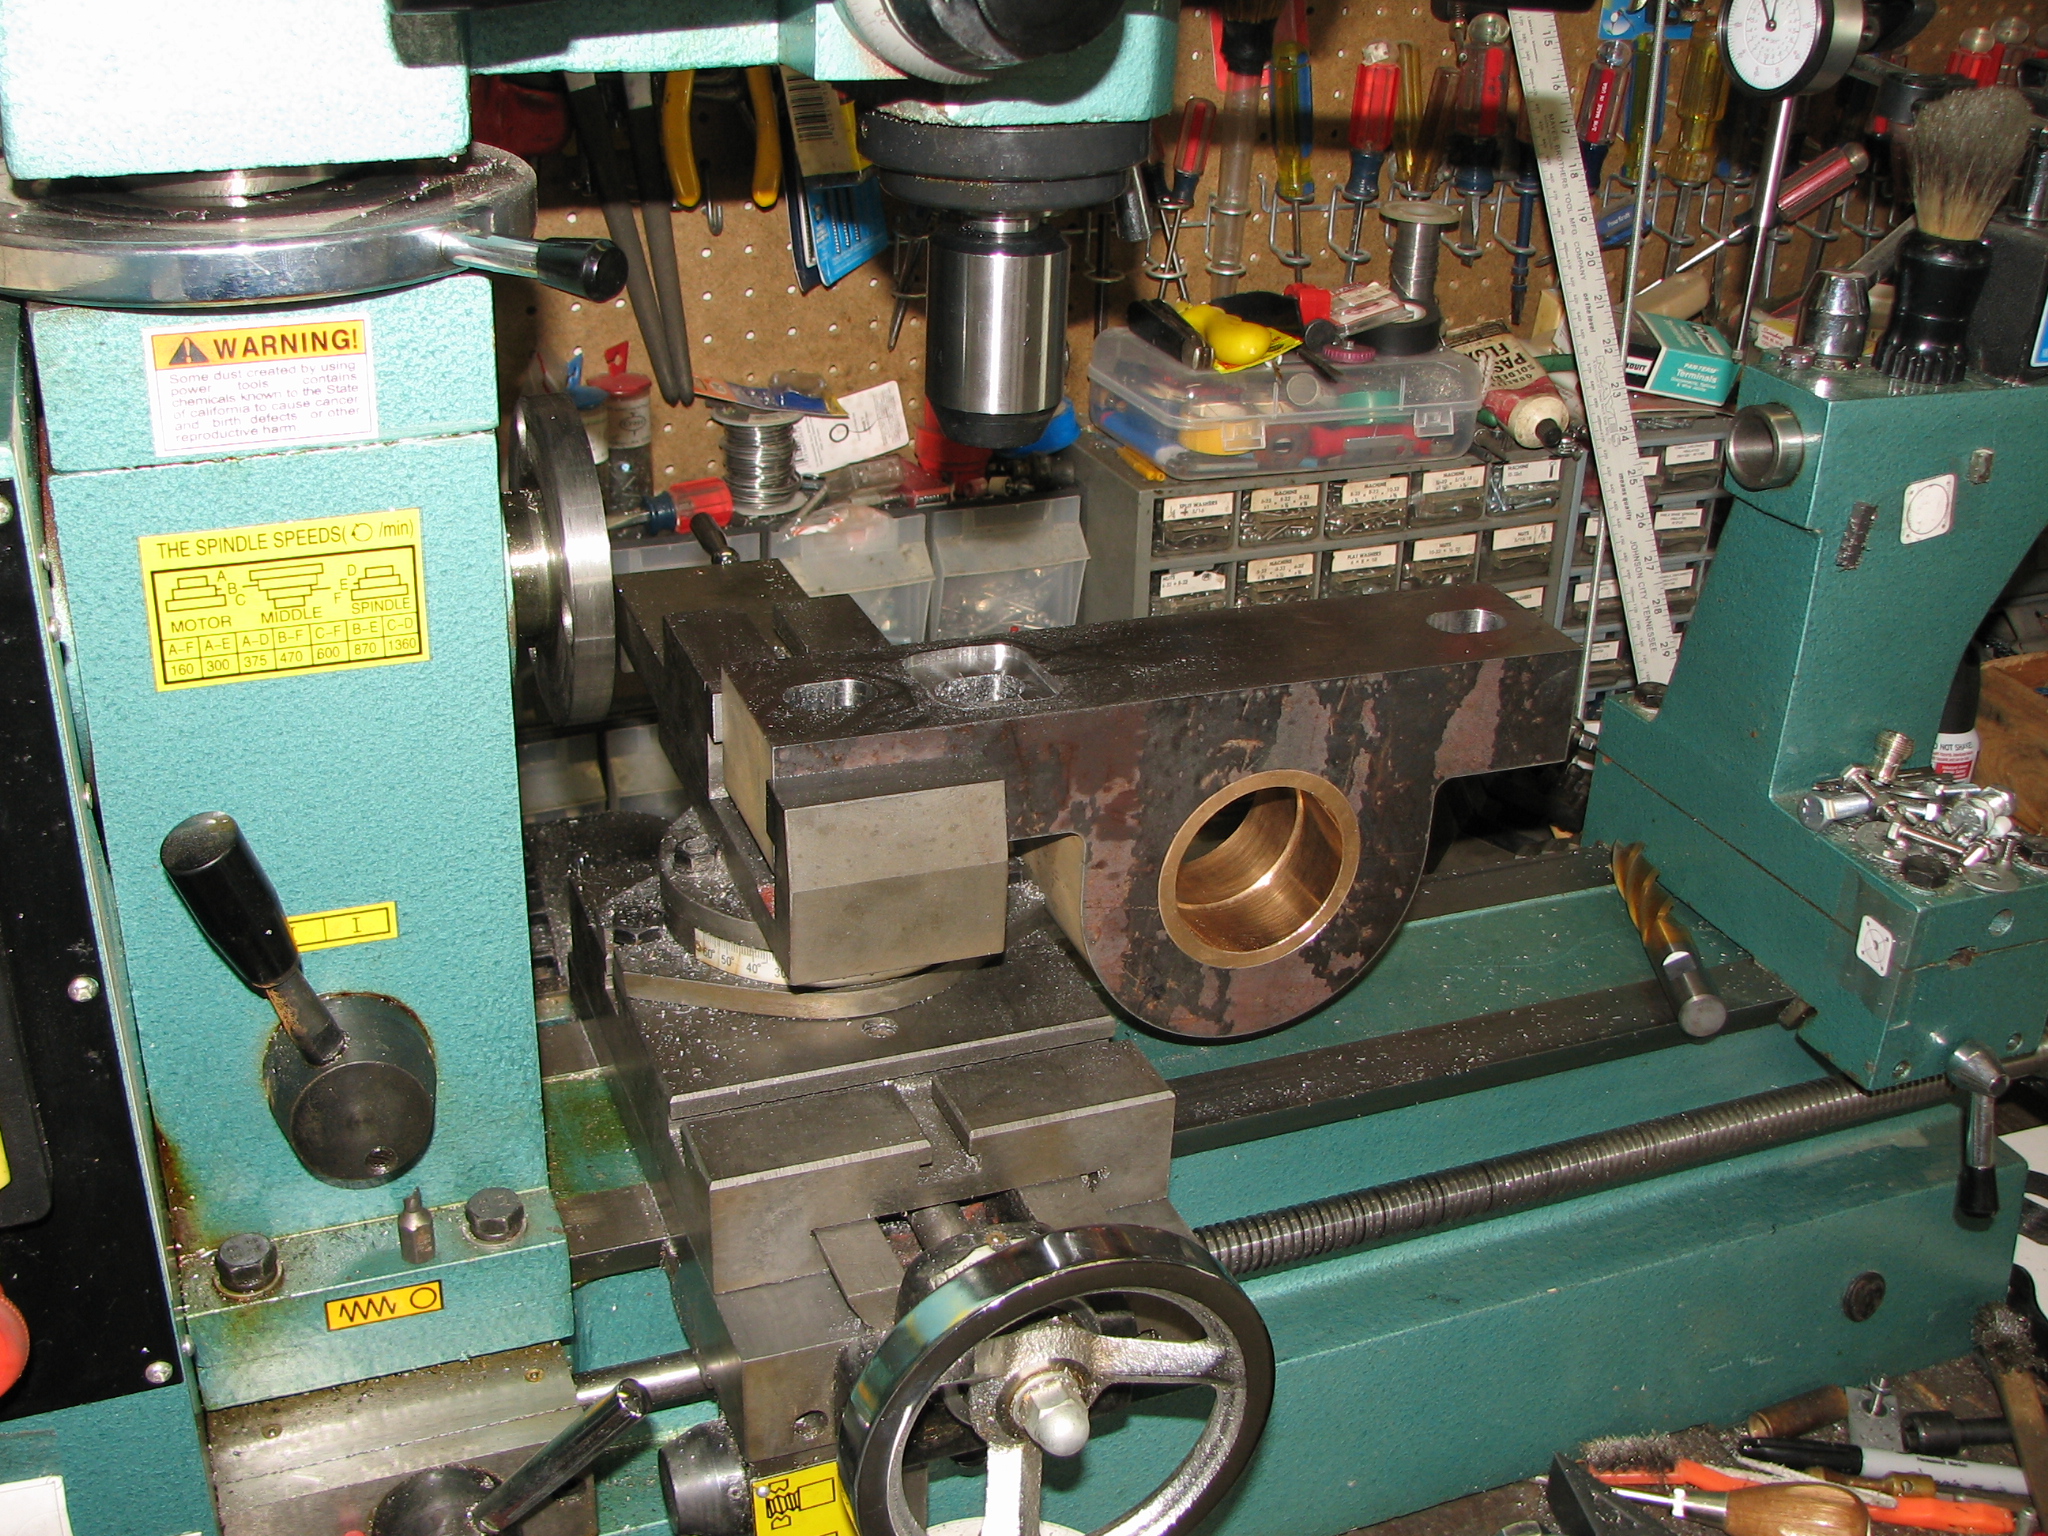
1. The mag-drill never showed up. To avoid further delay, I came up with a new approach, using my old bench drill press, modified.
a. I removed the stand and built a new one that could be clamped to the steel plate where the new pillow block will reside. http://kl6m.com/DISH3/drill2.jpg
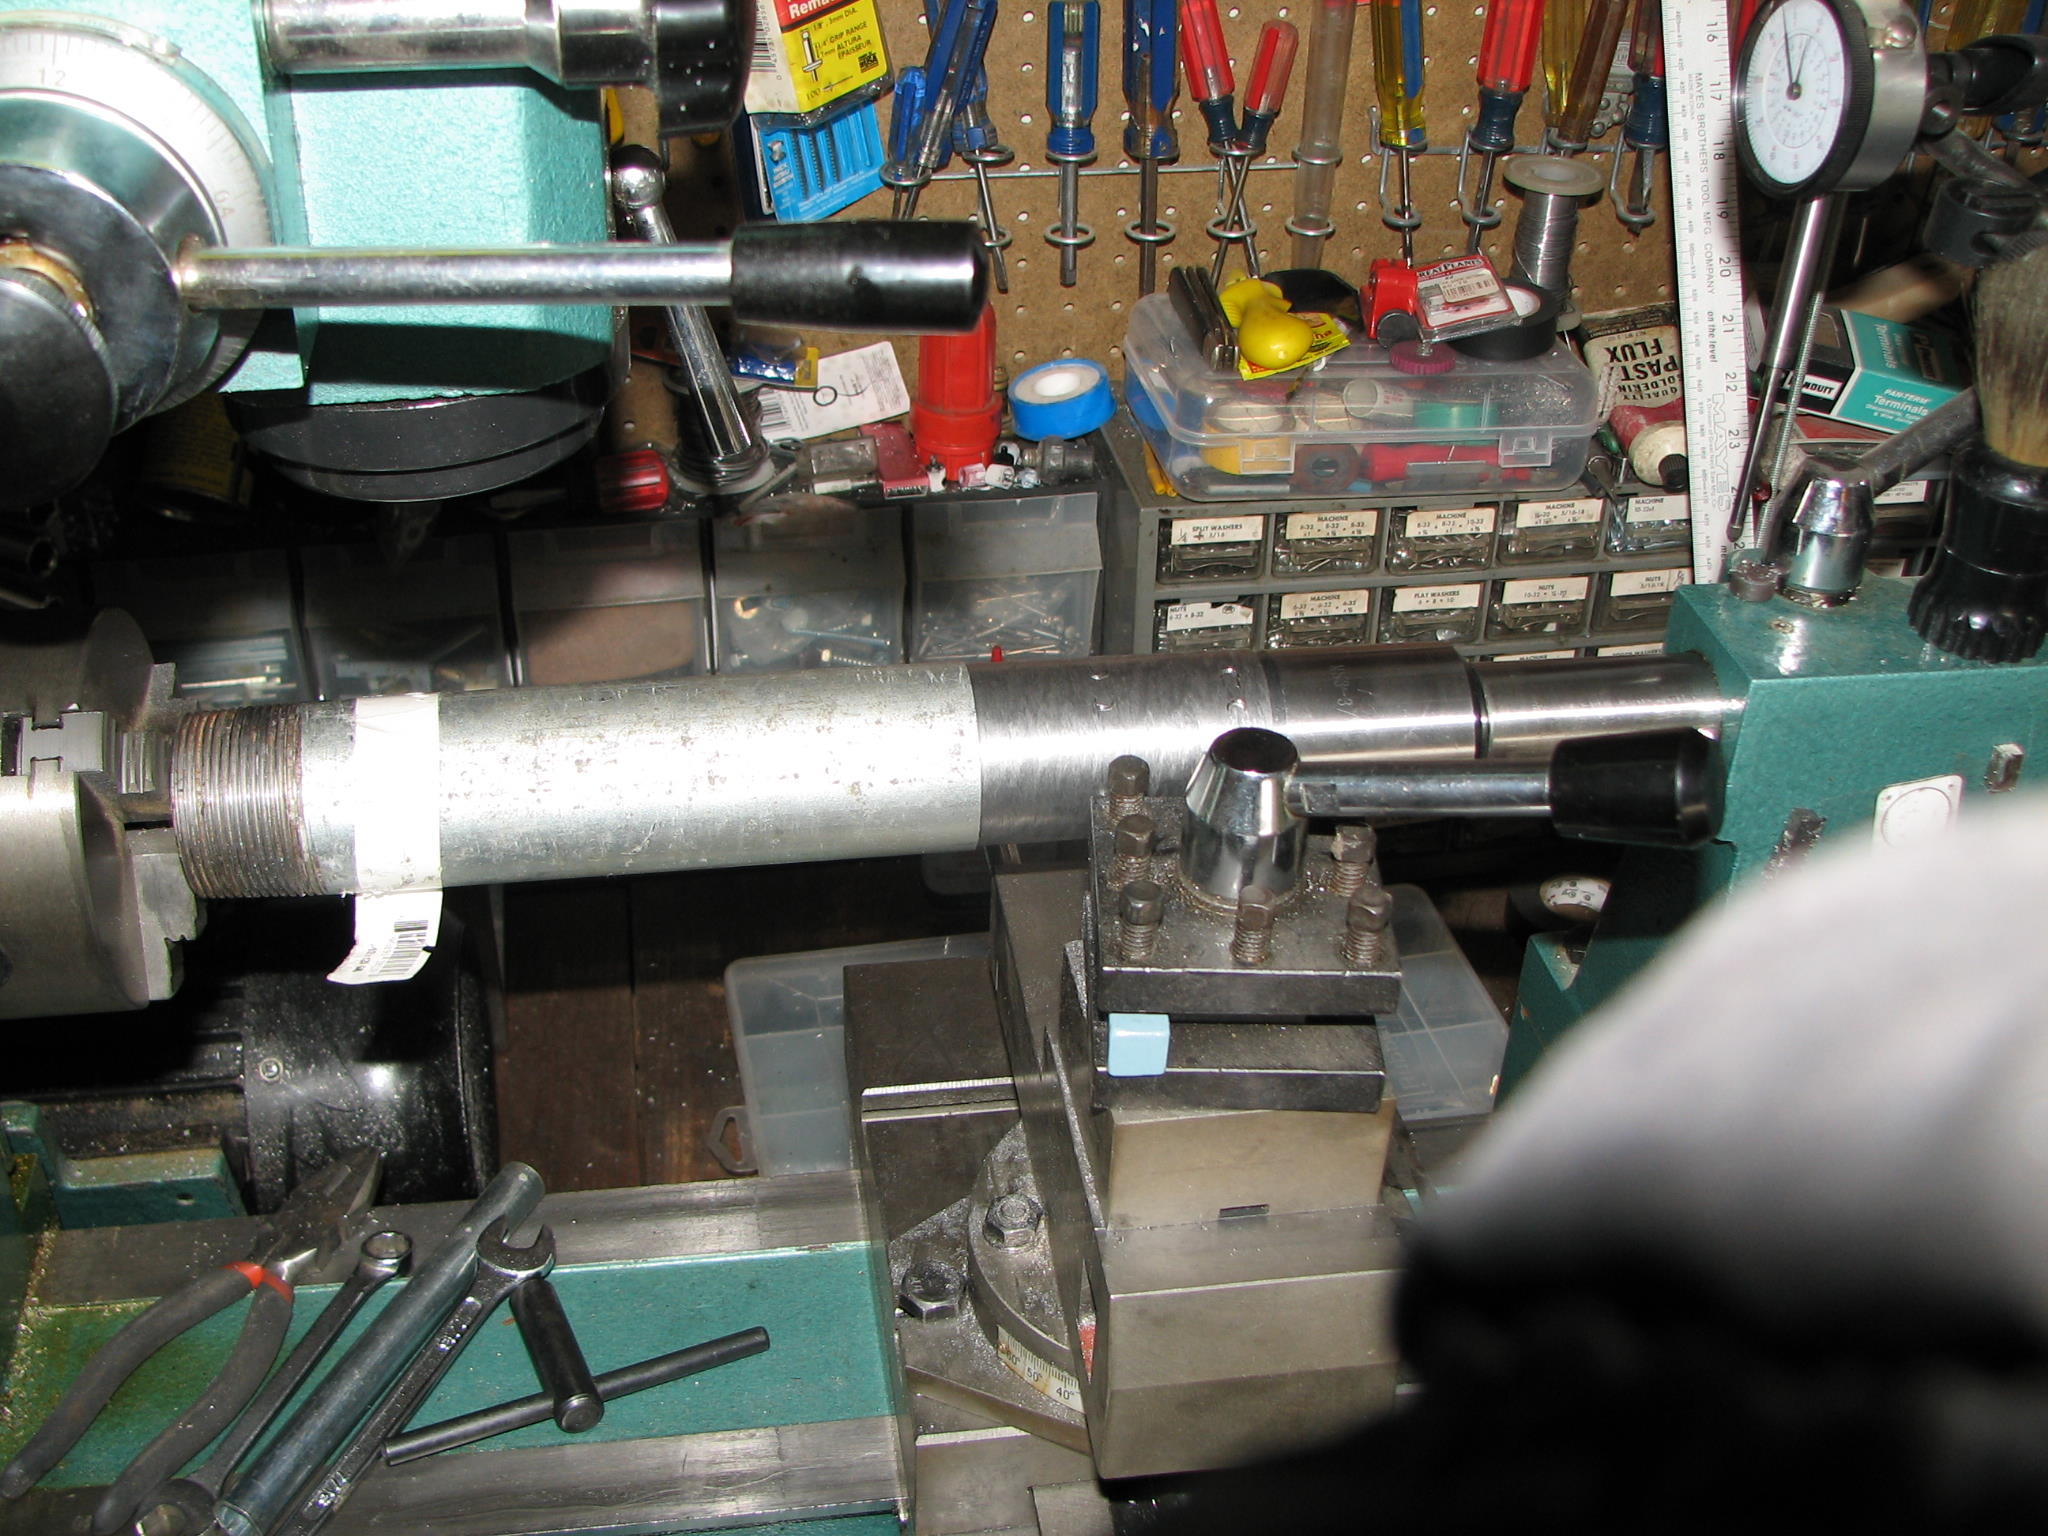
b. I had to turn the new pipe mount in the lathe to get it to fit in the drill press. http://kl6m.com/DISH3/drill3.jpg
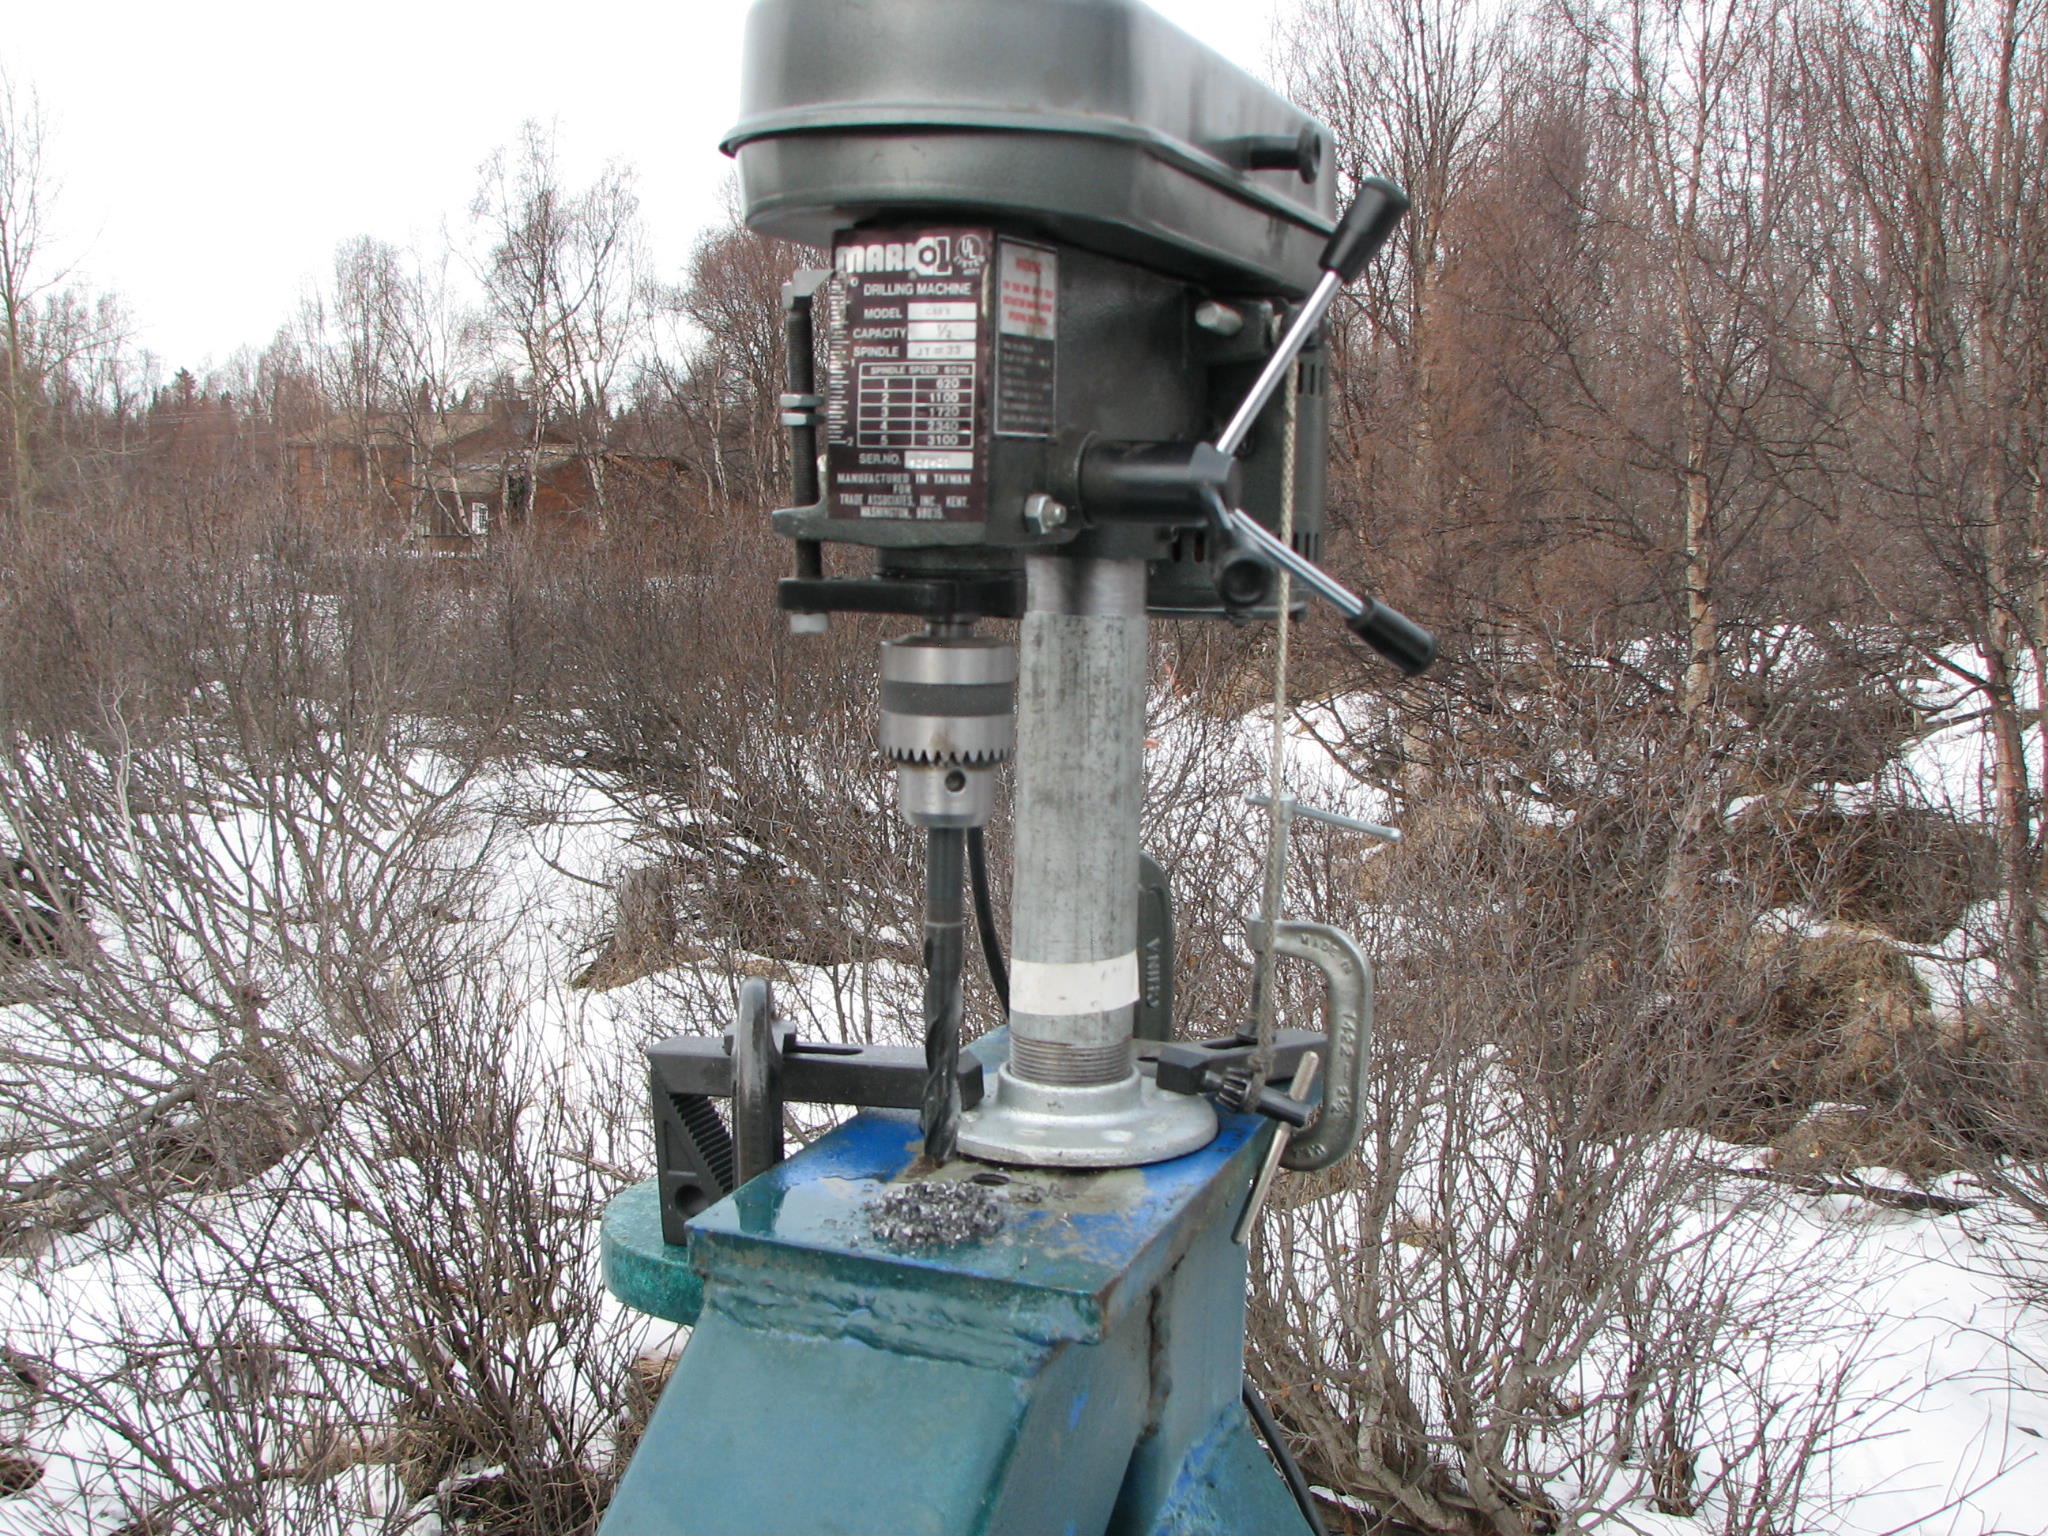
c. Drill press clamped to plate. http://kl6m.com/DISH3/drill4.jpg
2. On one of the plates, the middle hole had been previously repaired, possibly during initial fabrication. A nut had been welded in place but it sticks up about 1/8”. http://kl6m.com/DISH3/holes.jpg The original pillow block was hollowed out underneath so this was not an issue. The new pillow block is flat so I had to mill out a space. http://kl6m.com/DISH3/IMG_8851.JPG http://kl6m.com/DISH3/IMG_8852.JPG
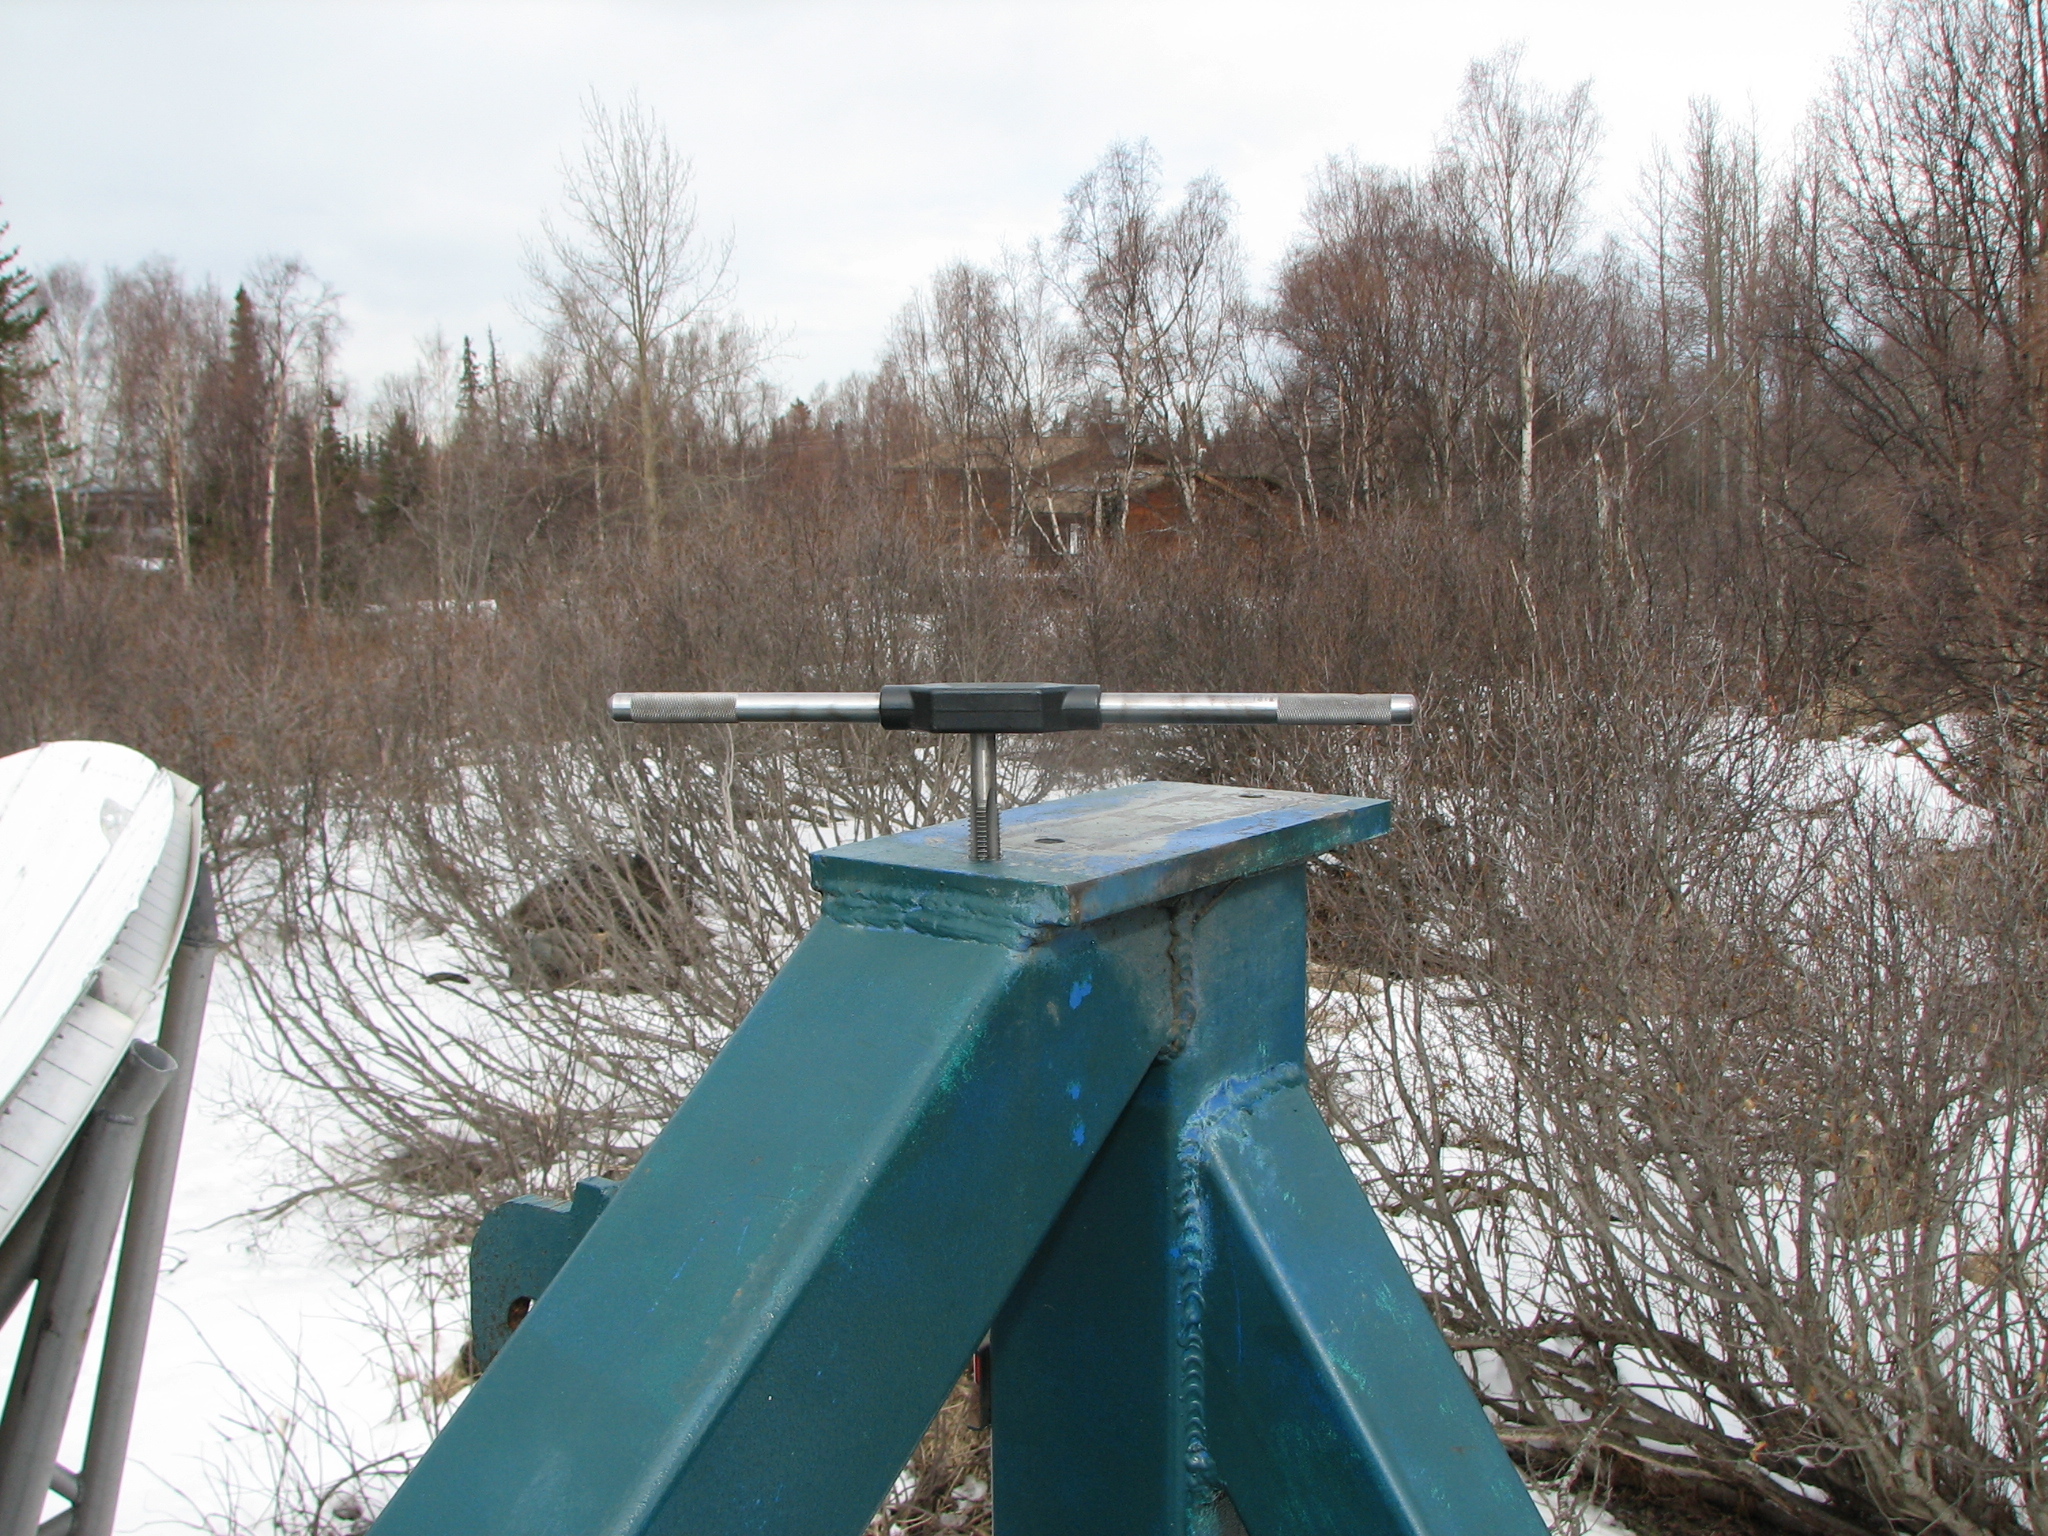
3. Tapping the new holes; starting the tap with a tap handle: http://kl6m.com/DISH3/tap.jpg
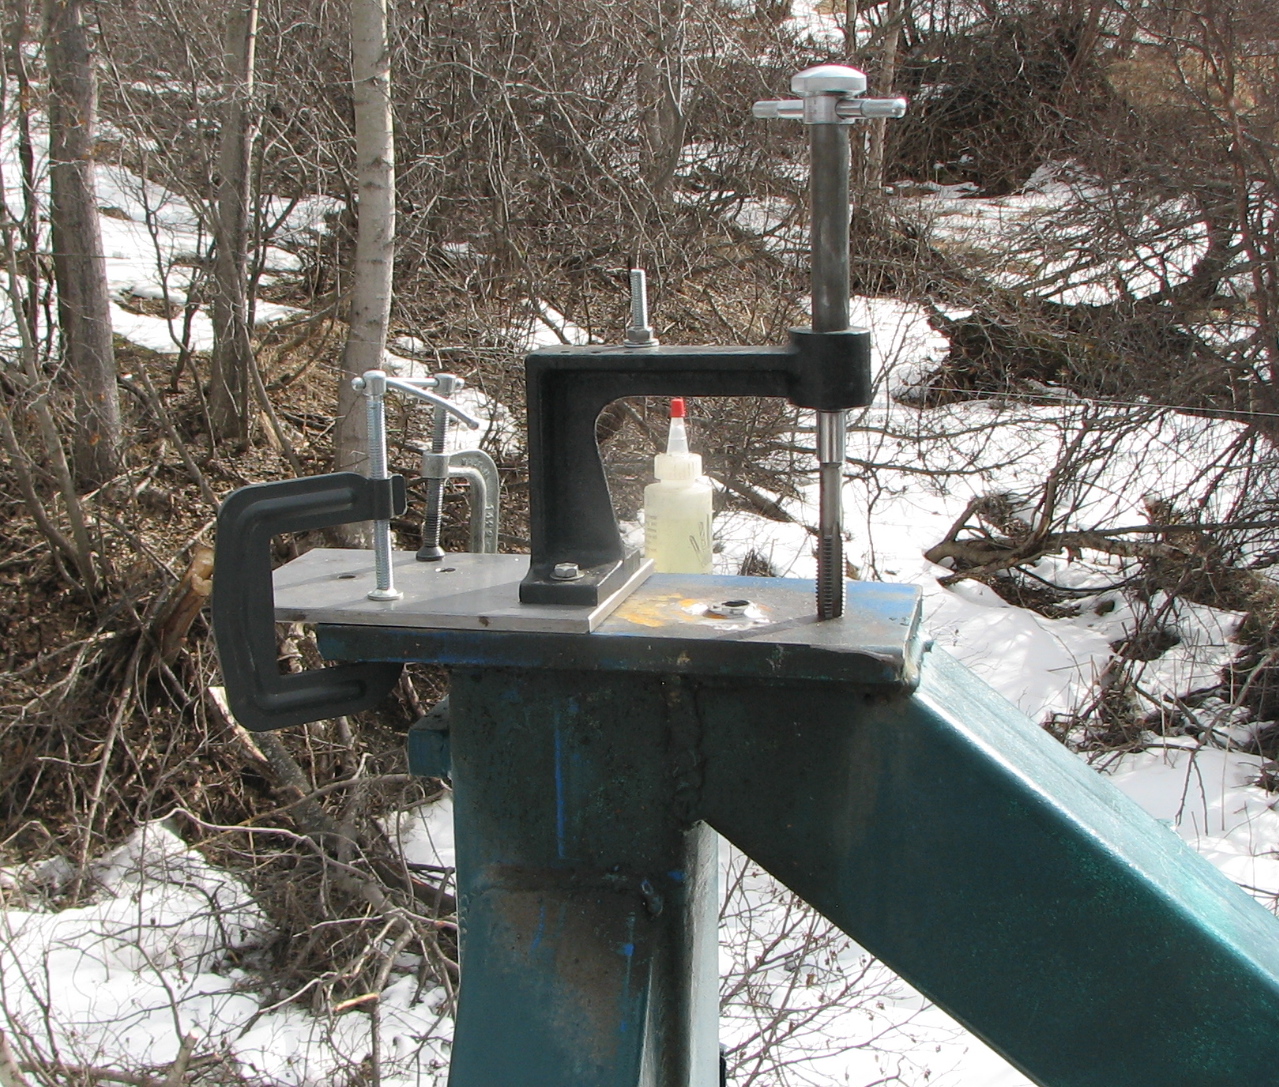
4. Tapping one inch steel plate, once I got started straight, I had to go with more leverage. http://kl6m.com/DISH3/tap2.jpg Finished hole: http://kl6m.com/DISH3/tap3.jpg
5. The ground is way too soft for the 45,000 pound crane, so I think the project is delayed until late May.
Previous Status (1-Apr-2014):
1. I received my finished pillow blocks today! http://kl6m.com/DISH/newpb.jpg
2. My friend Paul, WL7XQ and I removed some damaged panels: http://kl6m.com/DISH/dishpanels.jpg
3. I have located a mag-drill to drill the additional hole for the new pillow blocks. This should happen this week.
Previous Status (March 16, 2014): http://kl6m.com/DISH2/dishfix.html
Old Status (25-Dec-2013):
1. Actuator is removed, yet to be delivered to machine shop to be straightened. I tried to get the pin out so I could remove this, and tried this first: http://kl6m.com/dish/img_8187.jpg I was afraid this would fly off and injure me so I went with the “screwitout” above.
2. Broken actuator cover is removed, yet to be brazed back together
3. Thinking about changing actuator screw cover to something lighter, like ABS pipe, instead of heavy steel
4. Also thinking about opening up the actuator gear assembly to inspect (never inspected in 13 years of operation)
5. Cost estimate obtained for pillow block fabrication = $880 each x 2 = $1760. I’m shopping around.
6. My friend the welder has my connecting link, to be welded.
7. I plan on removing the two damaged panels next month (December).
8. I have found a friend of a friend who has access to a water-jet that can cut the steel for me. Now I just need some raw steel.
9. (to be continued)
MERRY CHRISTMAS !!